Not a scrap of progress on Flamingo as the house extension project consumes all my spare time… but she’s always there, in my mind… and sometimes she spills out into words that I grandly call poetry…😄 so here they are…
Tugging
I feel her tugging at the edges of my thoughts, in that dark closed space between waking and dreams
I use her image to calm the nights terrors. The what ifs and should haves, the sweat necked screams
It’s always sunny where she rests, and warmed, I hunker down in the form she presses in my heart.
Explore the gentle swelling curves of her, the scent, the touch, each joint and juncture a piece of art
Is this her purpose, to still my mind?
Her stasis a small price to pay.
Or does she long and pine for the brine,
The seagulls cry and the wild salt spray?
and another…
Hulk
What cherished hulk is here
What chubby lines, lazy sheer
Who’s lady is this
This nautical Miss
Tarp sheltered
Summer sun sweltered
Pitch pine sweating
Oak frames Not getting
Any younger.
Does she hunger
for the blue?
The Green?
Or would this lonely queen
Be content
To be sent
On a slipway sliding
softly gliding
Into east coast mud brown waves
Who will give her the freedom she craves
Who will tap a plank declare her sound
Haul a line and opine
She’s well found
Who will stoke the little stove
and head below hove
To, in the Sound, and safe
For a brew
Before bearing away
Away away
North, South east or west
Any which way
But loose!
Plans
The extension has a way to go yet so there’ll be very little to report from the ‘boatyard’ however I’m planning to upgrade the ramshackle lean to shed complex next to Flamingo so that when I finally have boatbuilding time on my hands I’ll have a decent workshop on hand too. Or as like to call it, my retirement home!
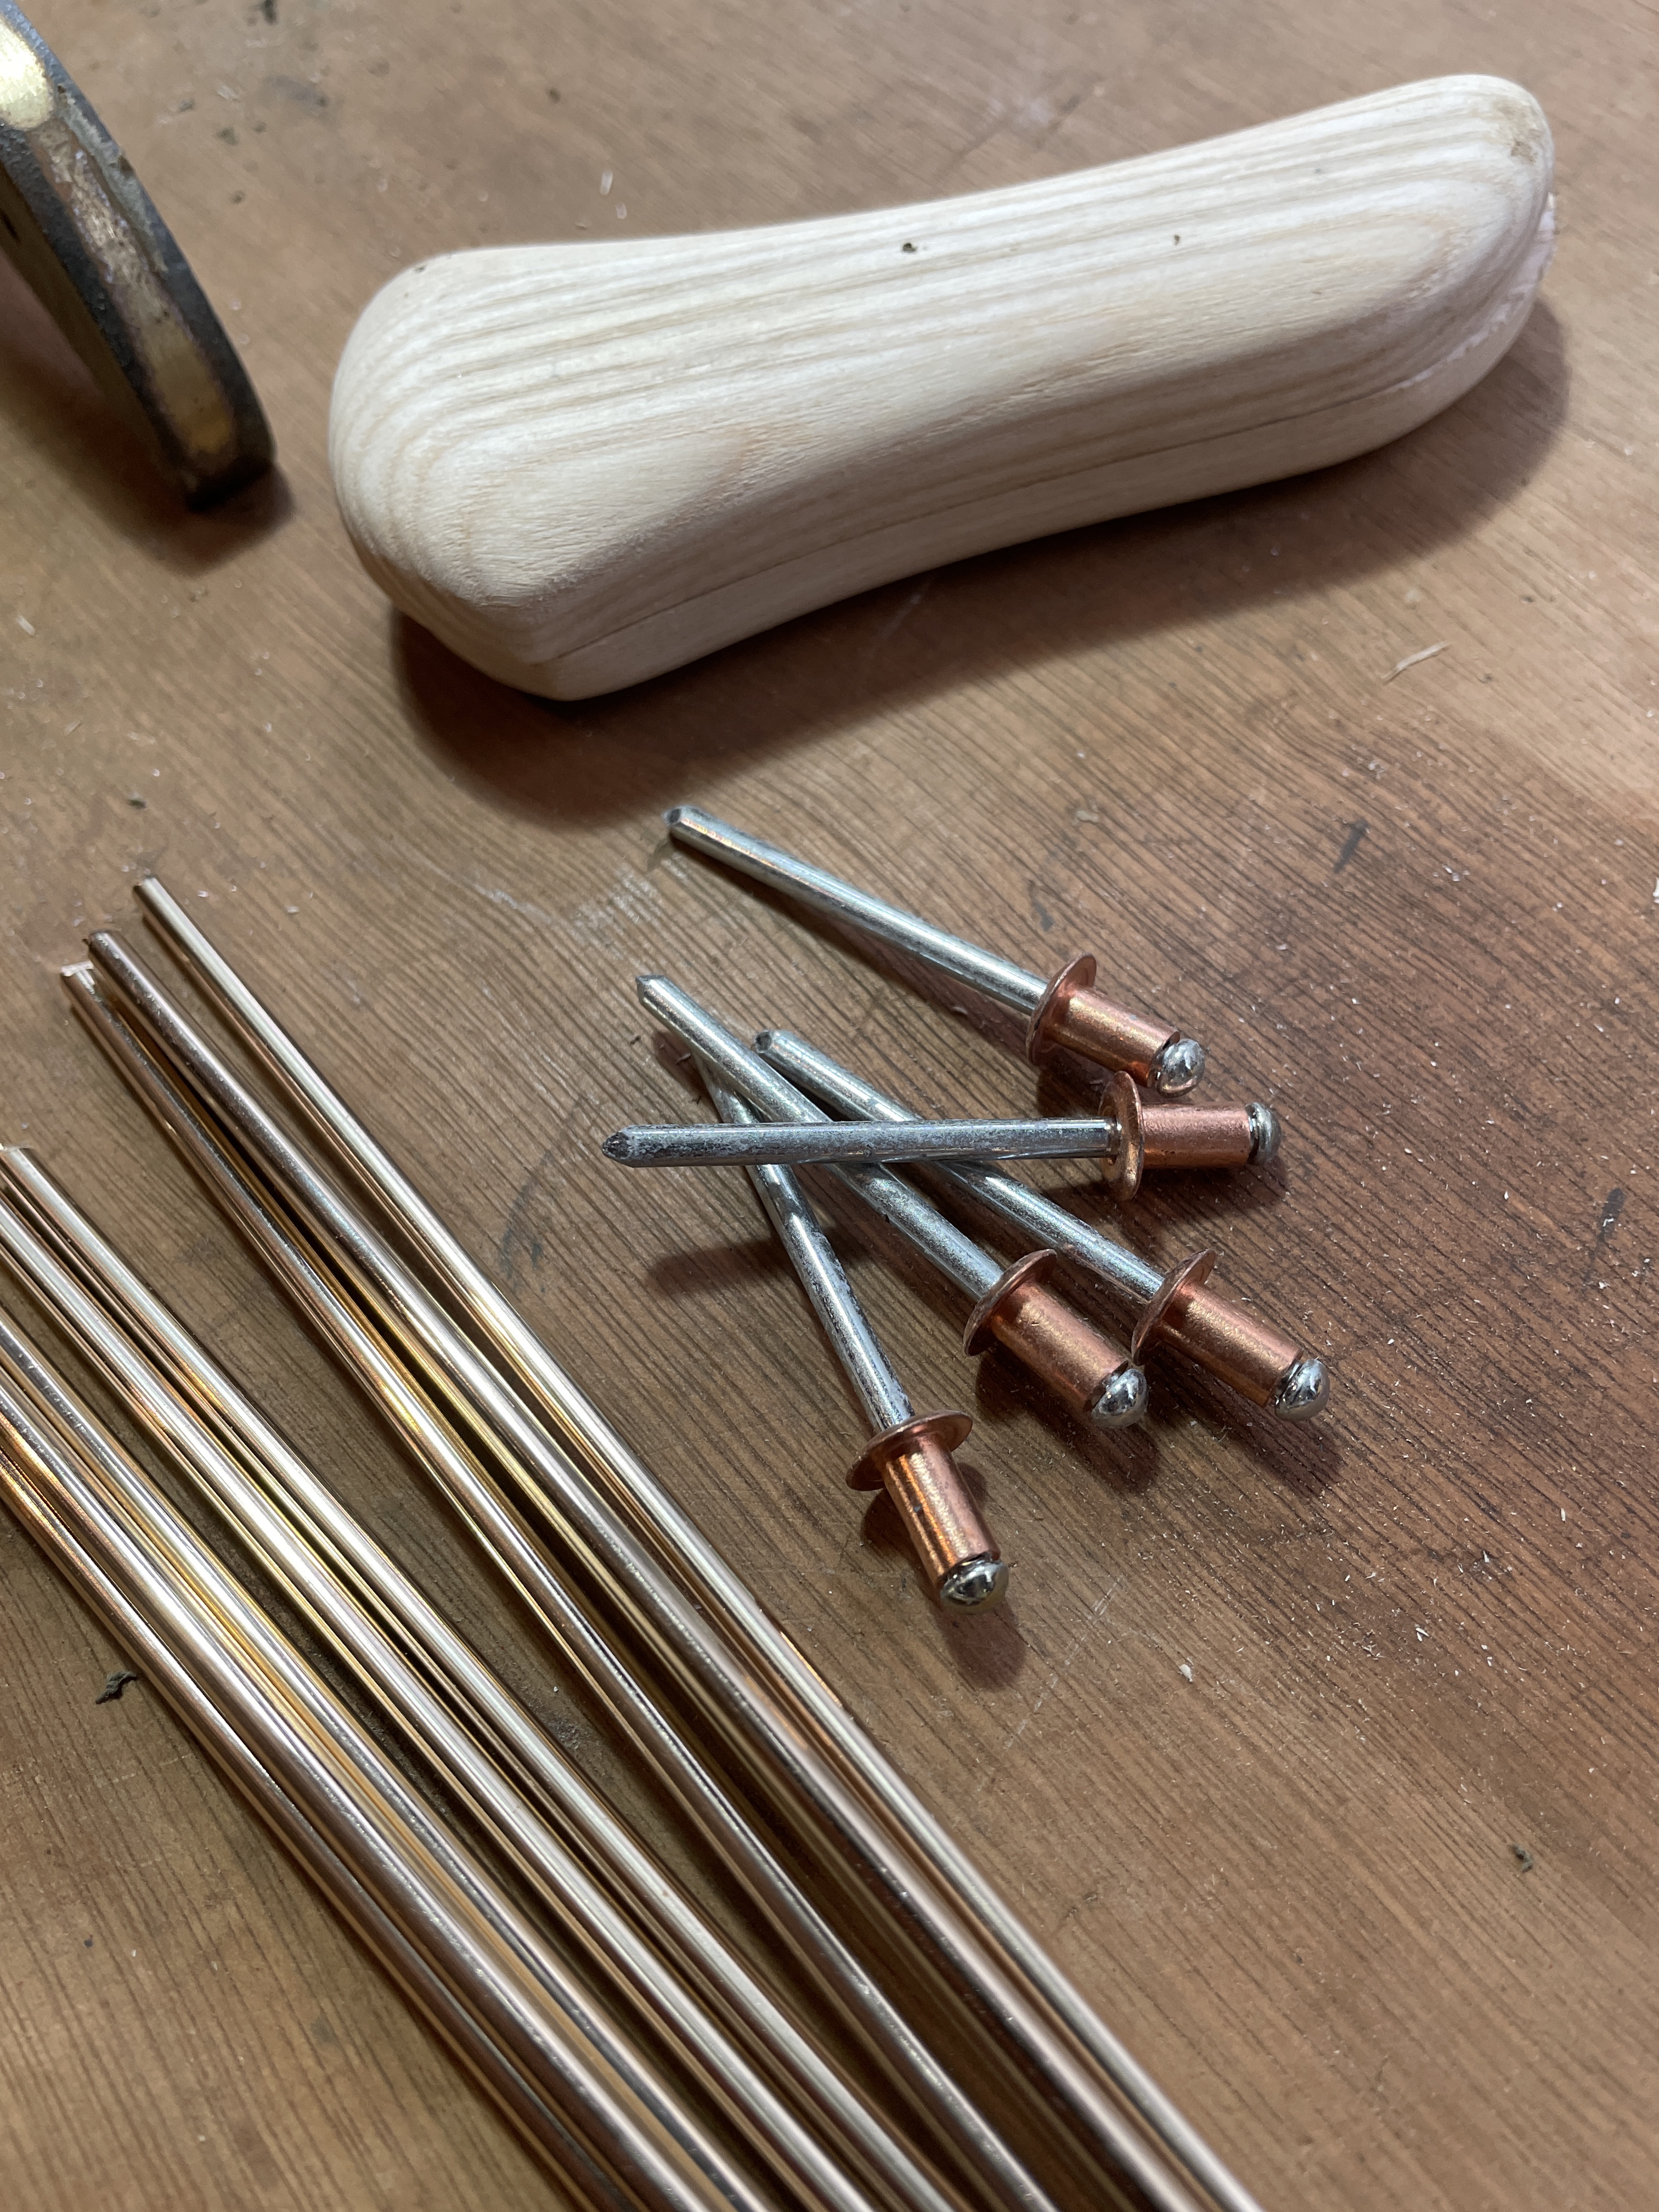
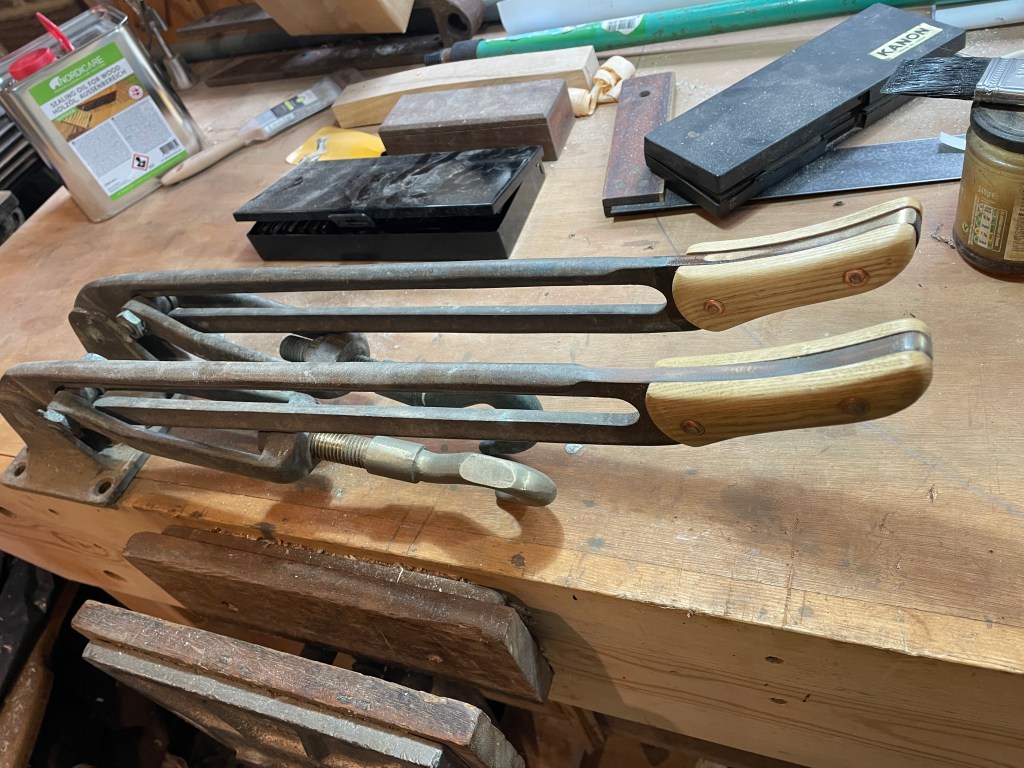
With some offcuts of Ash from the paddle project I thought I’d tackle making handle pads for the Laurent Giles levers. The old ones were long past saving and it seemed like a nice project for a rainy Sunday.
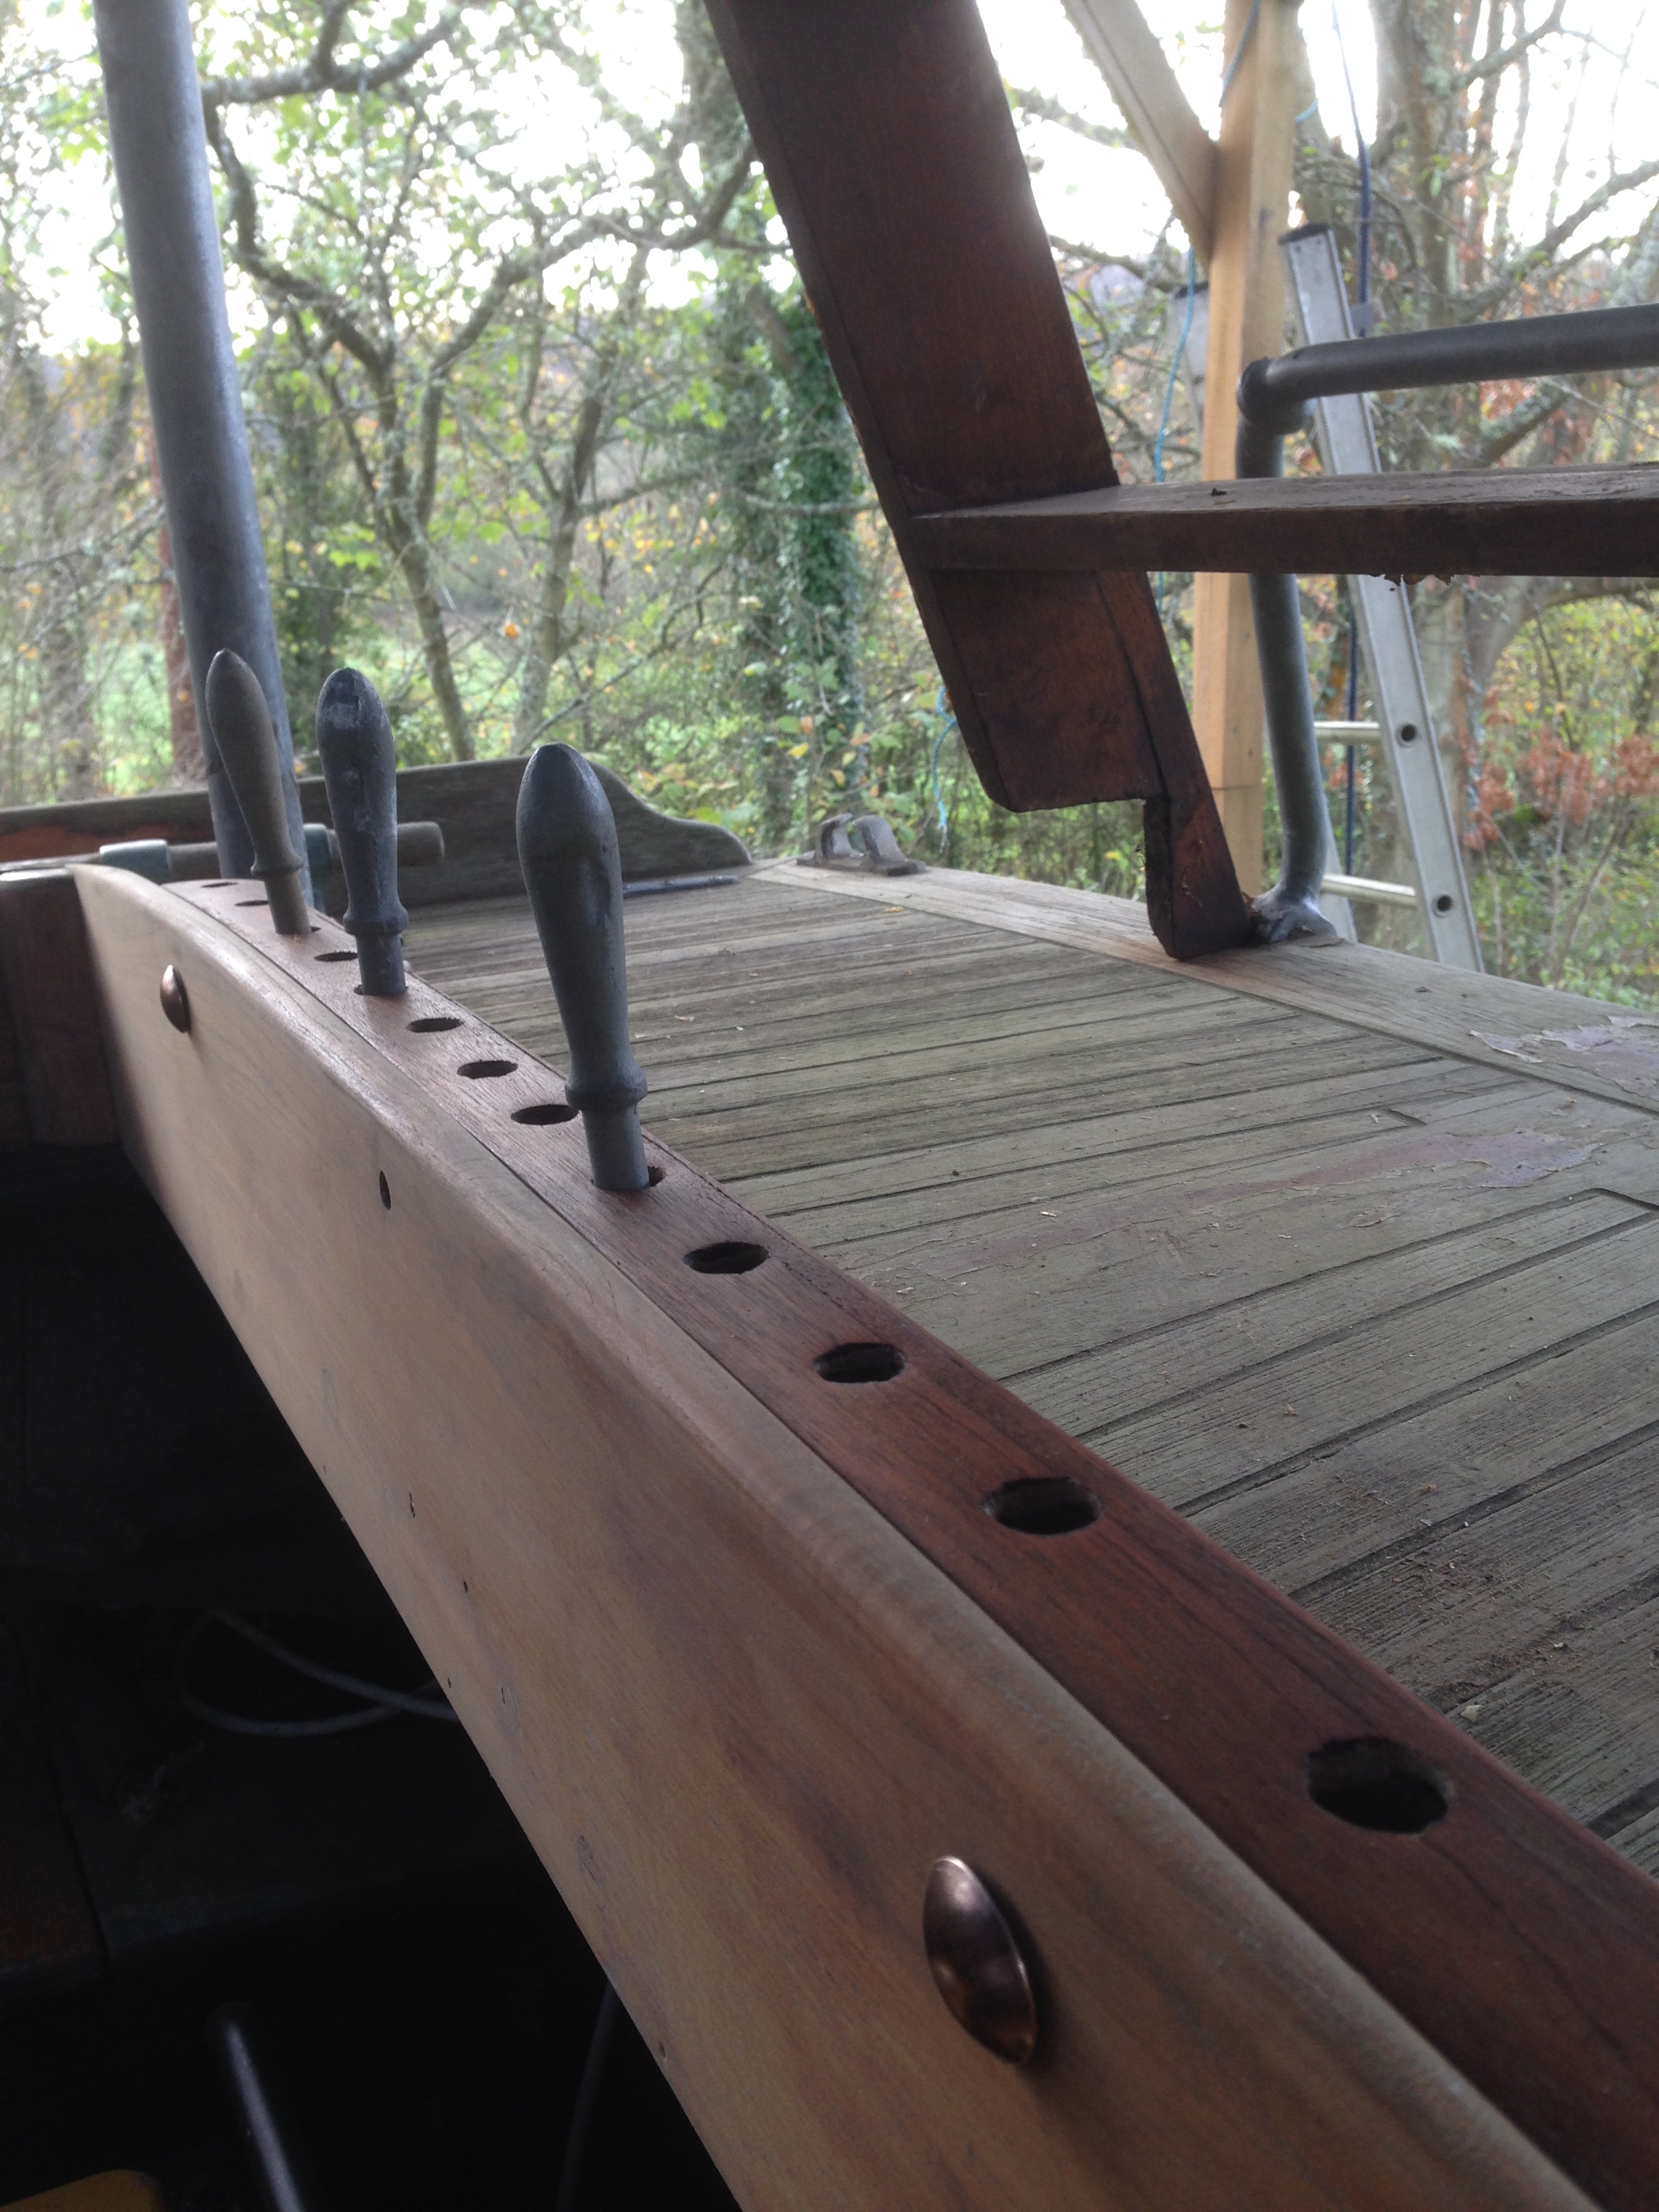
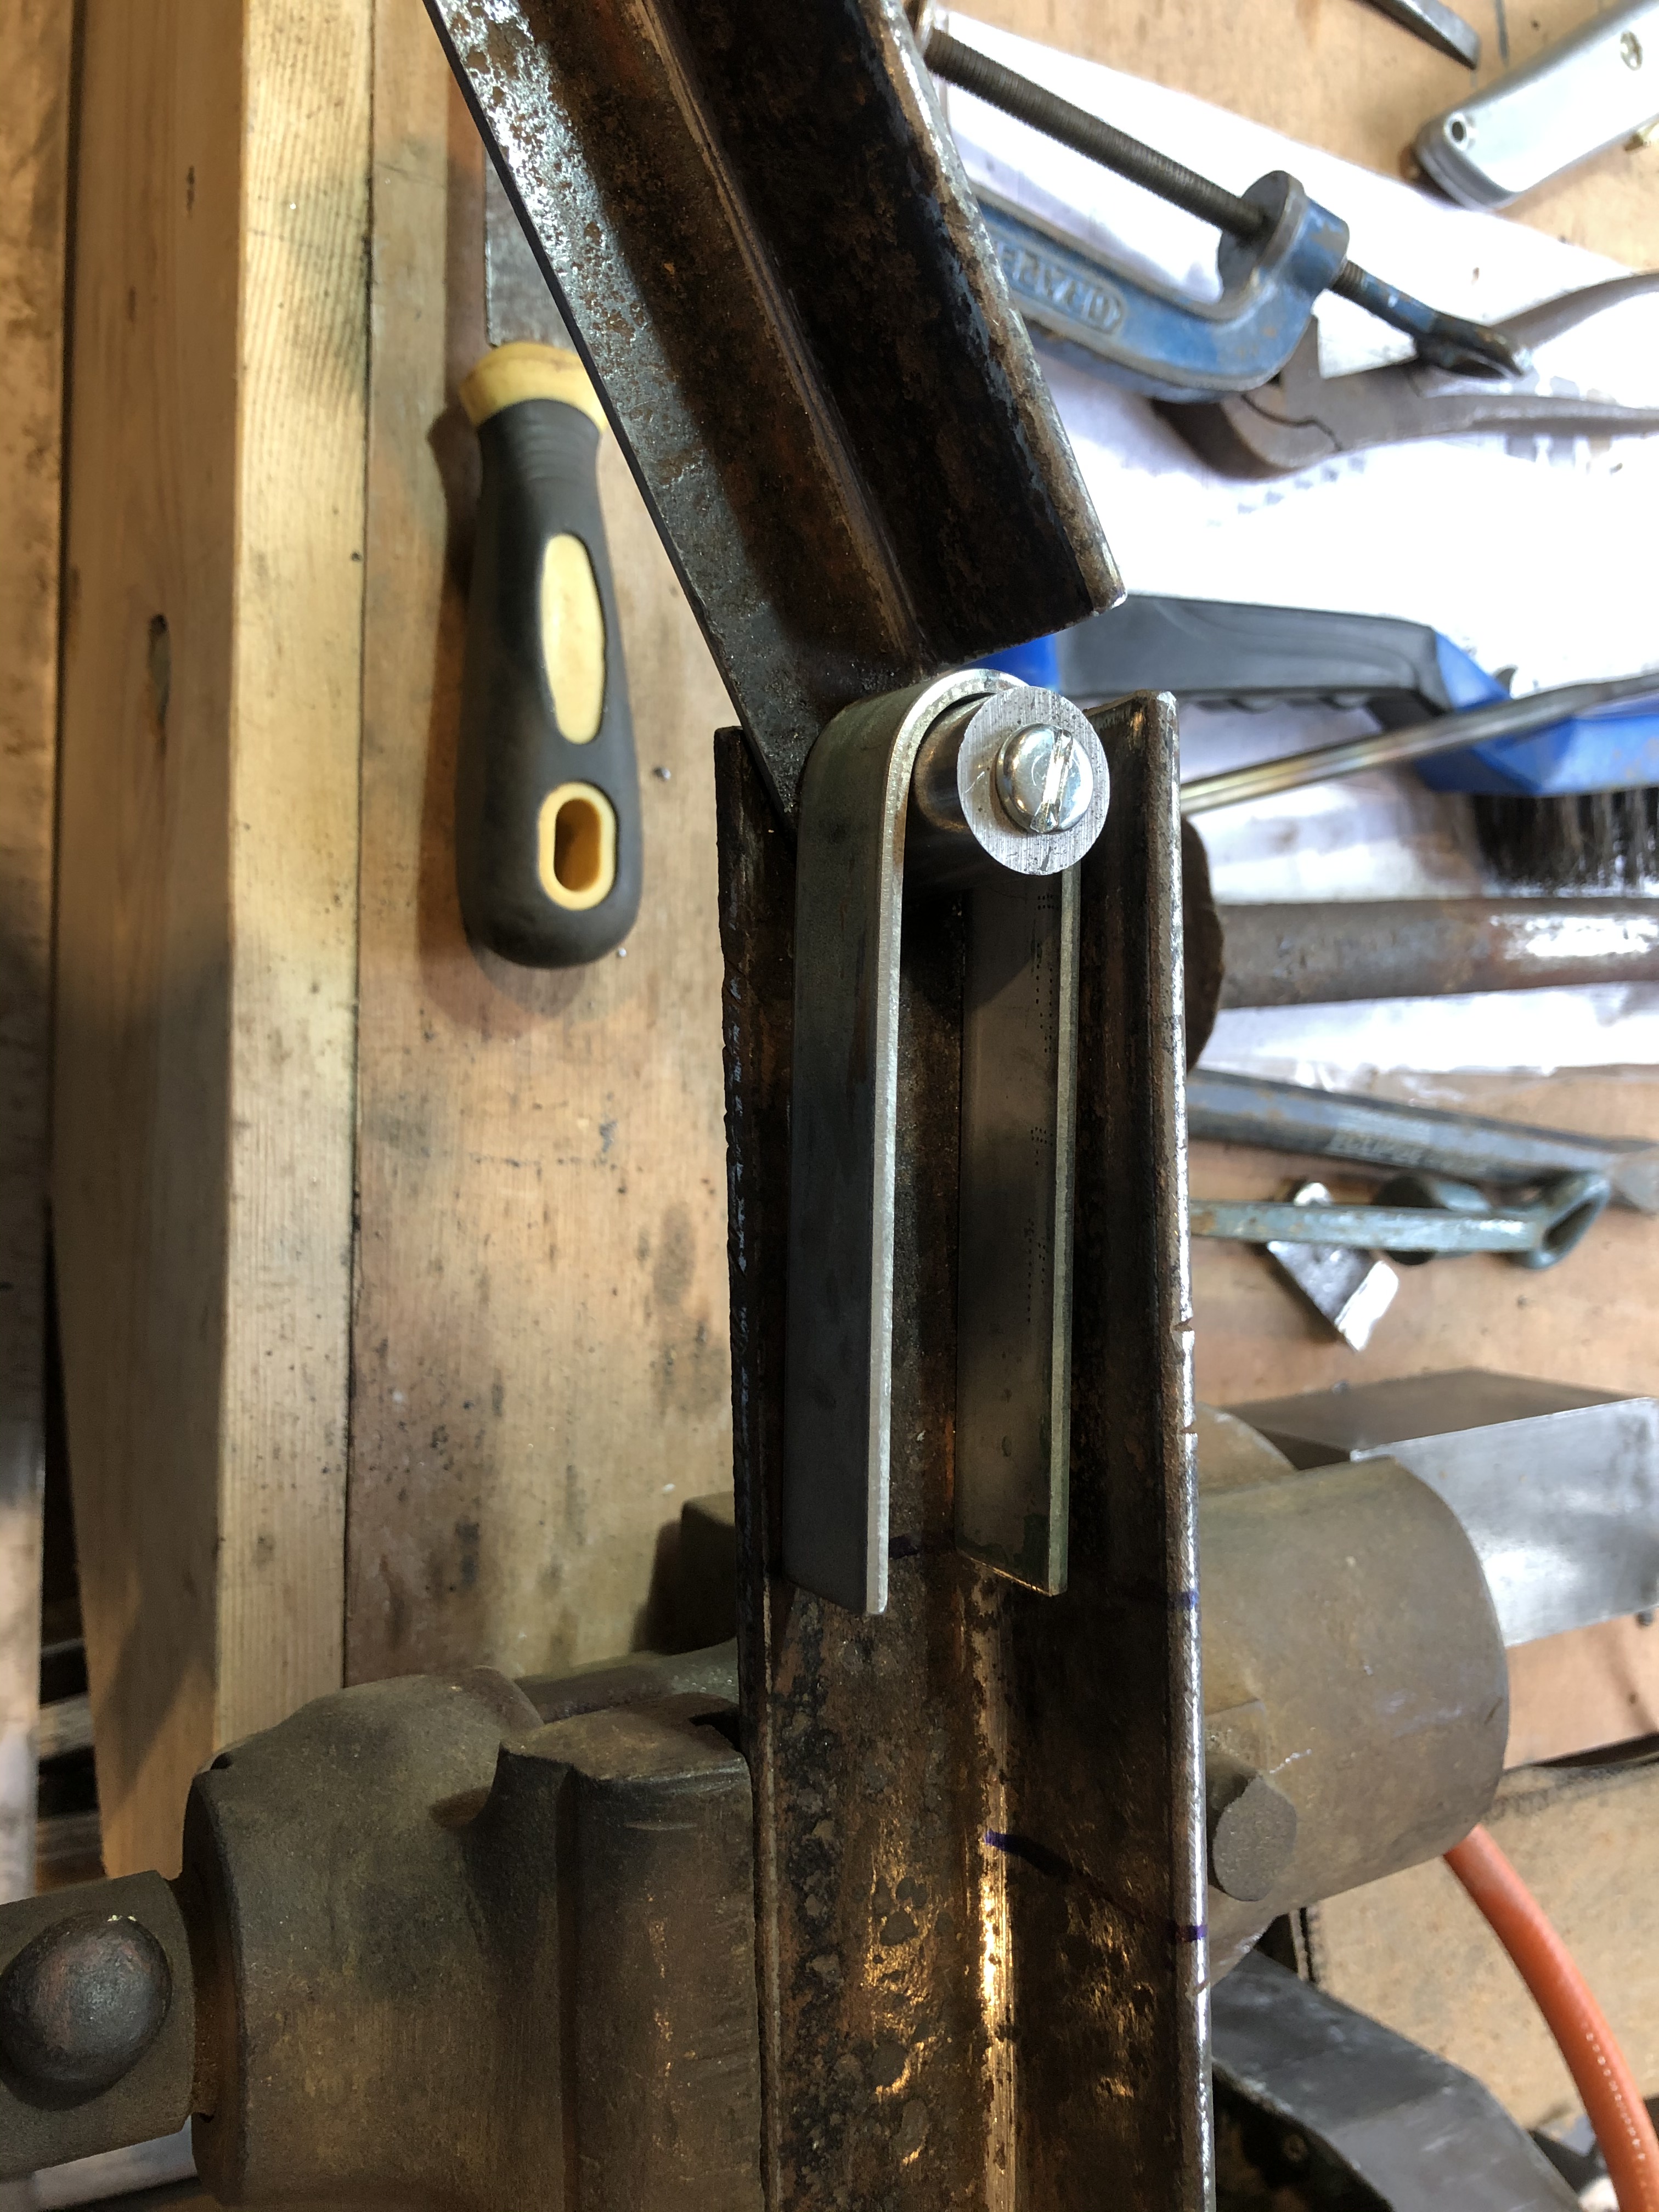
Flamingo has running backstays rather than fixed. The backstays are the galvanised steel cables that provide tension in the rig and some support for the mast. This means that each time you tack or gybe you need to slacken off one side (leeward or down wind) and tension up the other side (windward or up wind) to counter the force of the wind and keep the jib or foresail under the correct tension.
You can see in the photo below, the galvanised steel cable with the eye hooked on to the lever, with the lever handle pointing forward (to the right in the photo) and flat on the deck it will be slack but if you swing it through 180° to the left it tightens up.
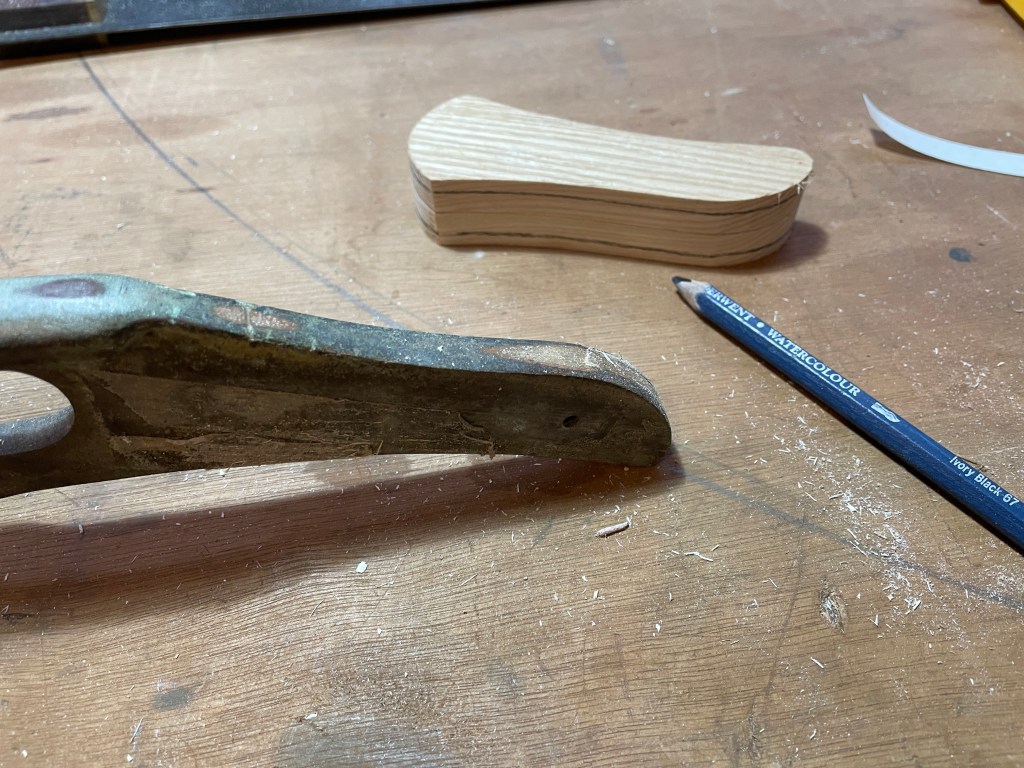
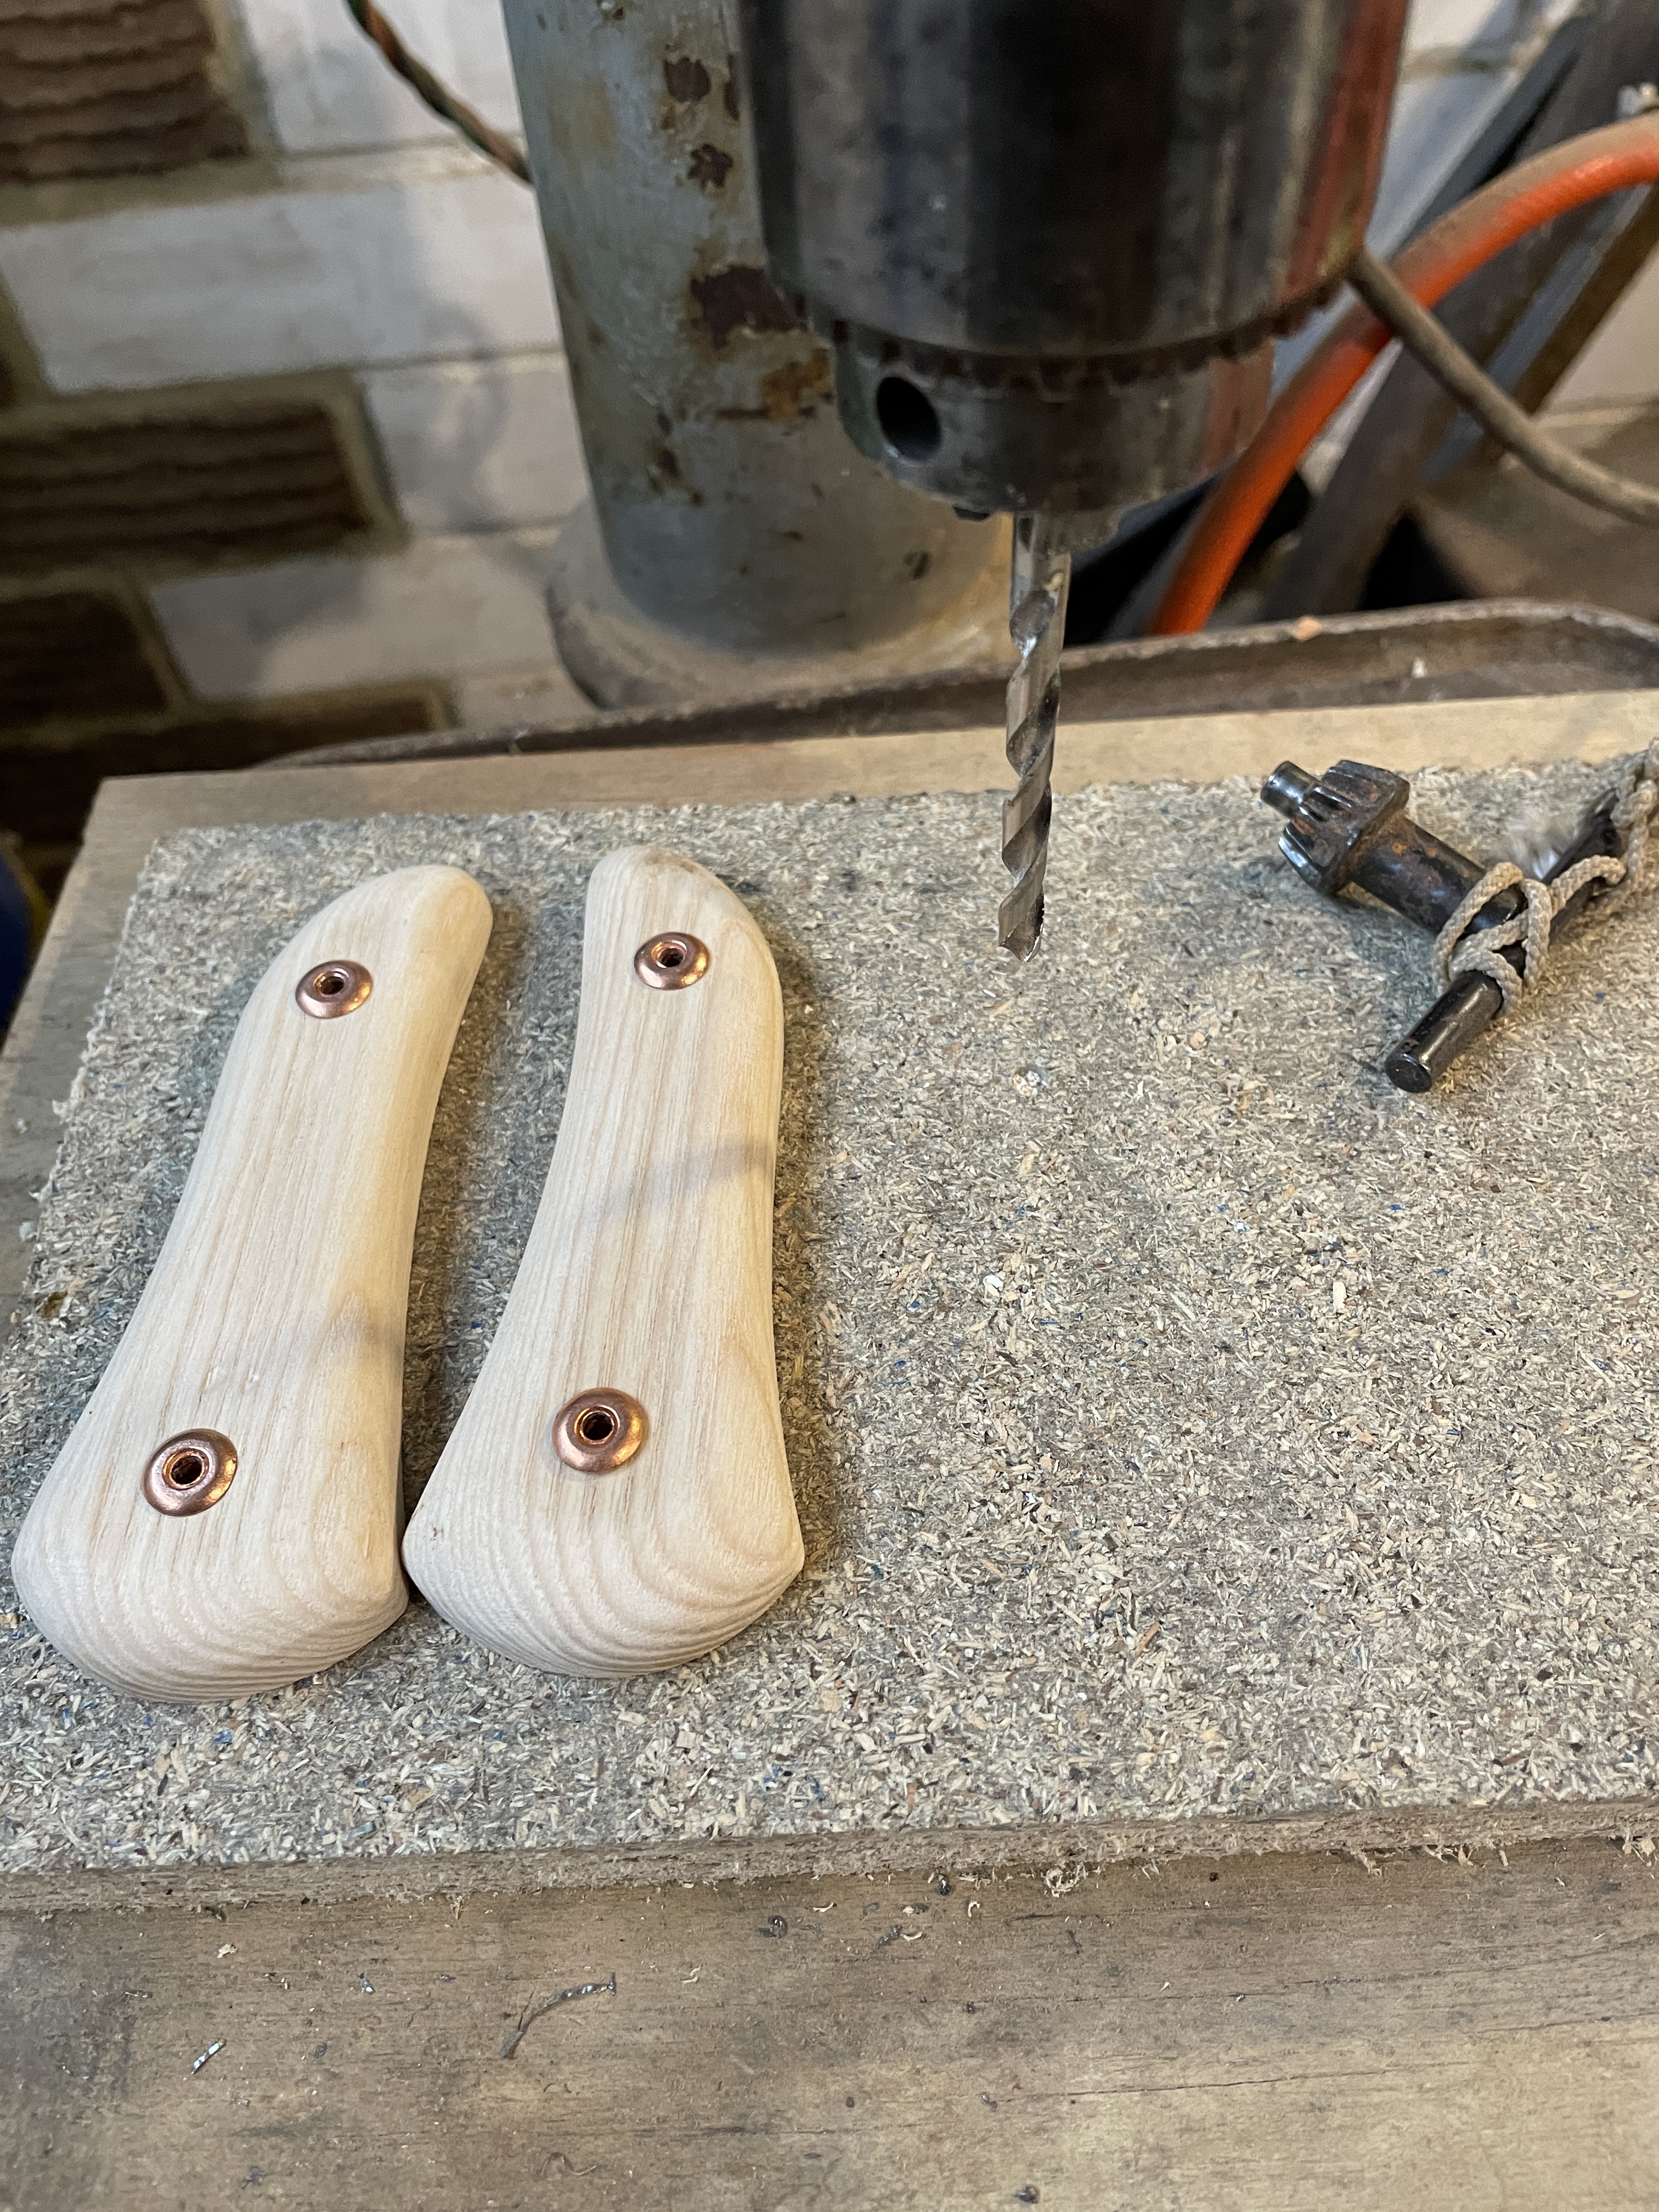
First I cut out the rough shape with a jigsaw then sanded with drum and disc sander til I was happy with the fit. Then I ripped the block in half on the circular saw to create the two cheeks or pads. Sticking them together with double sided tape I then marked out for the first stage of shaping. Keeping crisp easily visible lines at this stage really helps get the form nice and even later on so with a drum sander in the lathe I put a chamfer all round.
Ash cheeks or padsMarking up for the first stage of shapingAsh pads fixed together and marked upChamfered all round
After chamfering its freehand sculpting on the drum sander to get a nice soft form, with smooth transition between the flats where the rivets will go and the profile of the bronze handle.
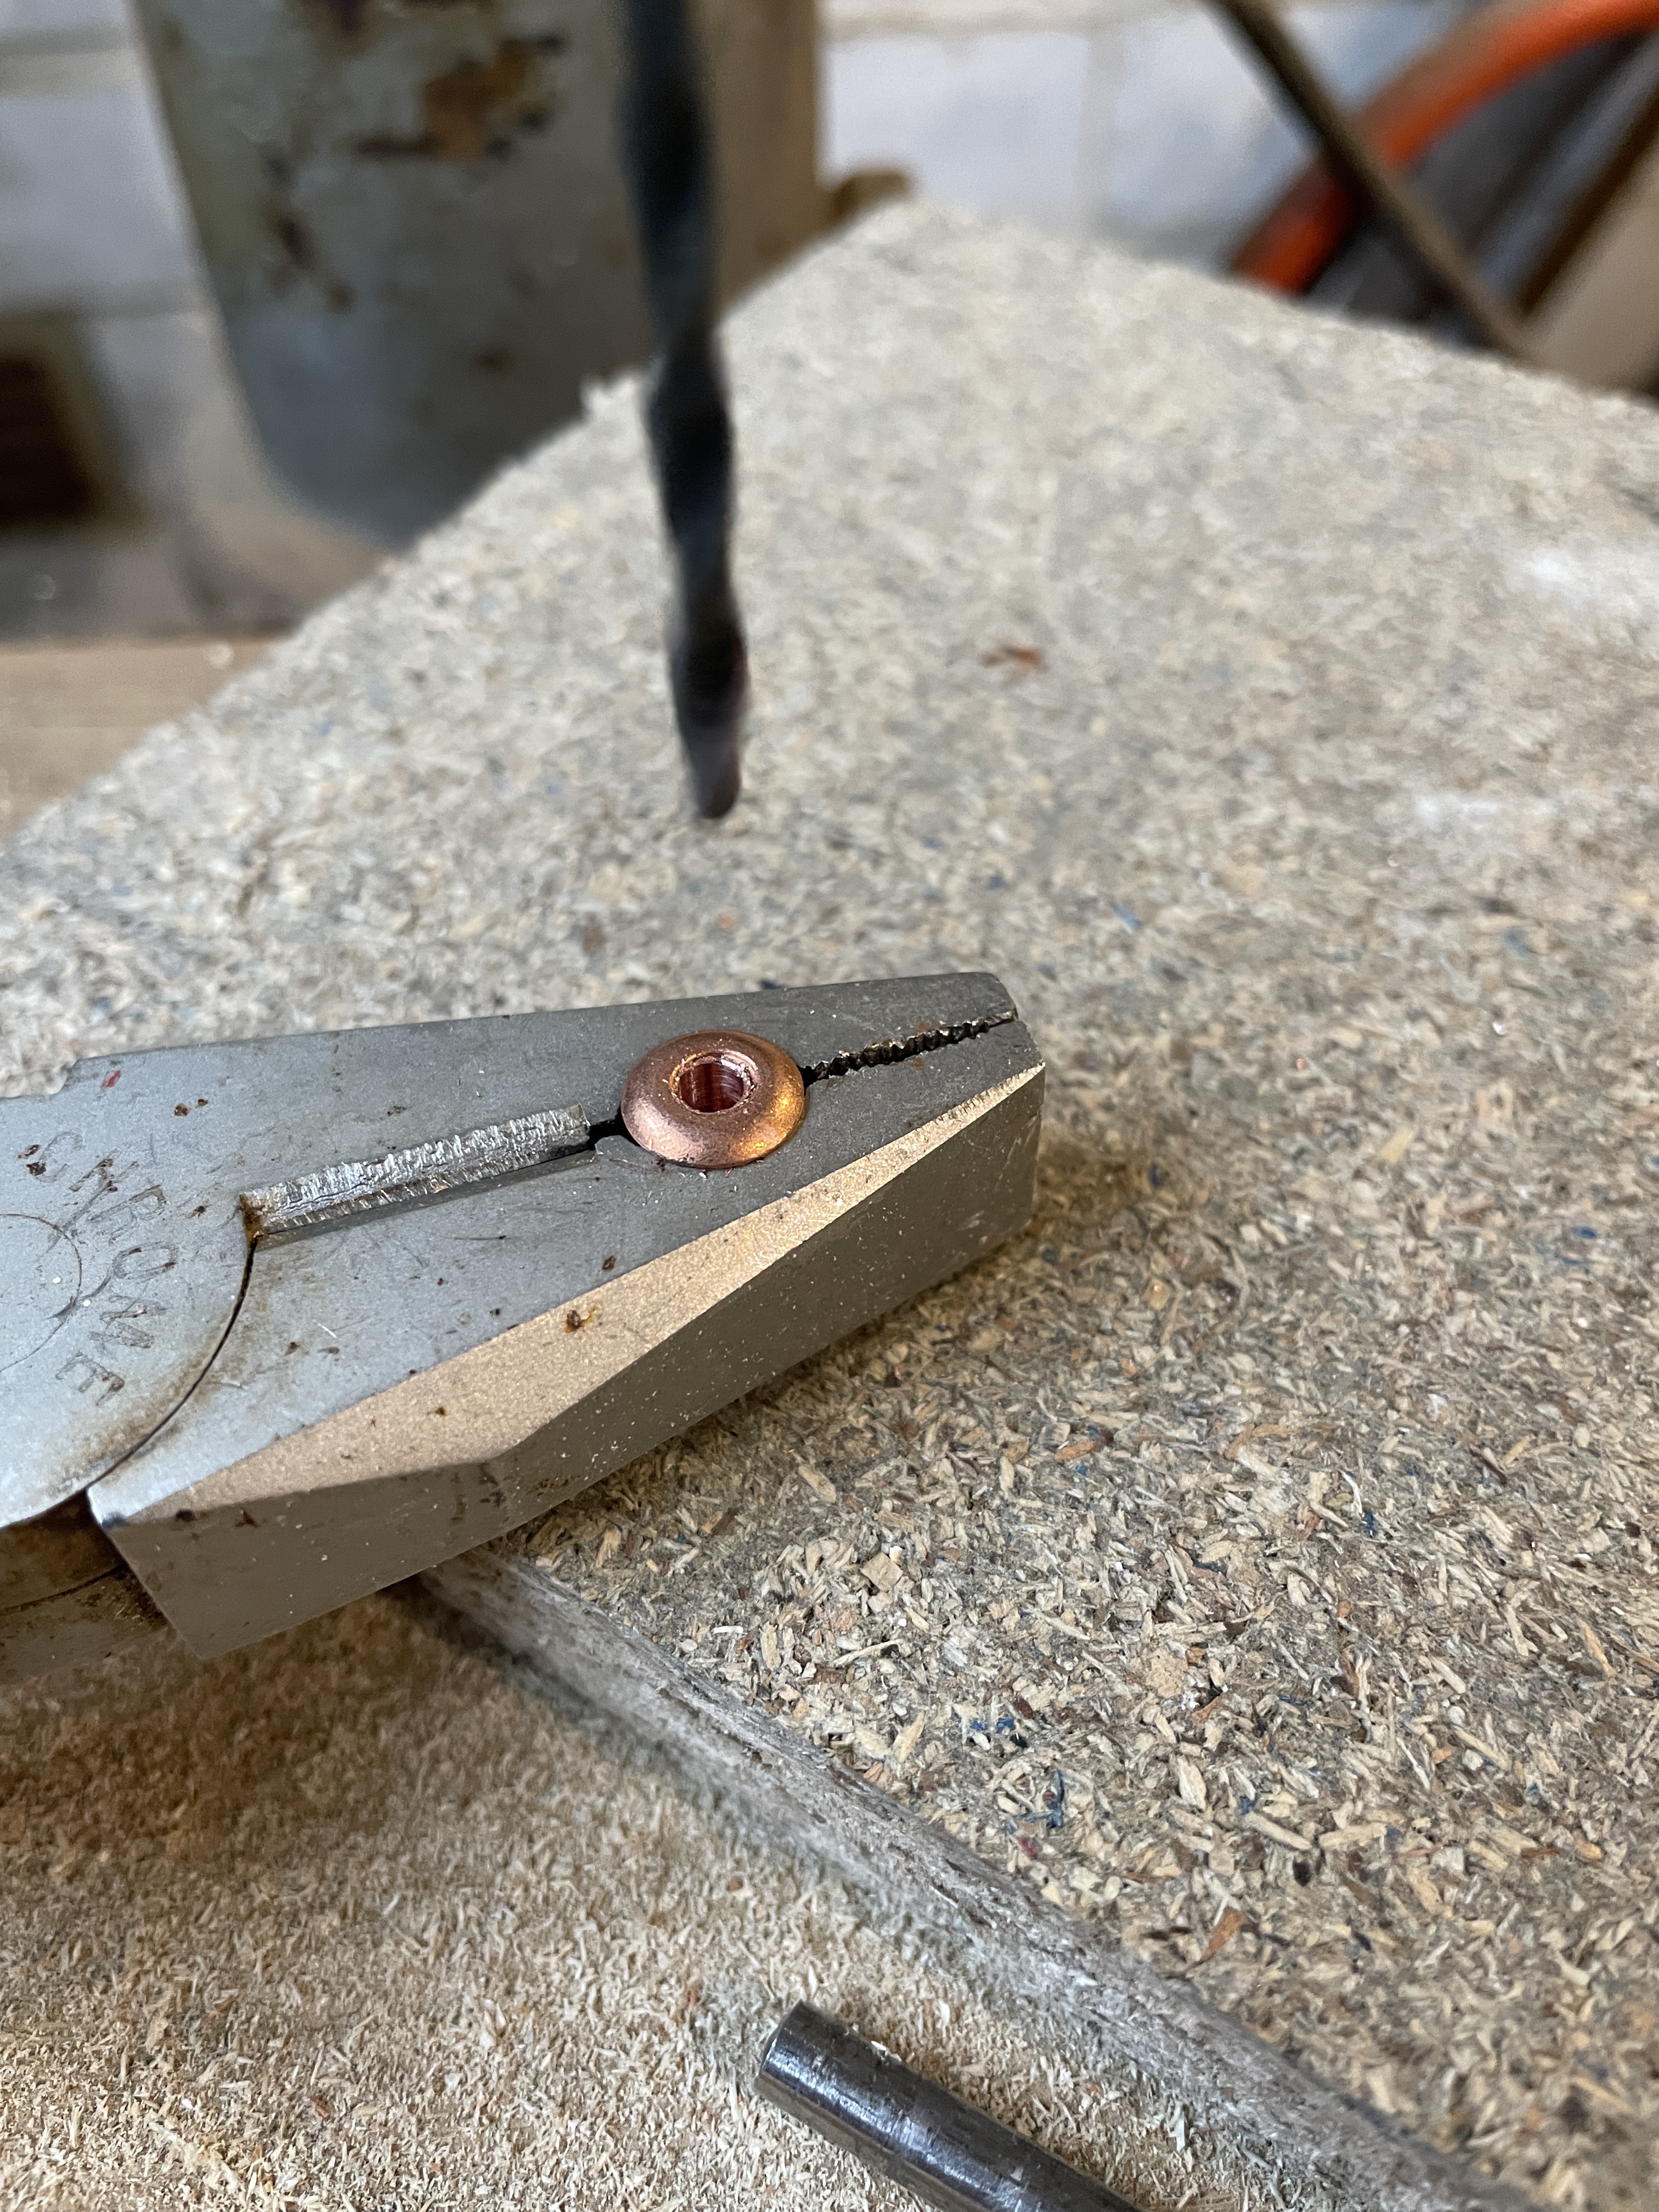
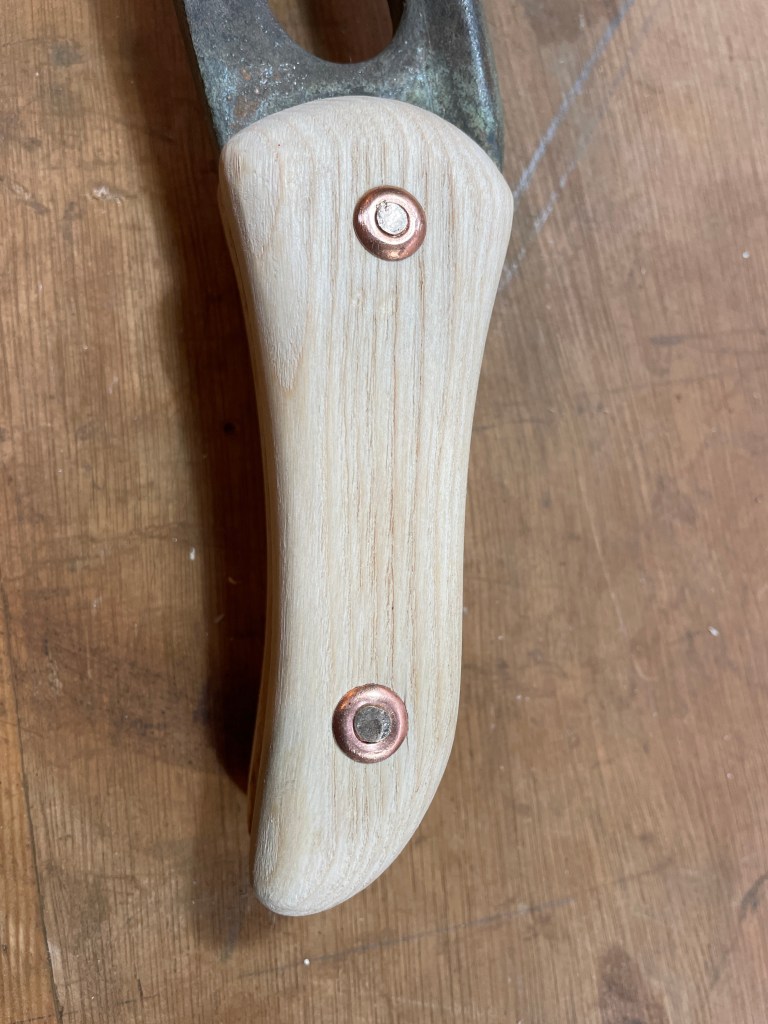
I used some copper pop rivets to make sleeves and bronze rod to connect them. Needless to say the rods and the rivets didn’t quite match in size so a little dexterity with pliers and pillar drill was needed to drill out the copper. Once that was done it was simply a case of assembling everything on the handle and then peening over the ends of the bronze rod to clench the copper rivets tightly.
Bronze rod inserted and peened over to finish
I’m quite please with the result, it needs a good soak in linseed oil and turps to protect it but the pair of levers look much better now.
Bronze backstay levers with nice new handles!
All done and ready to fit back on the deck once I complete a couple of other tasks (finish building an extension, fit a bathroom, replace a flat roof, fit a kitchen, install a home office, install some skylights……🧐 )
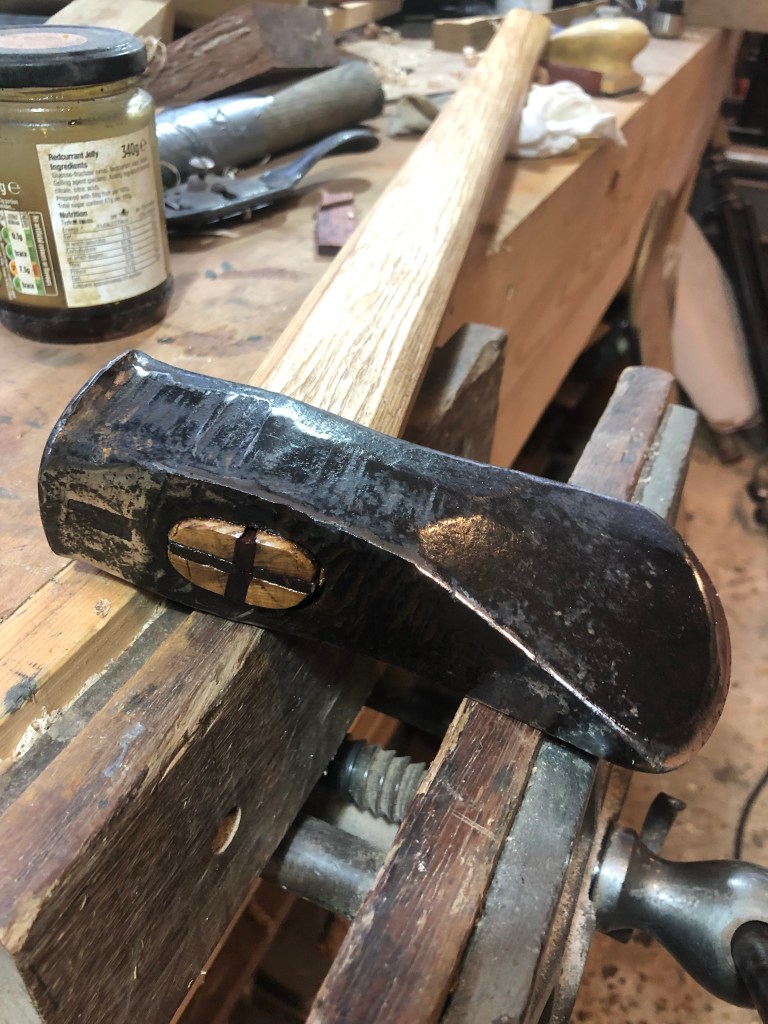
Down at the ‘boatyard’ there are always distractions and with Flamingo’s new blocks all finished and nestled safely cheek by jowl… or perhaps cheek by sheave… their 1930’s pennies gleaming in oiled splendour, just waiting for their moment to shine, this old splitting axe, or maul that belonged to my mother caught my eye. There’s something about handling old tools that connects you to previous owners. I have an old smoothing plane given to me when I was 17 and just starting out, even now I seldom pick it up without thinking of Paddy and Topsy Margaret who gave me the bucket of old tools it came in. There was more than one Margaret in my life growing up, so this one took on the name of her scruffy little dog Topsy, as a differentiator between her and Fancy Margaret … I wonder if she minded… Anyway I digress. Restoring this old axe from something frankly rather lethal to a useful tool again kept mum popping in to my mind and I like to think she would have appreciated its resurrection.
Mothers old maul
A firm believer that nothing couldn’t be fixed with a bit of string and some glue, mother patched it up long after it should have been consigned to the repair box.
It didn’t take much to free the handle. I made the new one from an offcut of a paddle making project, (more on that in another post) ground a new edge and wire brushed it til it gleamed!
Tool handles.
The key thing with tool handles is straight grain and no knots. Hickory is often the go to choice for any tool that will be subject to high impact however, I really like the workability of Ash and its flexibility helps absorb the shock, plus I had some under the bench so decision made! I left the profile chamfered near the head keeping more material there as that is where any mishits (is that a word? It looks… wrong) will likely fall and shaving the handle down to the size of the eye in the axe head would have made it super skinny and, to my mind, a bit flimsy.
A couple of hardwood wedges driven into the top finished it off.
Chores
Sawing and splitting logs always reminds me of childhood chores. My weekly list was; feed the chickens and let them out, feed the geese and let them out, burn the rubbish (I know!) take out the compost, and saw up one wheelbarrow of wood to feed the venerable old Rayburn that sat, wheezing tepidly in the corner of the living room. “a man who saws his own wood, is twice warmed” mother used to reply, if I moaned about this labour. This graft earned me something like 50p (about a million in todays money I’m sure…)
Though they never had the same list of chores to help the smooth running of the house, apparently just clearing their own plate from the table is contribution enough, I did let my kids loose on the wood pile once they were old enough, if they can walk and talk, they can saw and split is my motto and they all have all their fingers and toes so it must be true.😀
oiled and ready for splitting logs
So whilst it’s not exactly comparable to ‘Anduril, Flame of the West’ it is ready to be a serviceable tool for a few more years…
I’m dedicating this post to https://ashesstillwaterboats.com. Anyone who gives out free plans for making cool stuff deserves a mention. Especially as once I made the paddle and posted a photo, they sent me free plans for a canoe to build!
The Paddle templates are sent on paper at full size. I laminated them onto some skinny ply so I can keep them for future paddle making projects… with all that spare time I have…!
Paddle Blanks cut and ready for shaping.
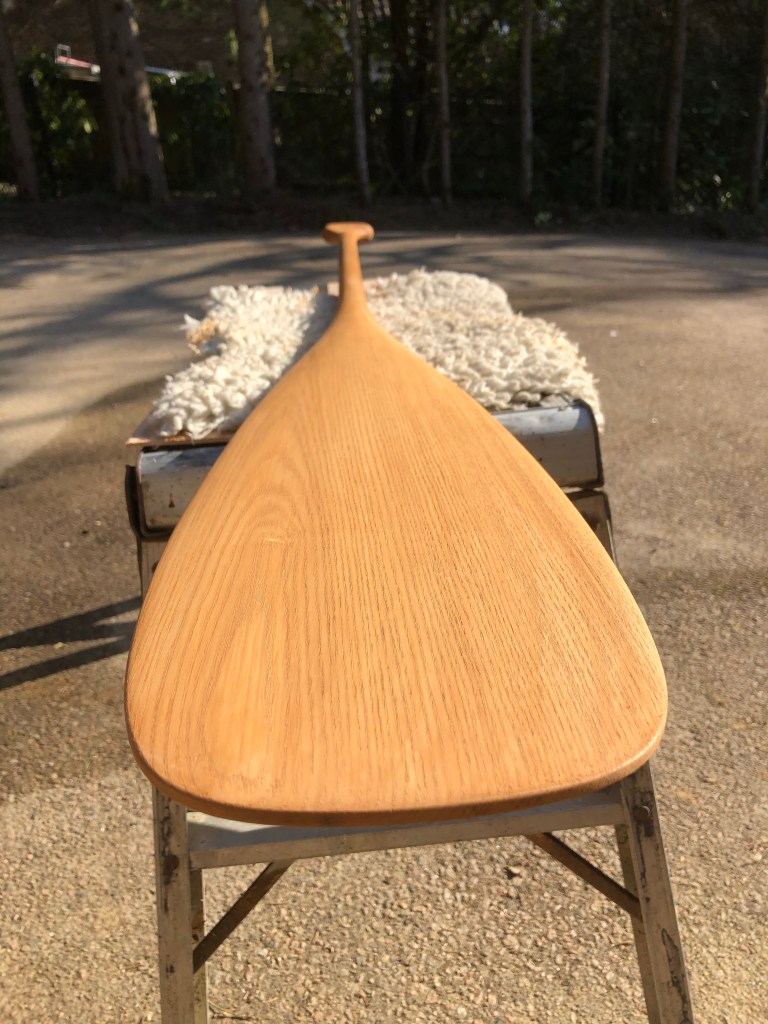
Of course credit also needs to go to Number 1 son who requested a handmade paddle for his birthday. Unable to decide between the Beaver tail model and the Otter tail, I got both. Having cut them out, Toby’s had to take precedence as his birthday was looming as was his canoe trip down the River Tay. The timber is Ash from a local timber yard www.treespanner.co.uk, really helpful people, good stock and great attitude. Anyone who helps load the vehicle, and says just transfer the money when you get home deserves a mention.
Method
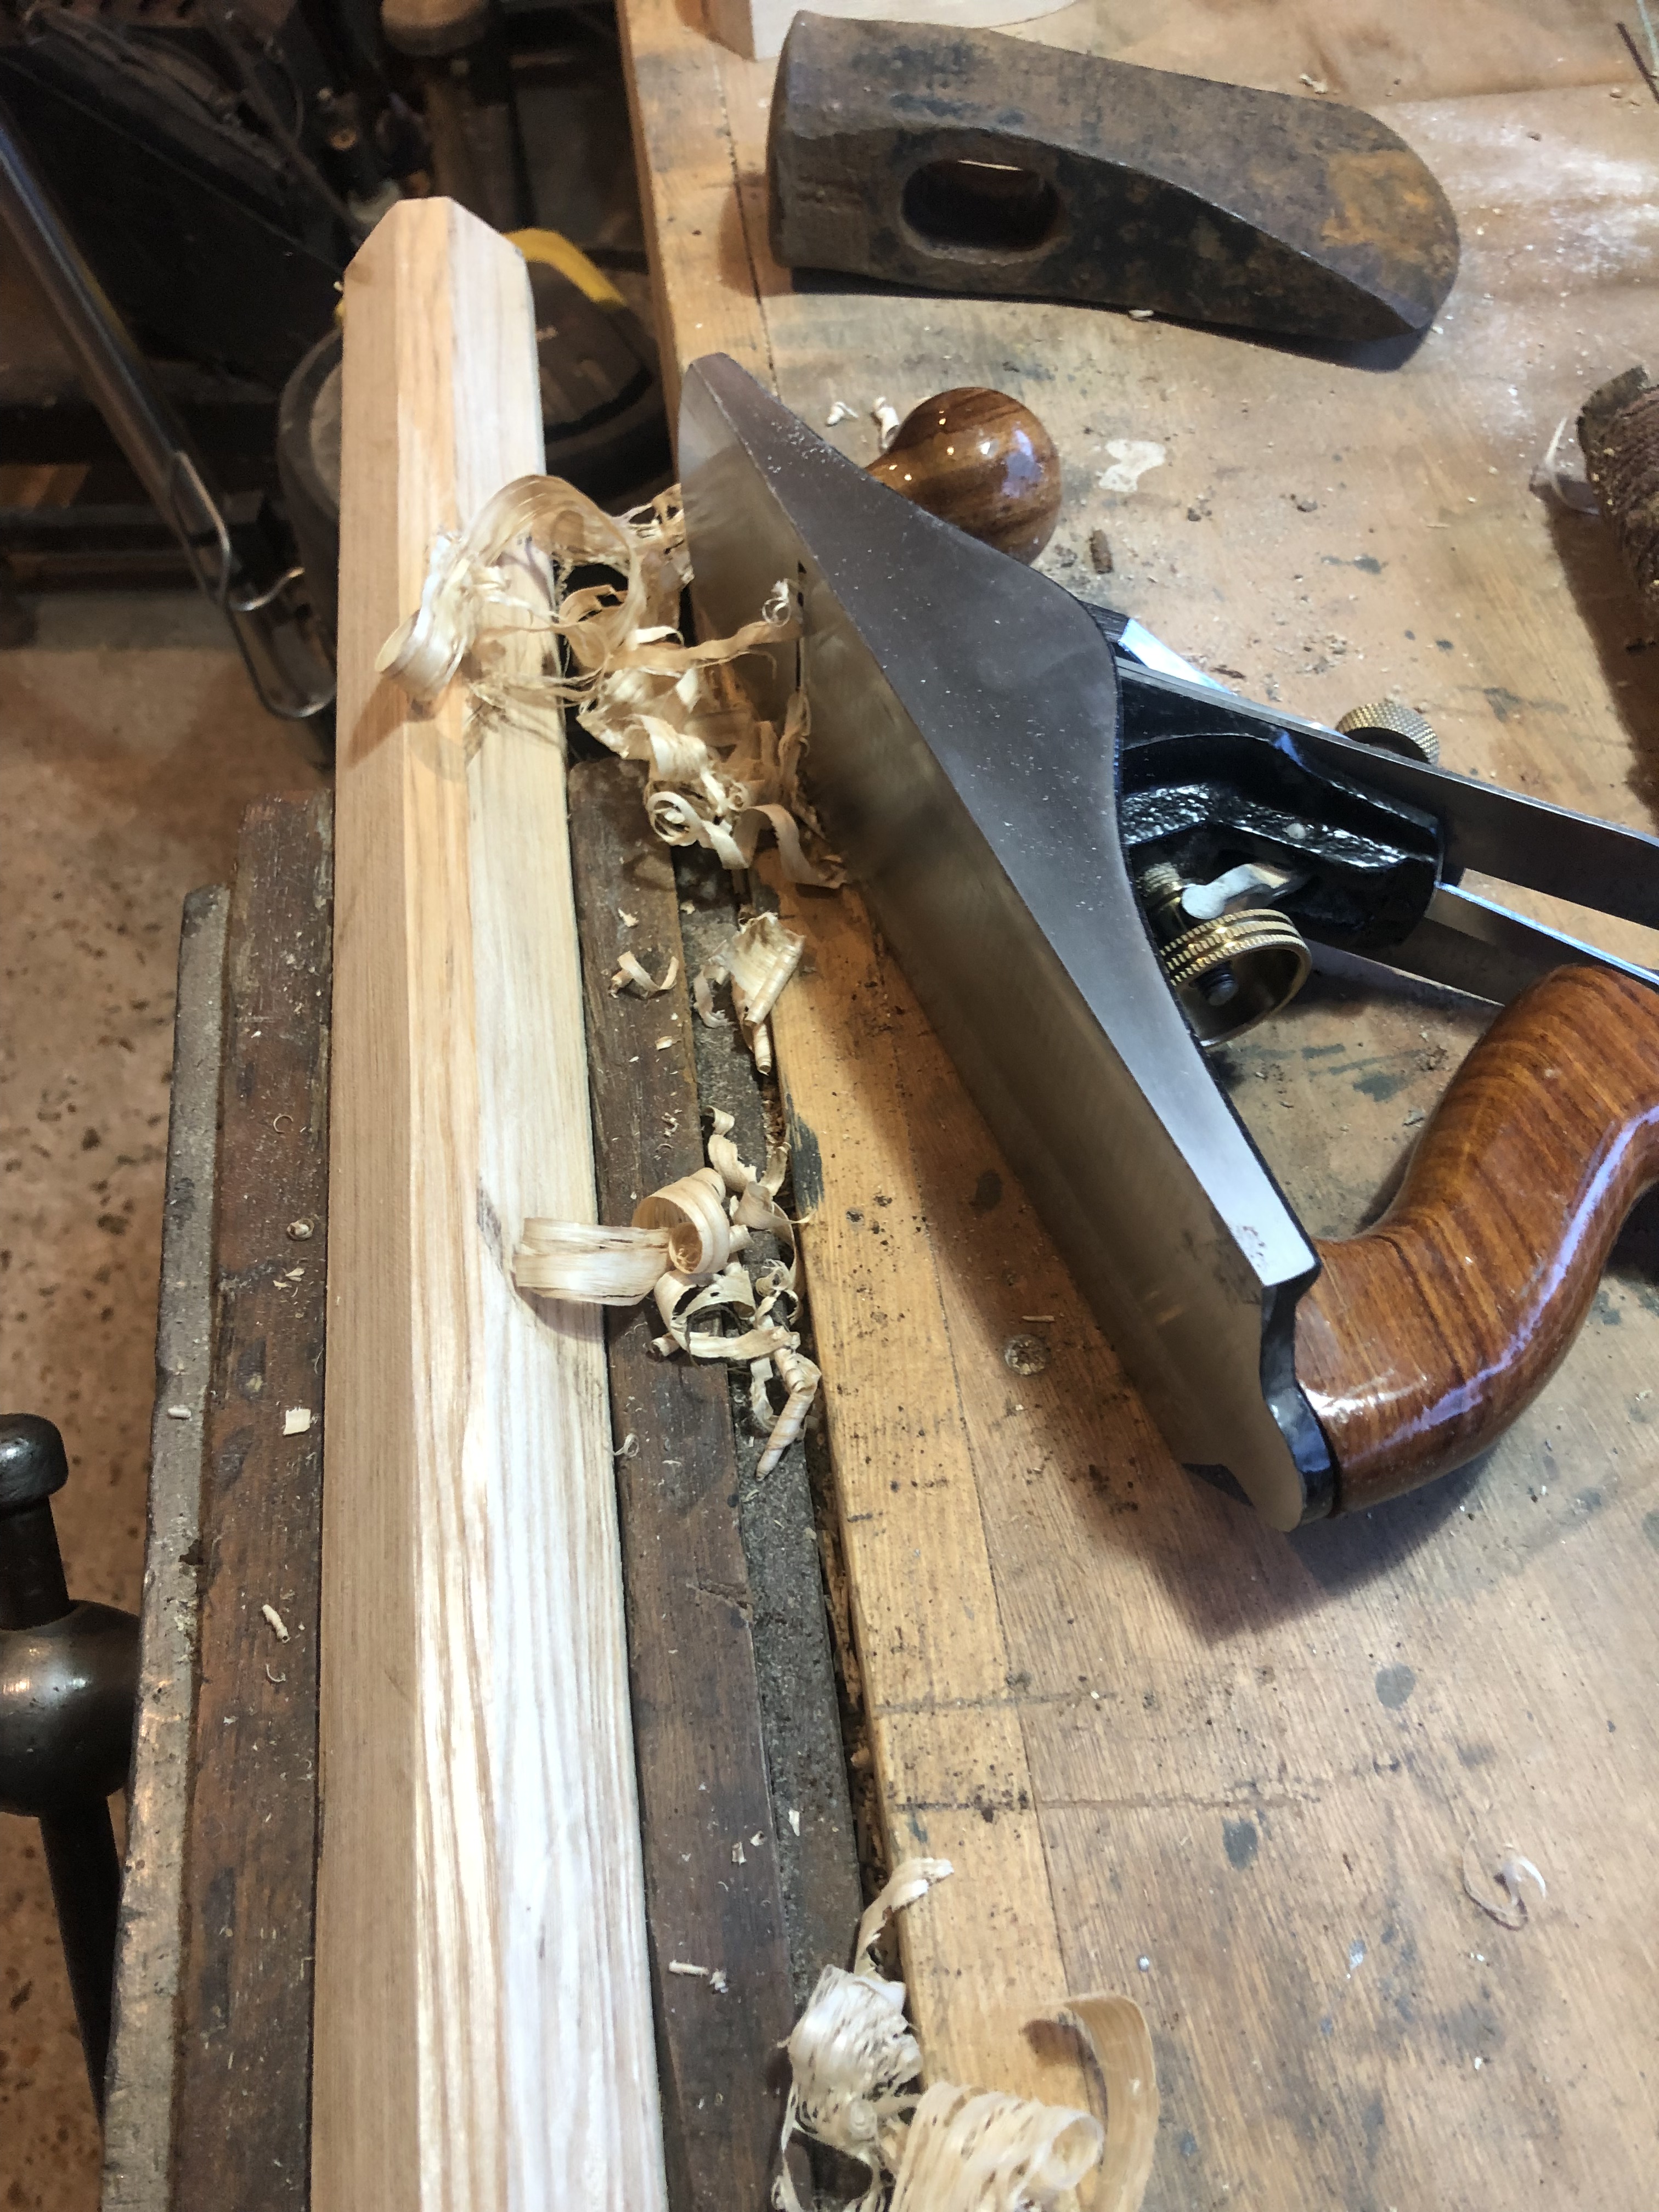
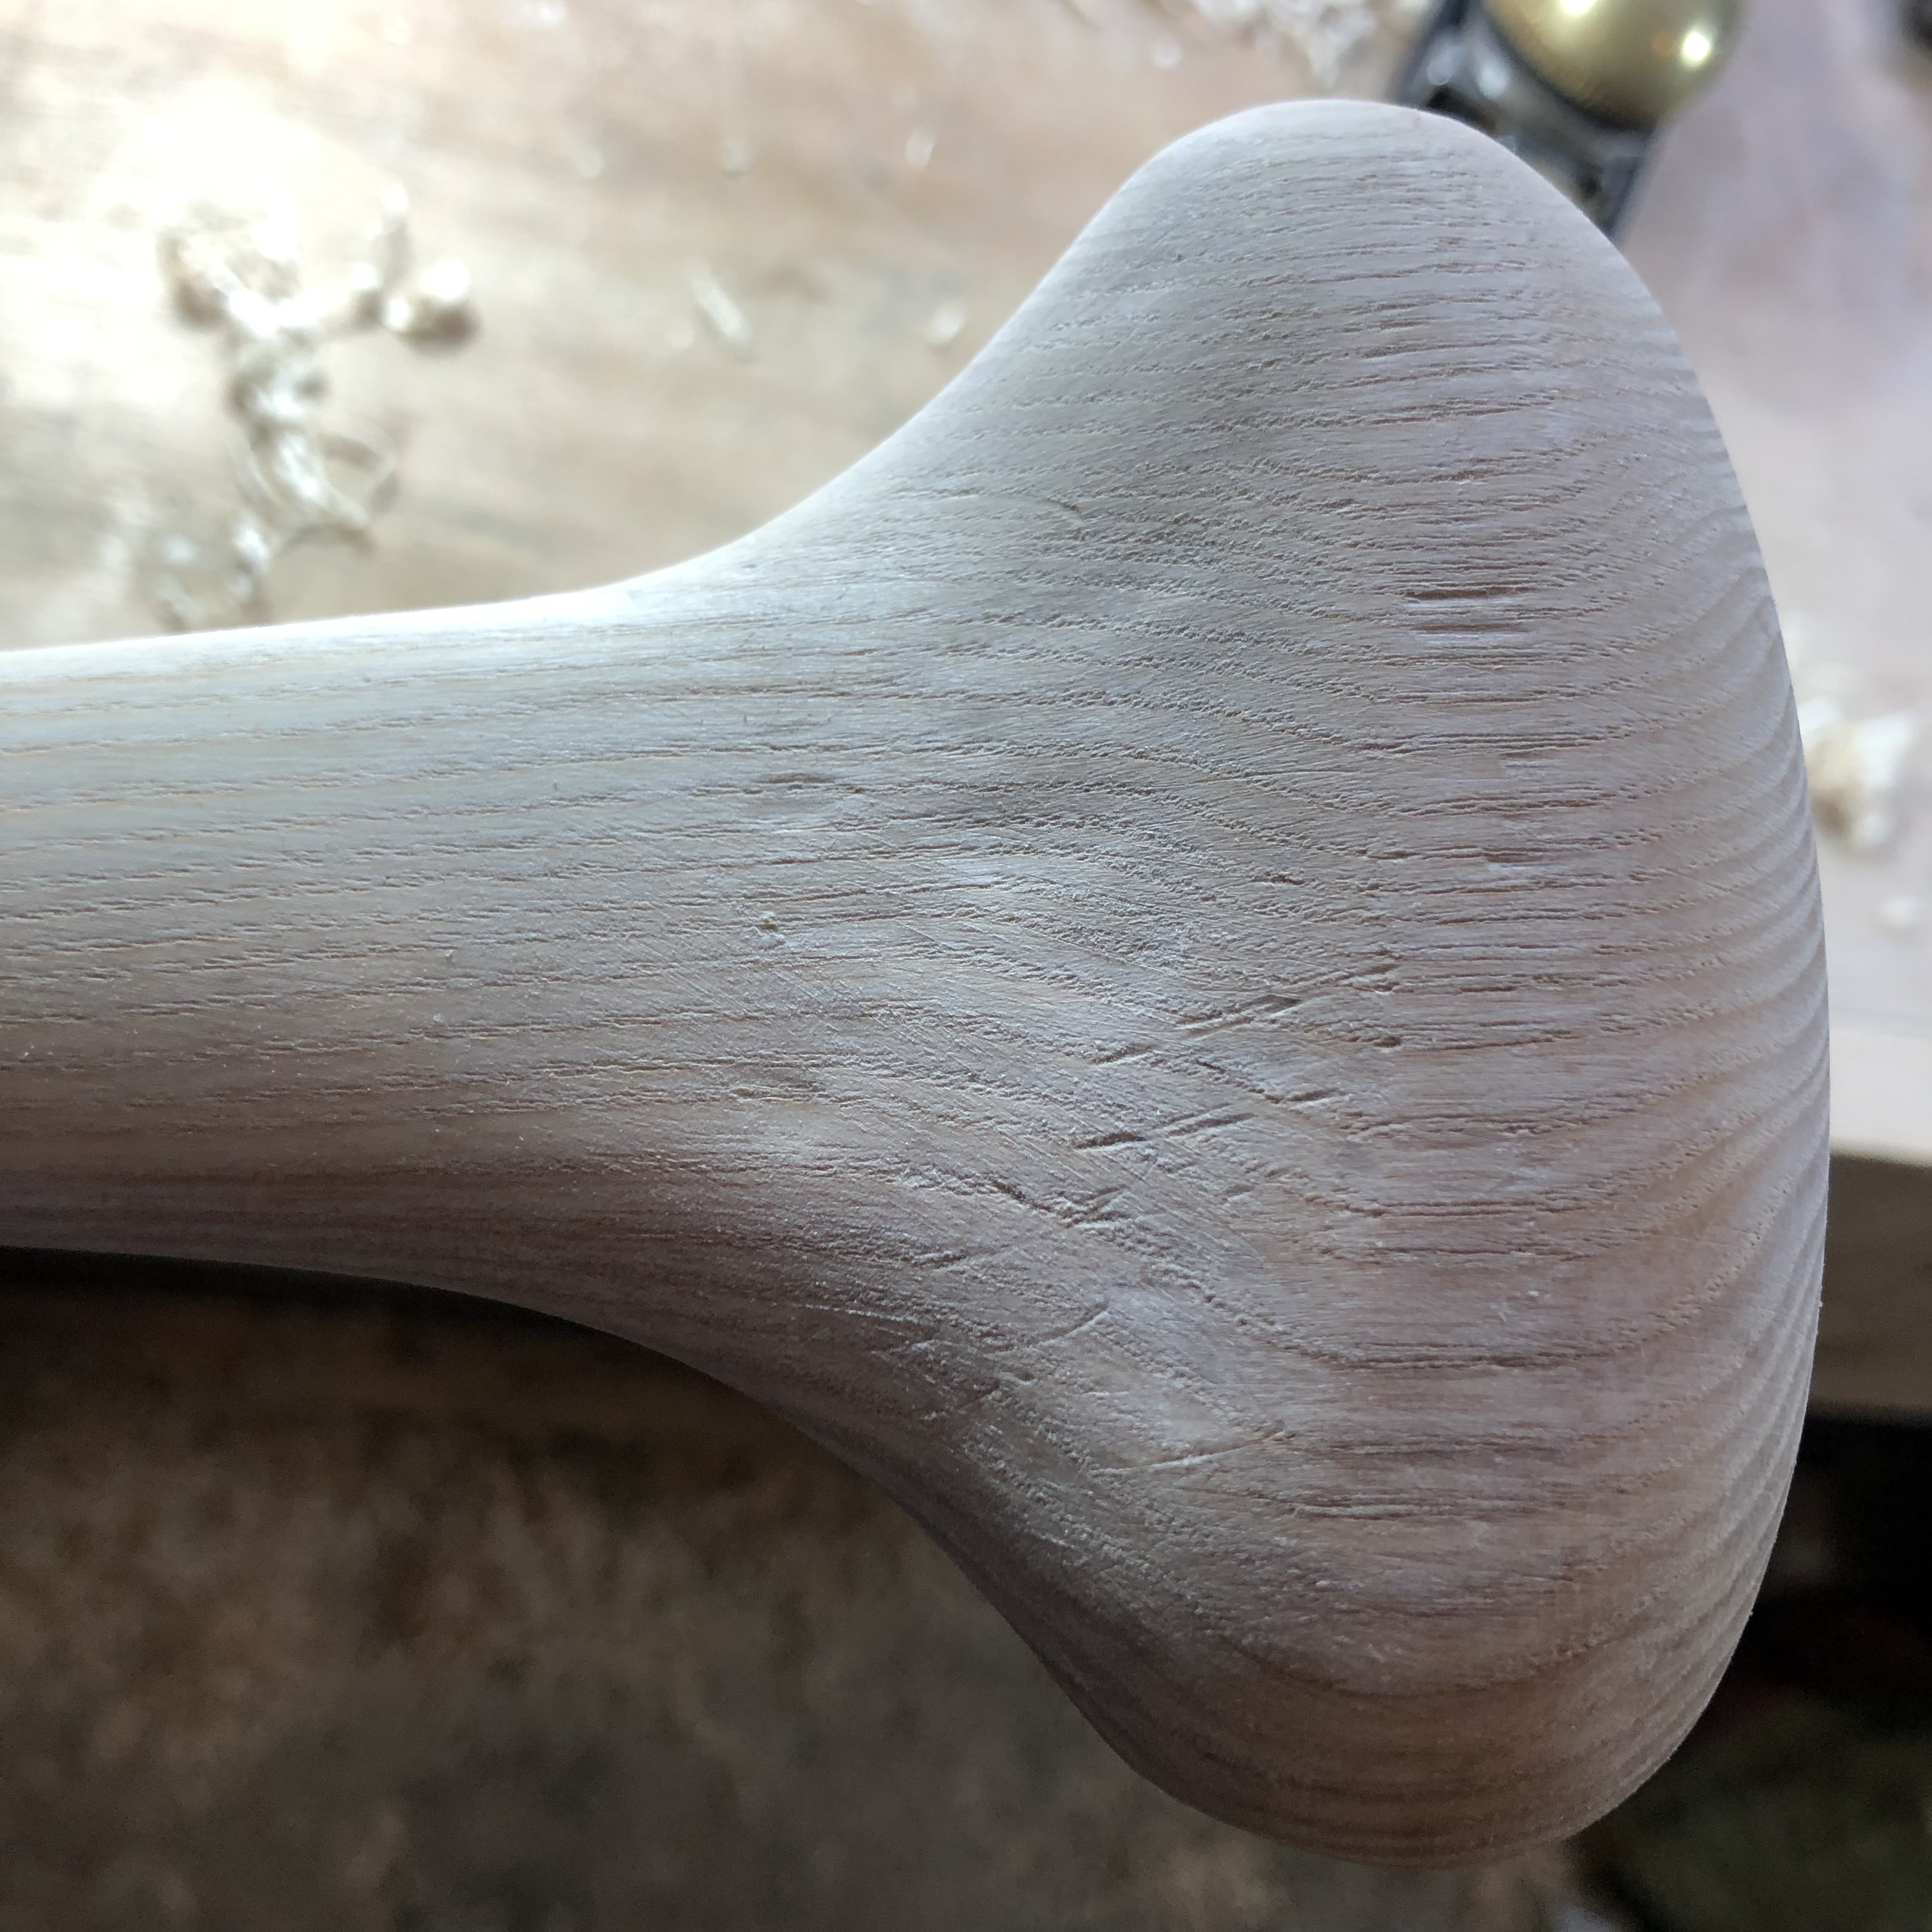
I borrowed fathers bandsaw to cut the outline then it was back to my workshop for shaping. The shaft I kept square for as long as possible so as to hold it firmly in the vice. The blade faces have only a gentle curve so Topsy Margarets smoothing plane was the best tool for keeping a nice uniform shape. The handle was shaped with a curved bottomed spoke shave, a variety of carving chisels and a curved carving knife (see below). The curved bottom spoke shave was used again for the transition from shaft to blade, then the shaft was done using the smoothing plane for the majority of the length employing the classic technique of taking material off the corners to make the square section octagonal, then take of the corners again to make a Hexadecagon (yes yes, I had to look it up…😀) and then smoothing all the corners of ’til it felt good in the hand. In section it isn’t a true circle it’s an ellipse, so as to keep more strength in the direction of the stroke.
Some in Progress shots
Beavertail.
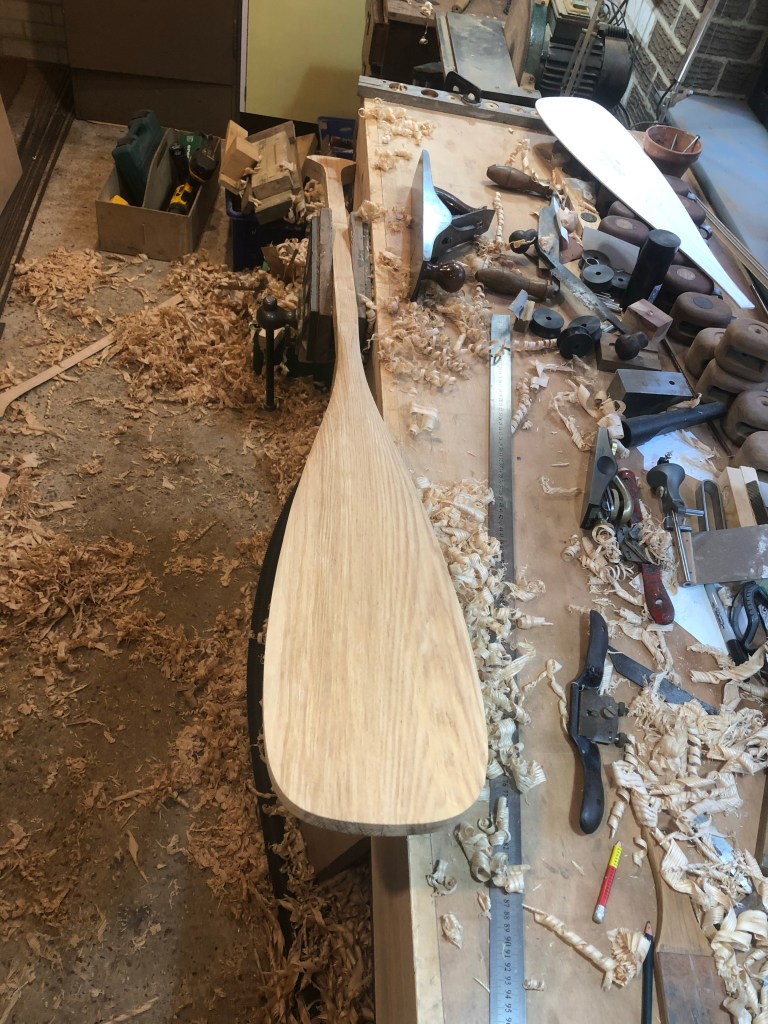
With a lot of sanding, a little stain and plenty of oil, the finished Beaver tail paddle glows in the sunlight.
There is something very therapeutic about shaping a good piece of wood, working methodically with a sharp blade, surrounded by fragrant shavings, revealing the shape hidden within (yeah yeah alright Michelangelo 🙄)
The pattern calls for an alarmingly thin section at the edge and I have to confess I baulked at going quite as skinny as the specification so they are probably slightly heavier than the optimum, but I’ll trade a bit of extra heft for a sturdier paddle that can take the knocks.
Sidetracked
I did get slightly sidetracked with a another little job, making a curved carving knife out of an old file. I justified it by using it to create the concave areas of the paddle hand grips but really it was just an excuse to fire up the little devil forge and hit metal hard with a hammer!
Devil ForgeCurved carving knife
Pudding
The proof of the paddle is in the paddling they say…
So in a classic competition that would go down in the annals of history as Beaver v Otter, Up the Ouse! Number 1 and I lit out for the horizon… well the weir in this case then back to the pub for a pint and a spot of lunch! Slightly irritating that you can’t tie up to the pubs pontoon (apparently this is a health and safety issue 🙄) and have to ‘trespass’ on the farmers field opposite then cross over via a footbridge but we didn’t let that spoil our pint!
Anchor Inn, a great pub stop up river from Barcombe MillsThe end of the line…
The match ended in a draw with neither Beaver nor Otter out paddling the other, I guess the obvious flaw here was both being in the same canoe… though I swear I was catching him up at one point….😄 Seriously though, I was really pleased with both paddles, possibly after a solid day paddling I might regret the slight increase in weight but I certainly didn’t notice it over a few hours.
Well the title says it all. This post will be more about why I haven’t made progress on the boat so if you were hoping for some in depth boatbuilding stroll on…. if you are vaguely interested in the goings on in my little corner of the world then welcome, and scroll on.
January 2021 was the last update! I was happily looking forward to a productive year but as is so often the case when man plans, the gods laugh.
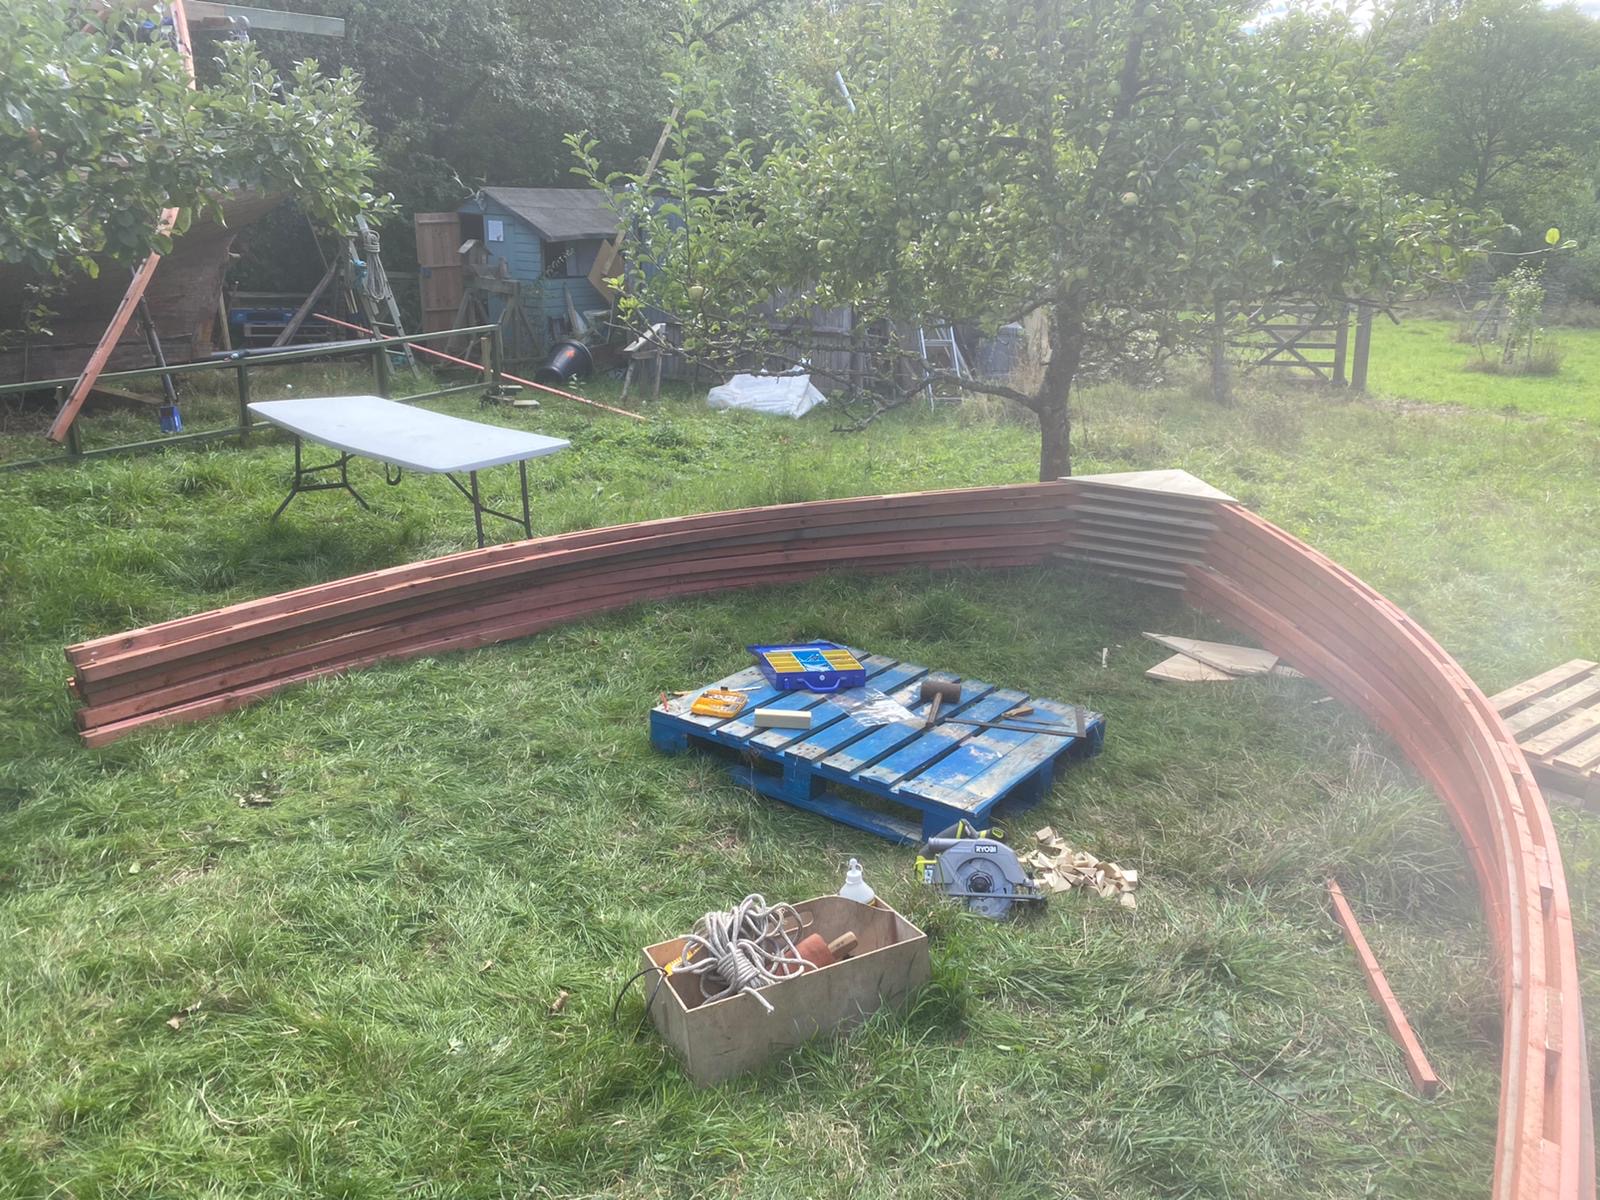
Storm Eunice took one look at my beautiful (it’s in the eye of the beholder!) bowshed structure and thought, I’ll see just how structural that is. Result? Bowshed 0, Eunice 1. After all our hard work and not inconsiderable expense I finally had to build what I should have built to start with, a strong scaffold structure.
The carnage Eunice left.
Several hundred pounds of scaffold later, some much needed help from the lads and Flamingo had a cover again. We used the remains of the Bowshed as the roof and fingers crossed it will last a bit longer.
Solid new scaffold shelter. Below, sons and nephews lend a hand.
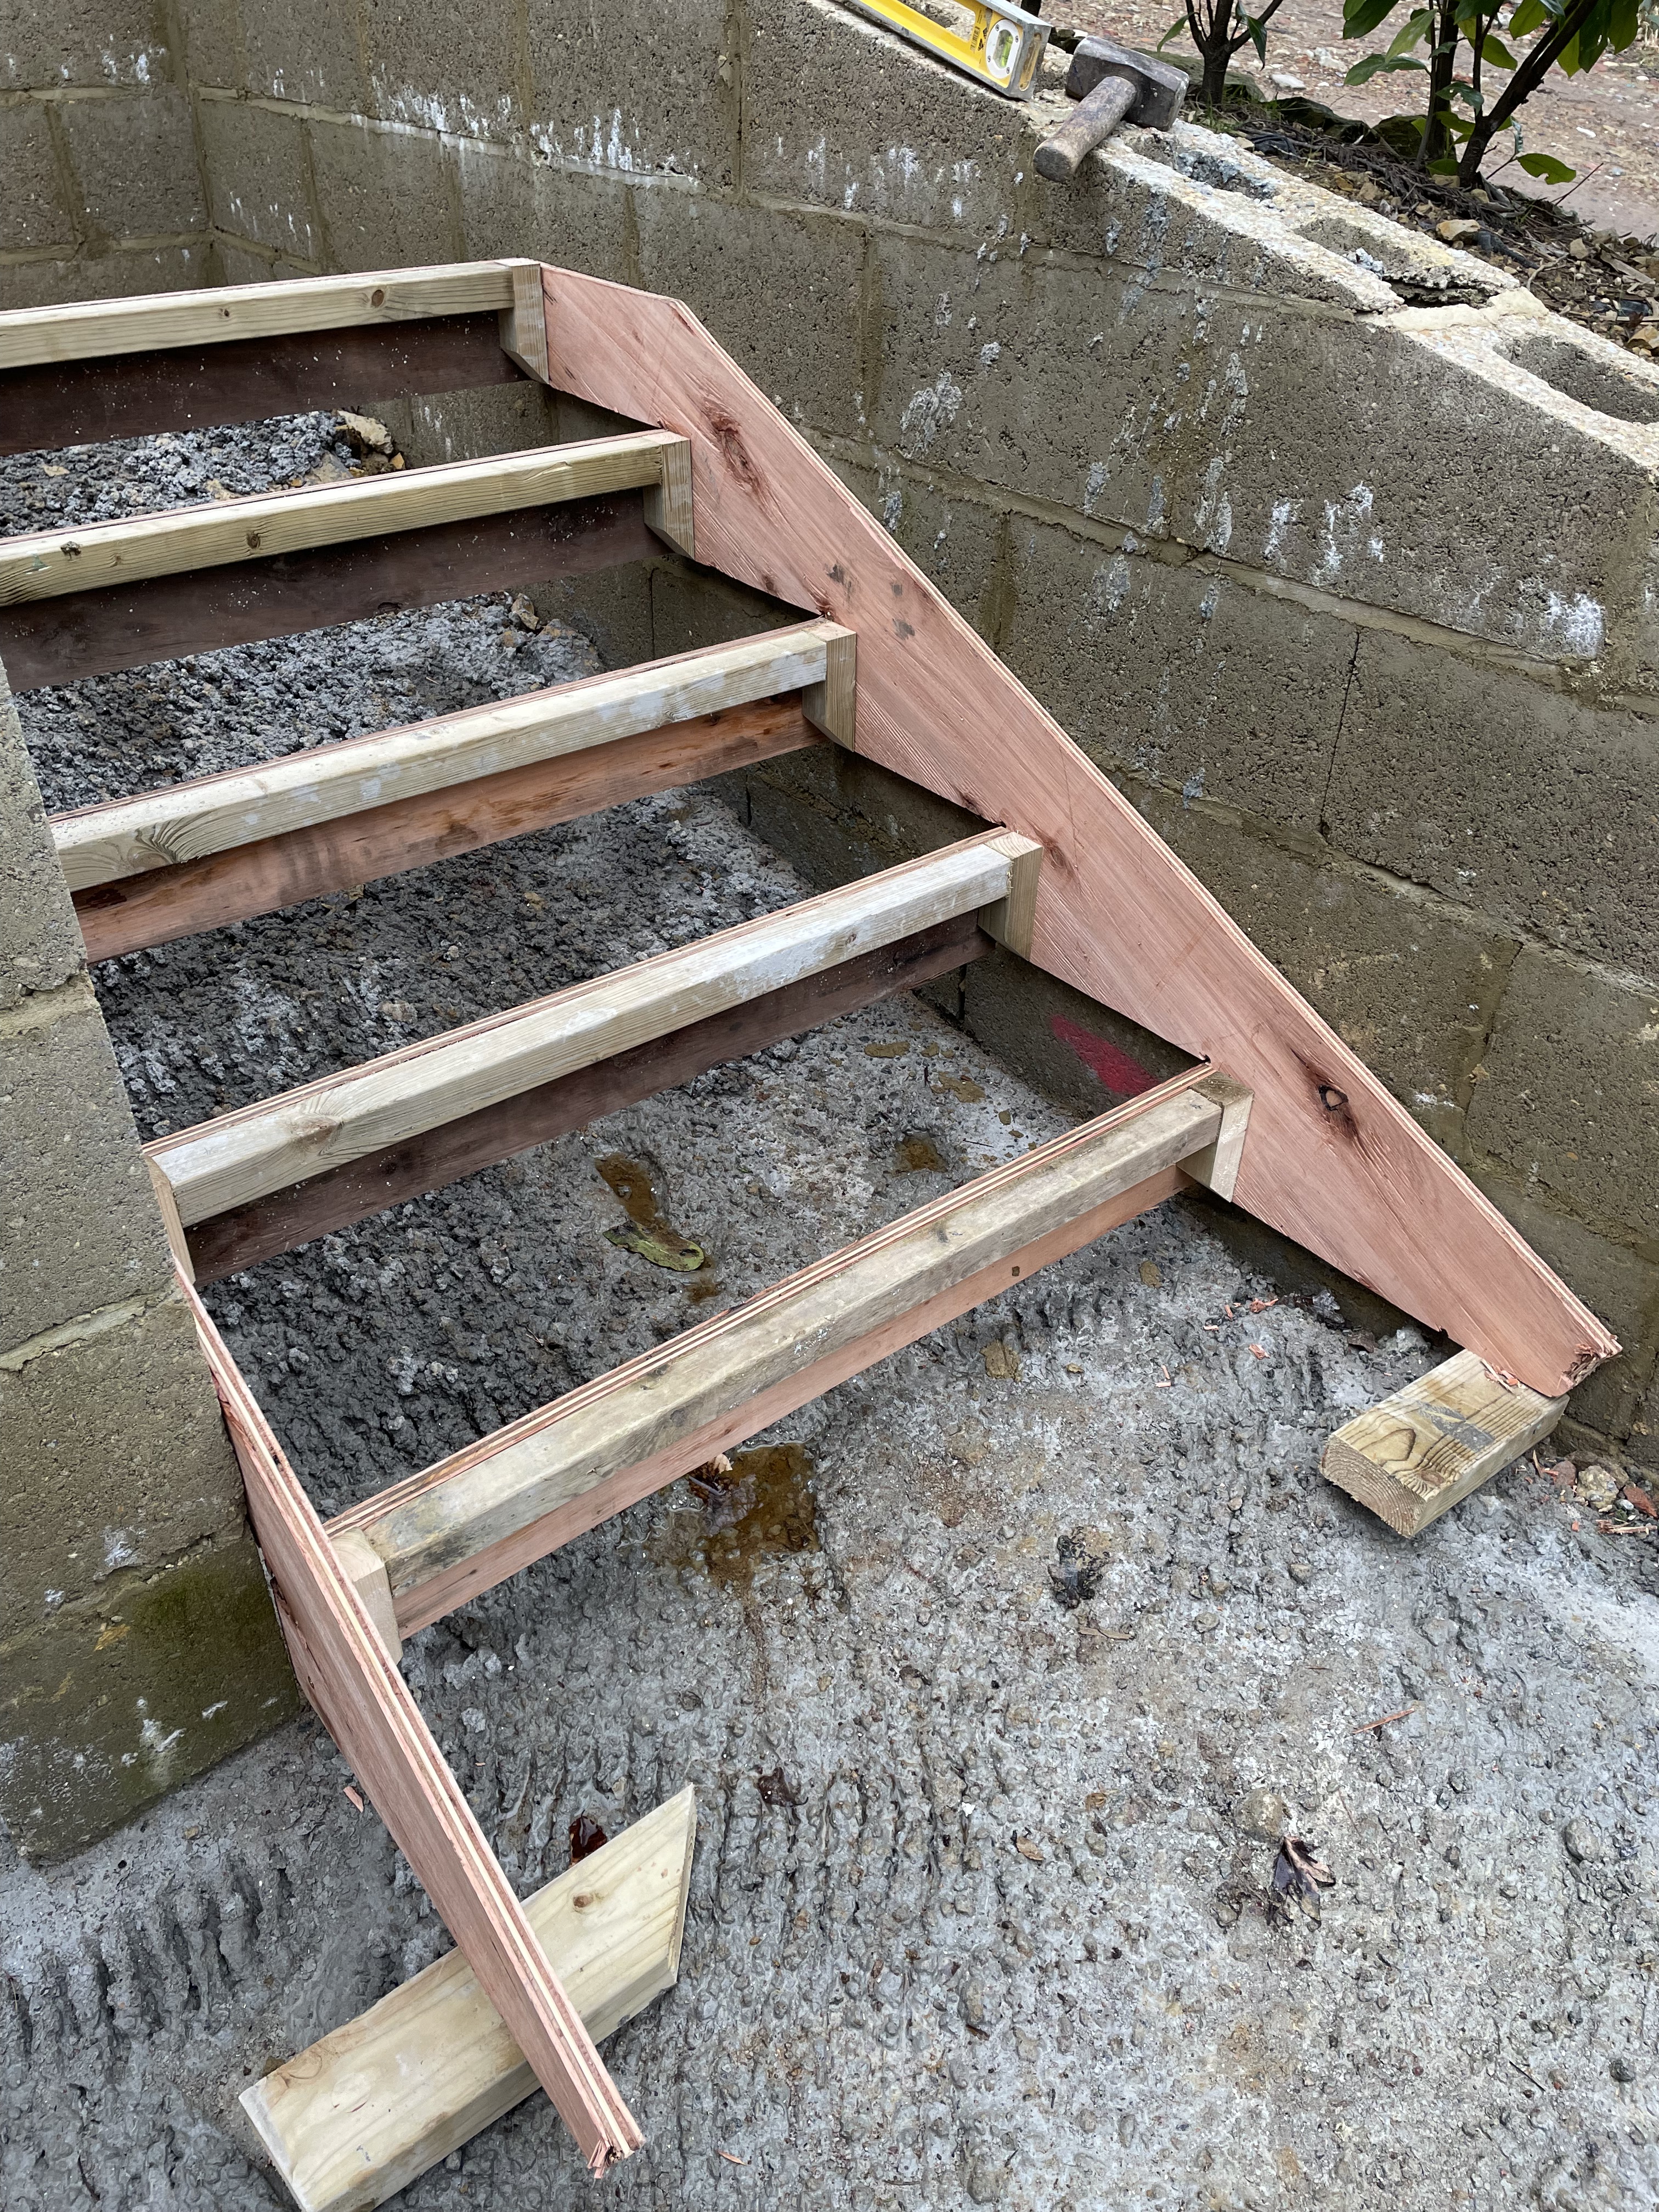
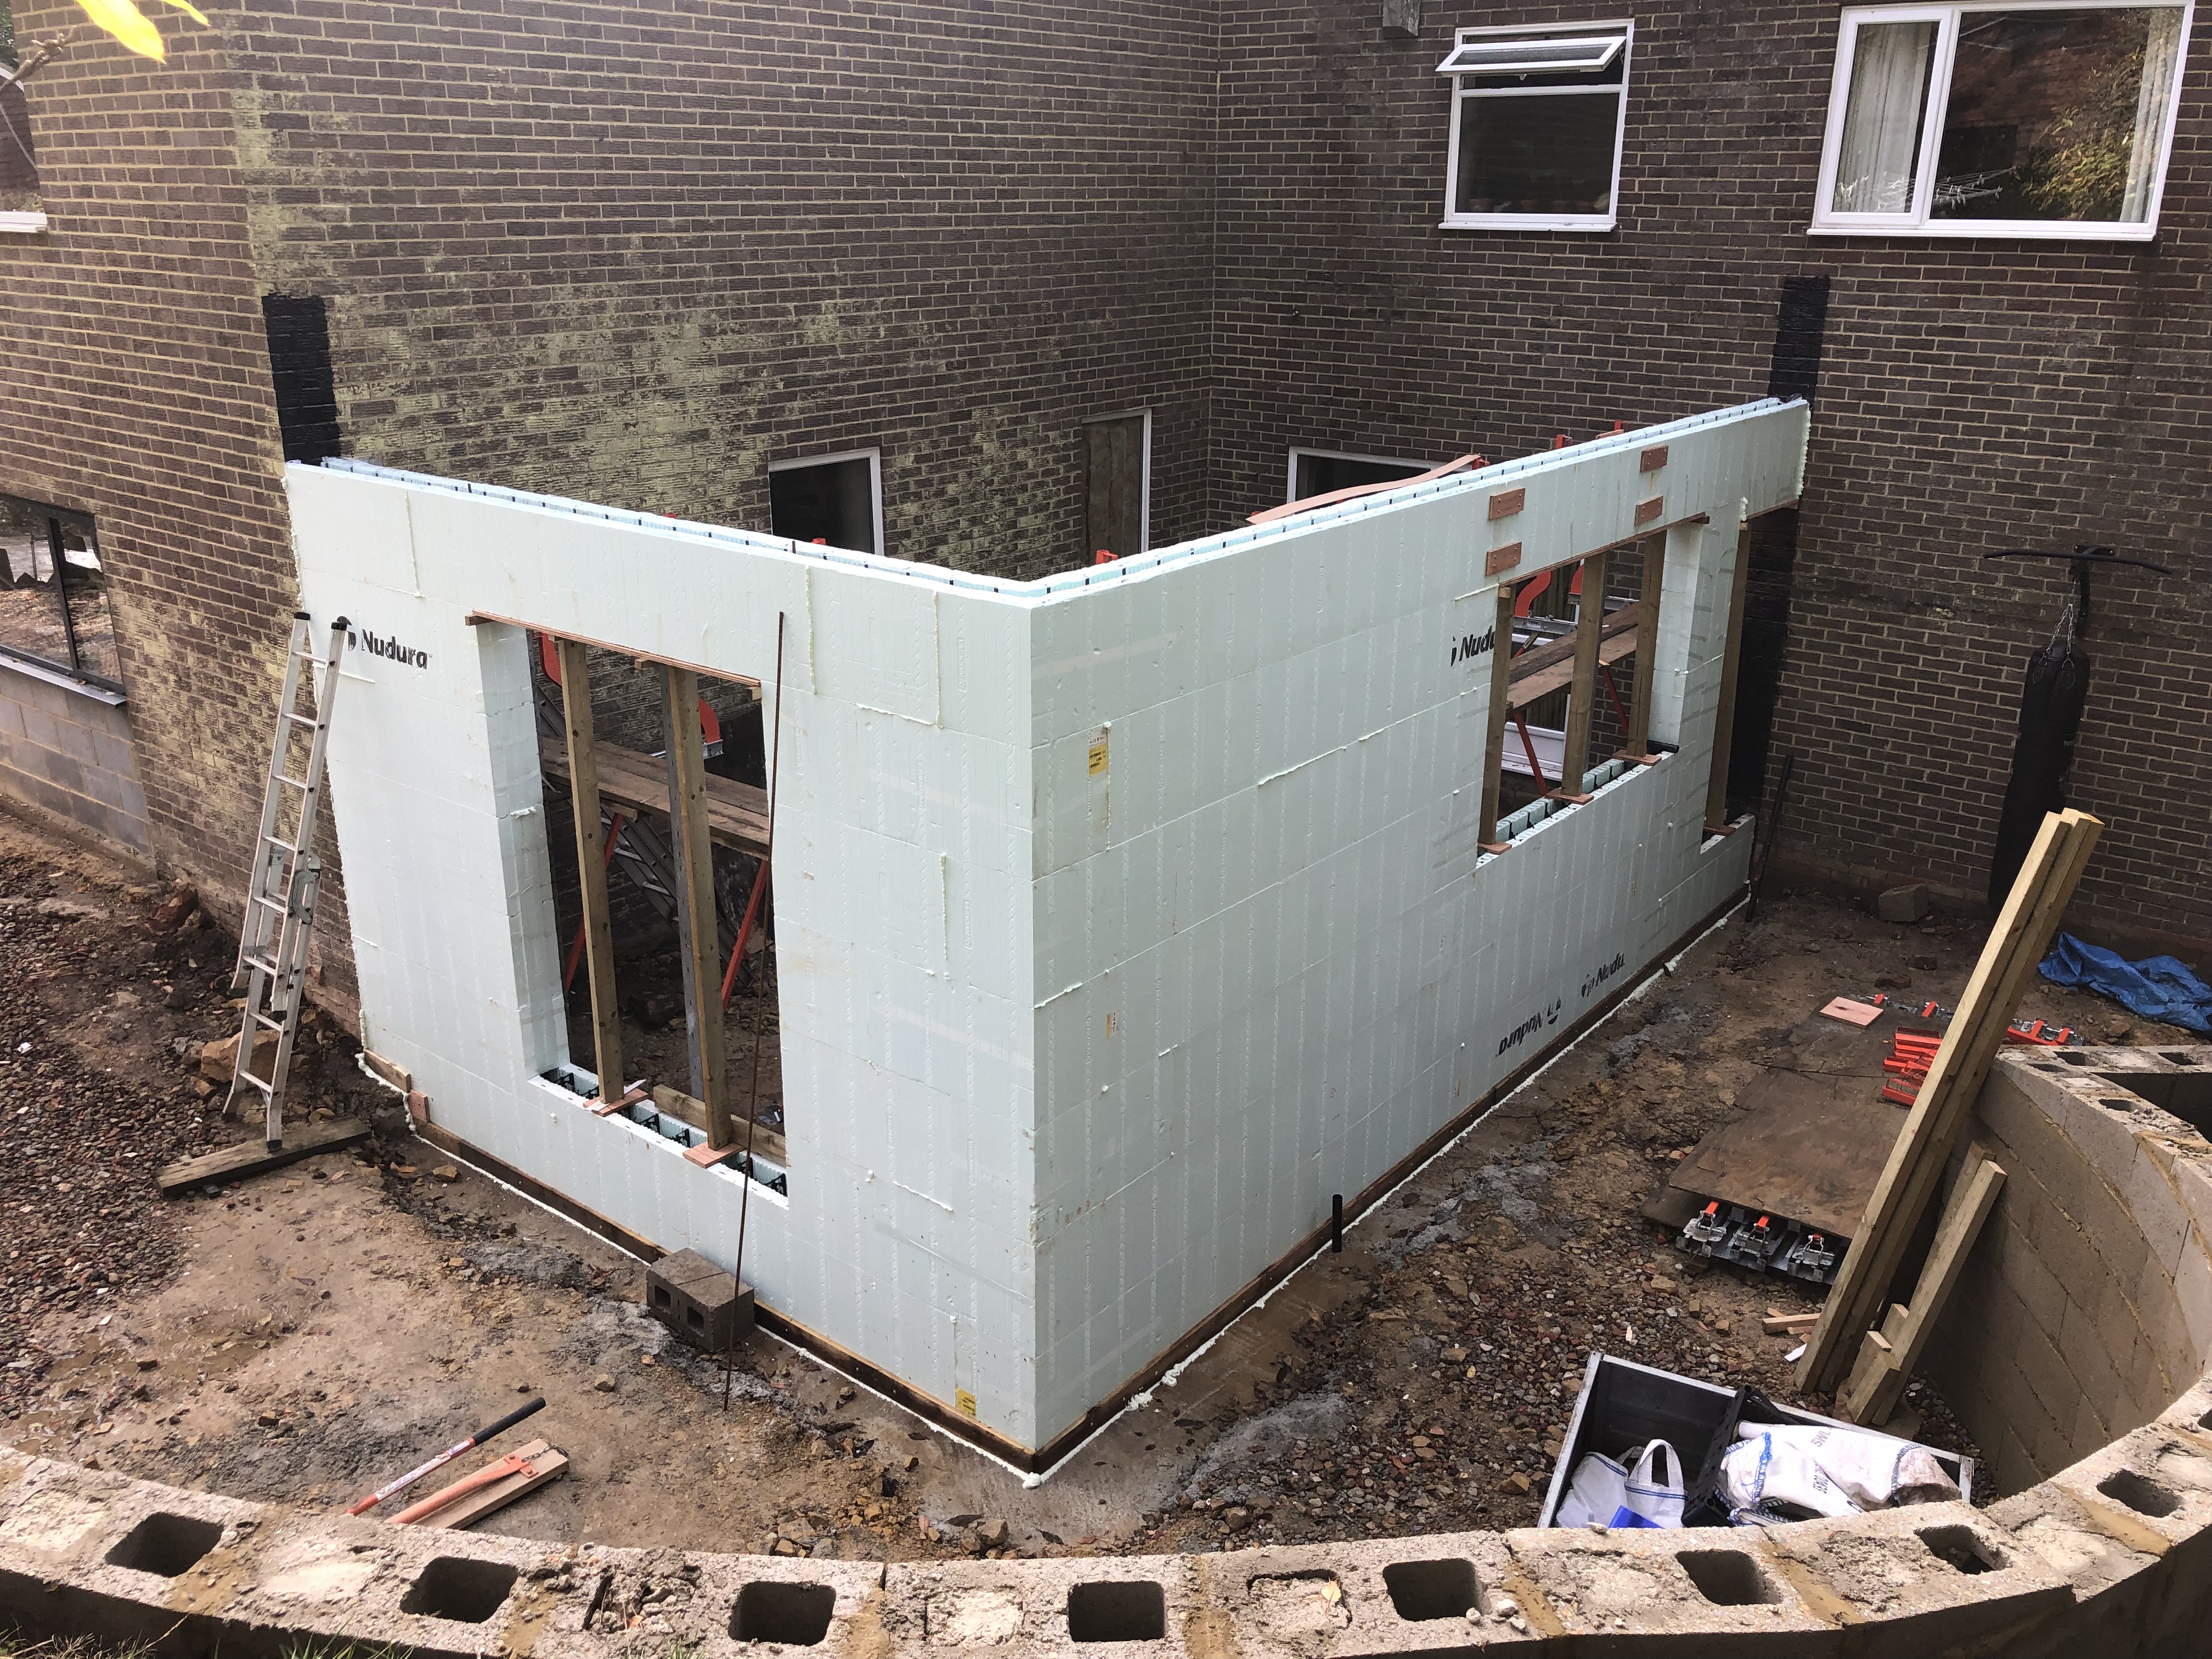
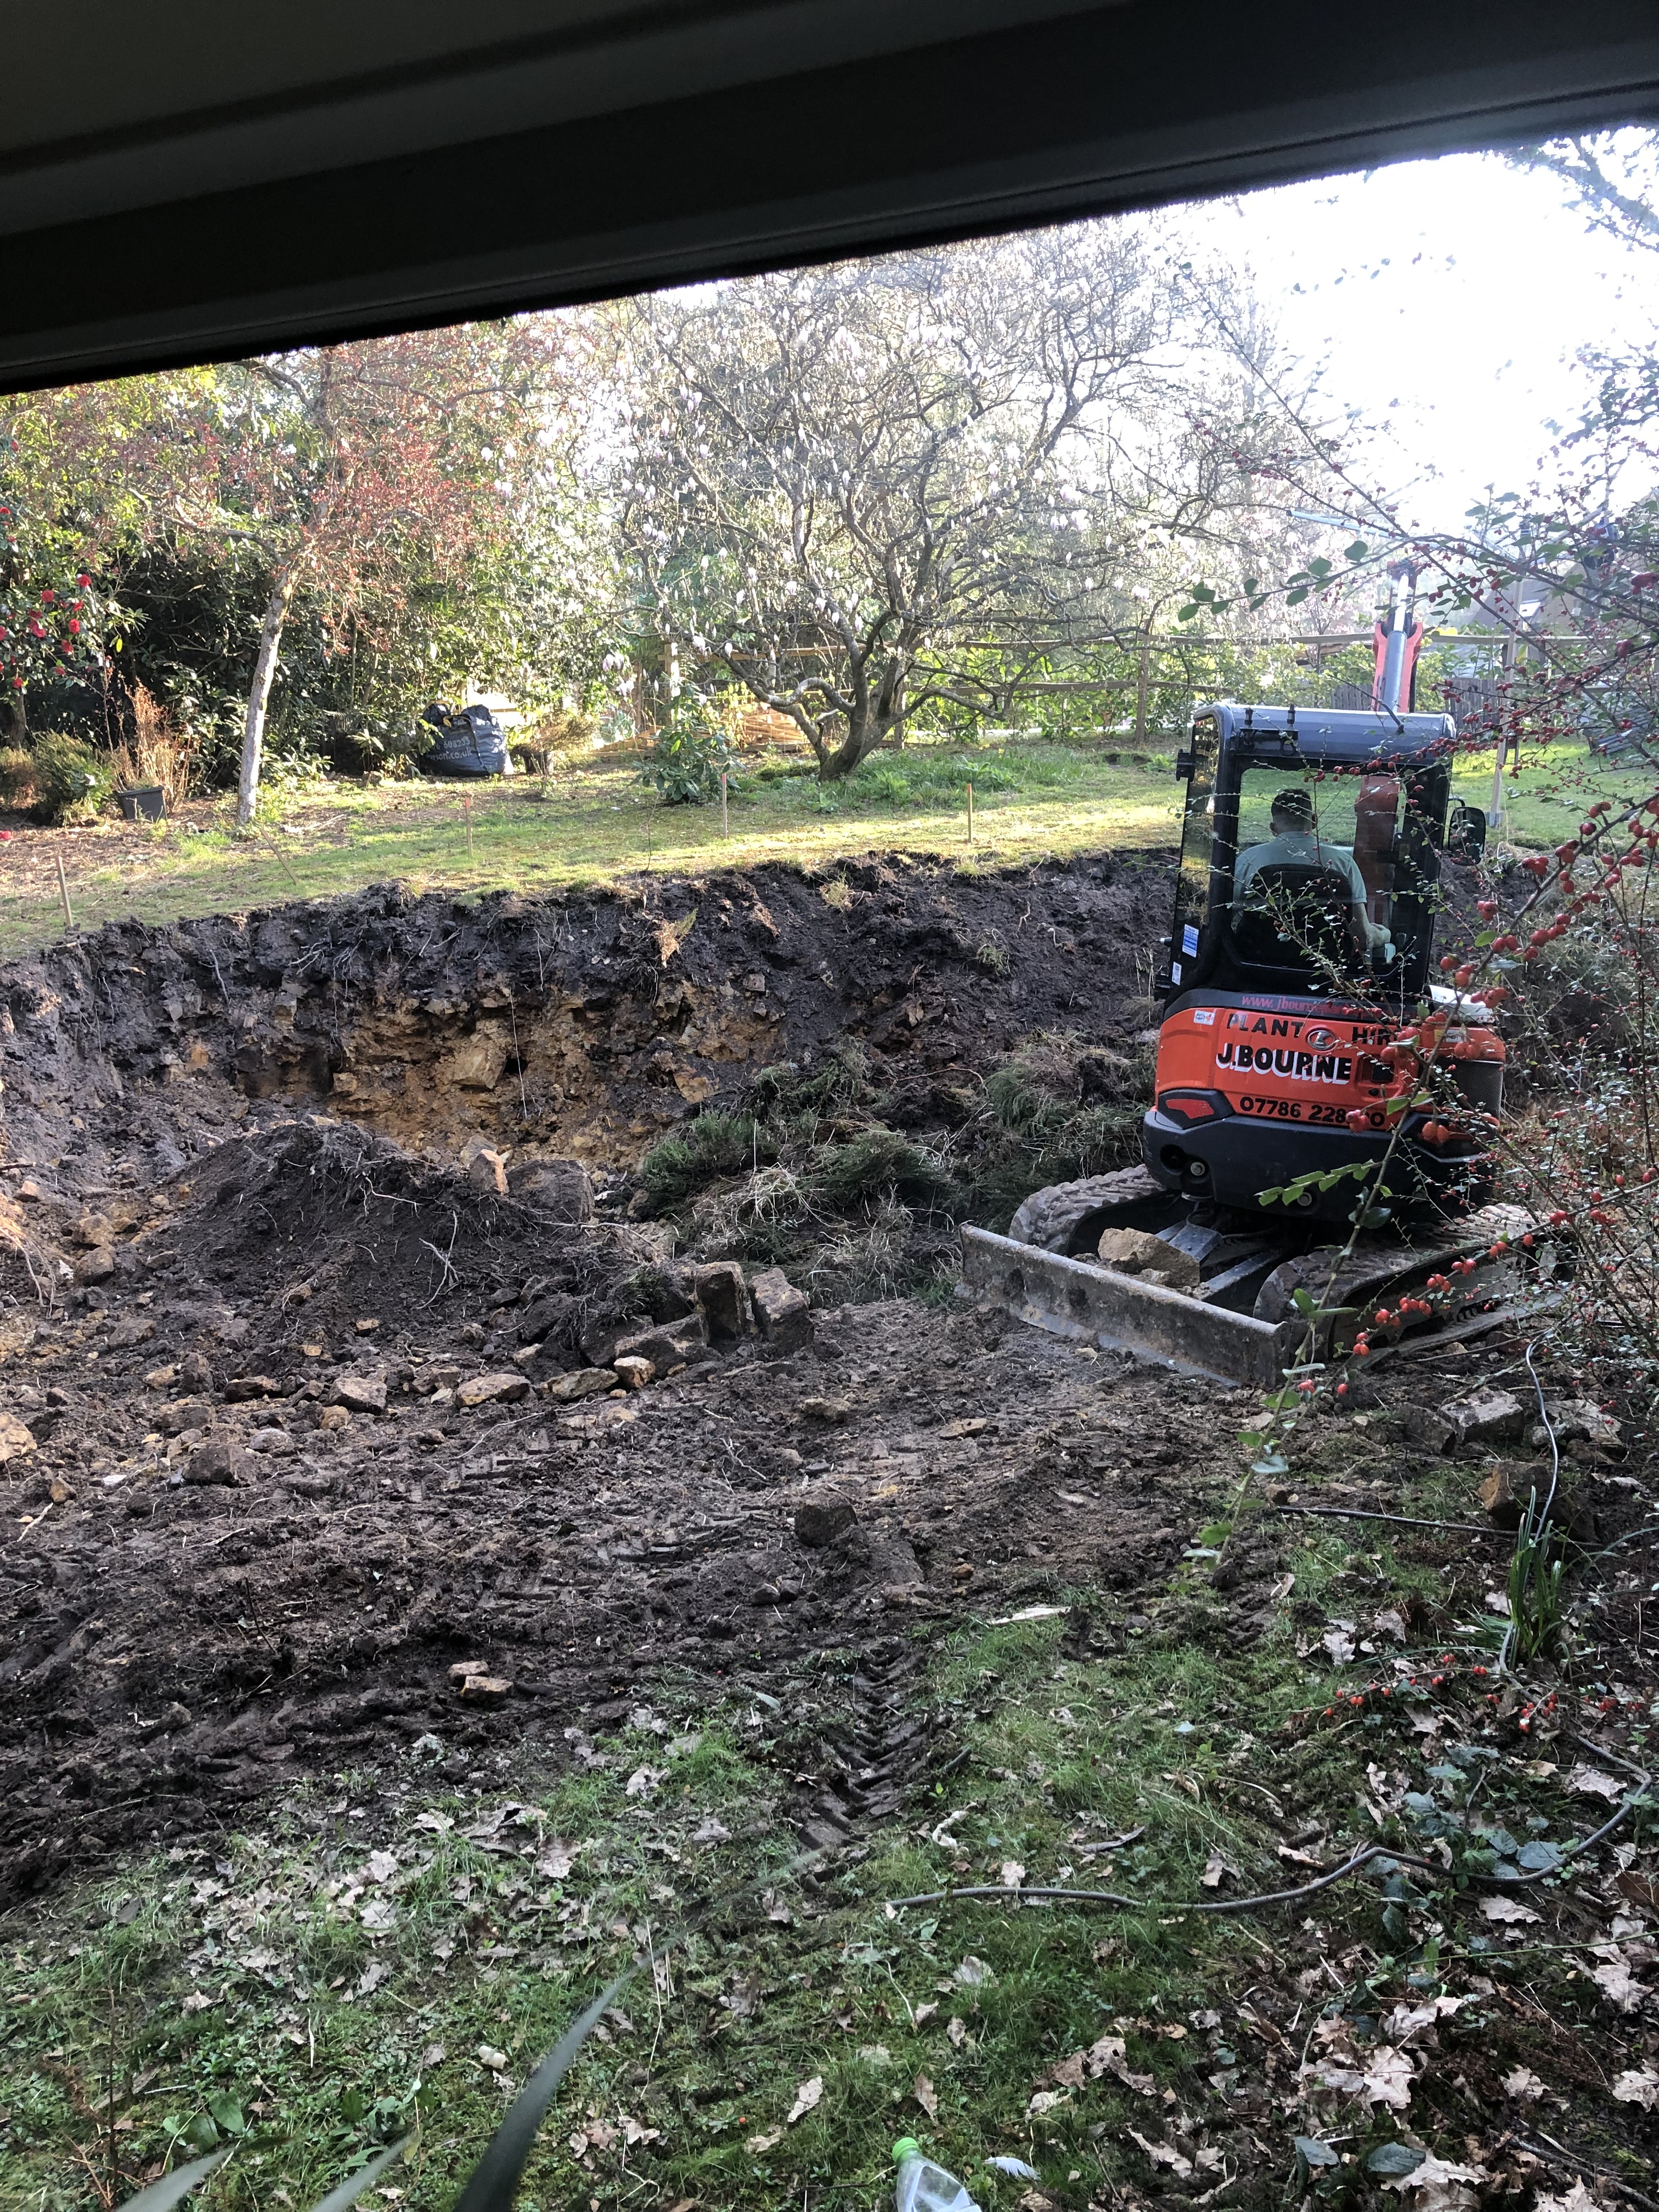
The next obstacle to navigate on the course to completion and launch was rather more daunting. The slightly quirky design of our 1960s gem of a house meant we needed to extend. Plans were drawn for a Den and Office downstairs and a swanky new Bathroom and Bedroom upstairs. The slope of the garden meant a retaining wall, and while we were at it, and with no concept of how much work this would entail, we decided to make the area big enough for a little patio for enjoying morning coffee outside the new home office… because we have so much time on our hands we need new places to spend it relaxing in…
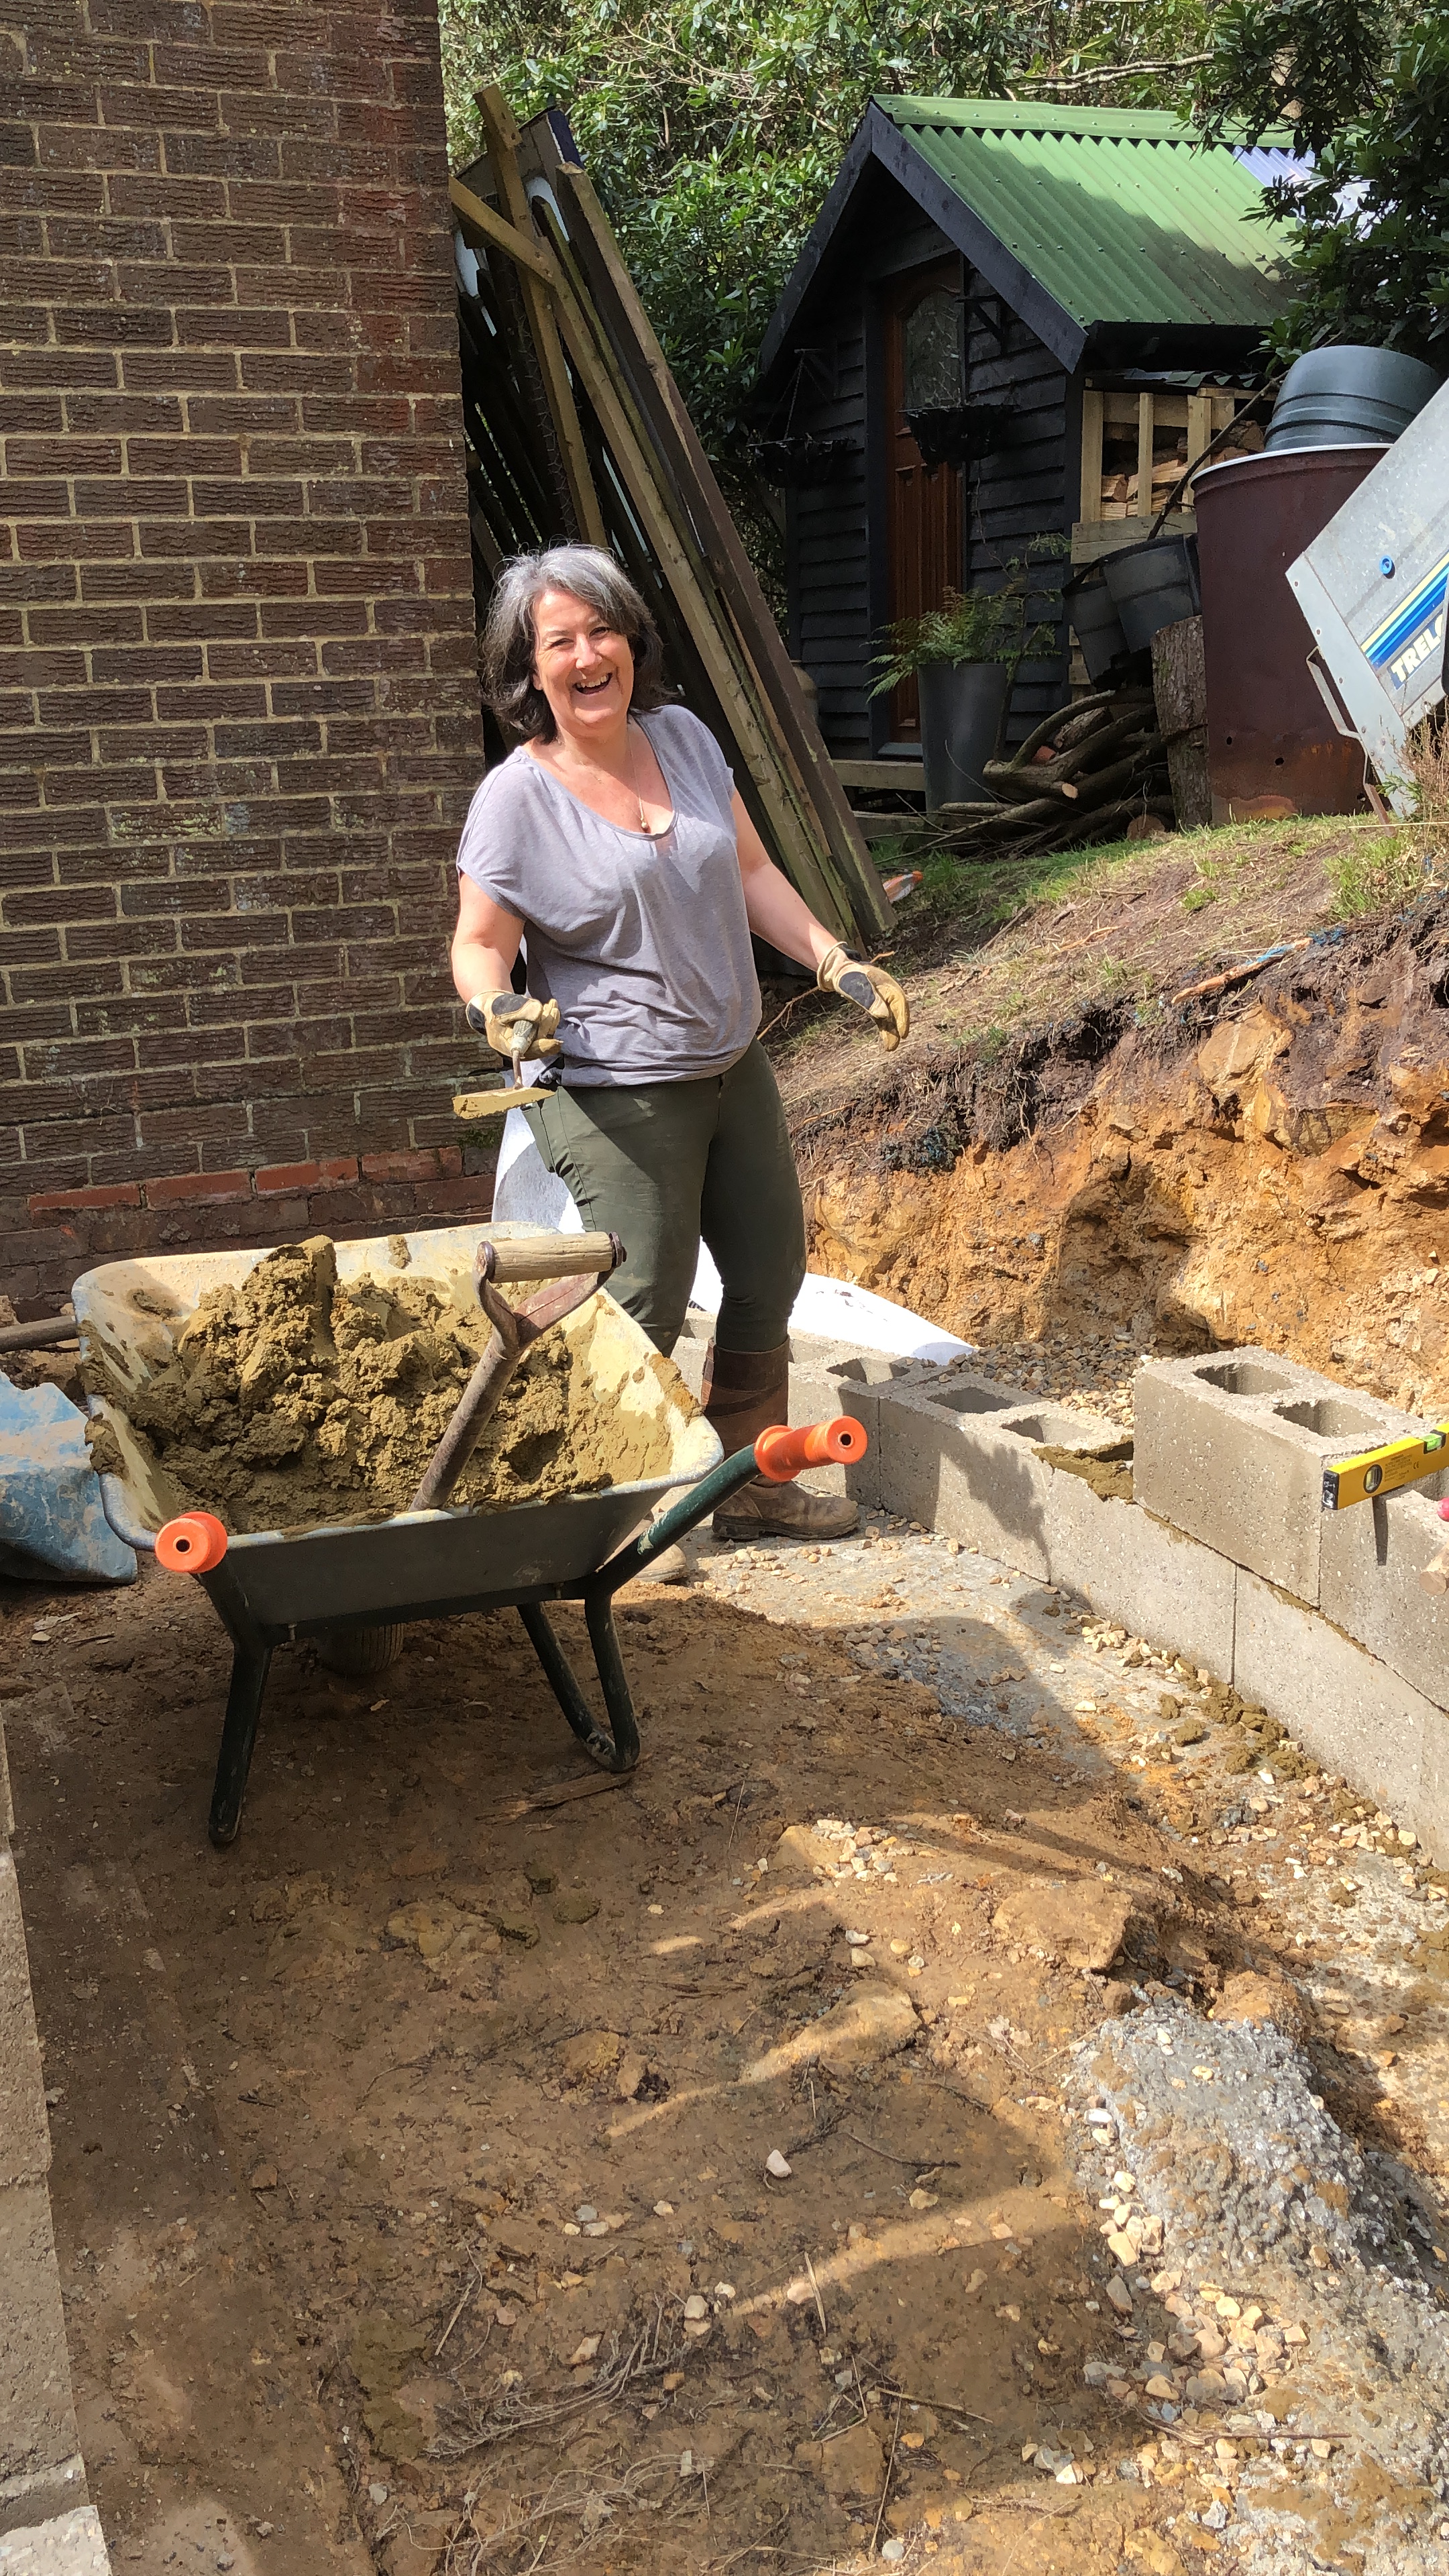
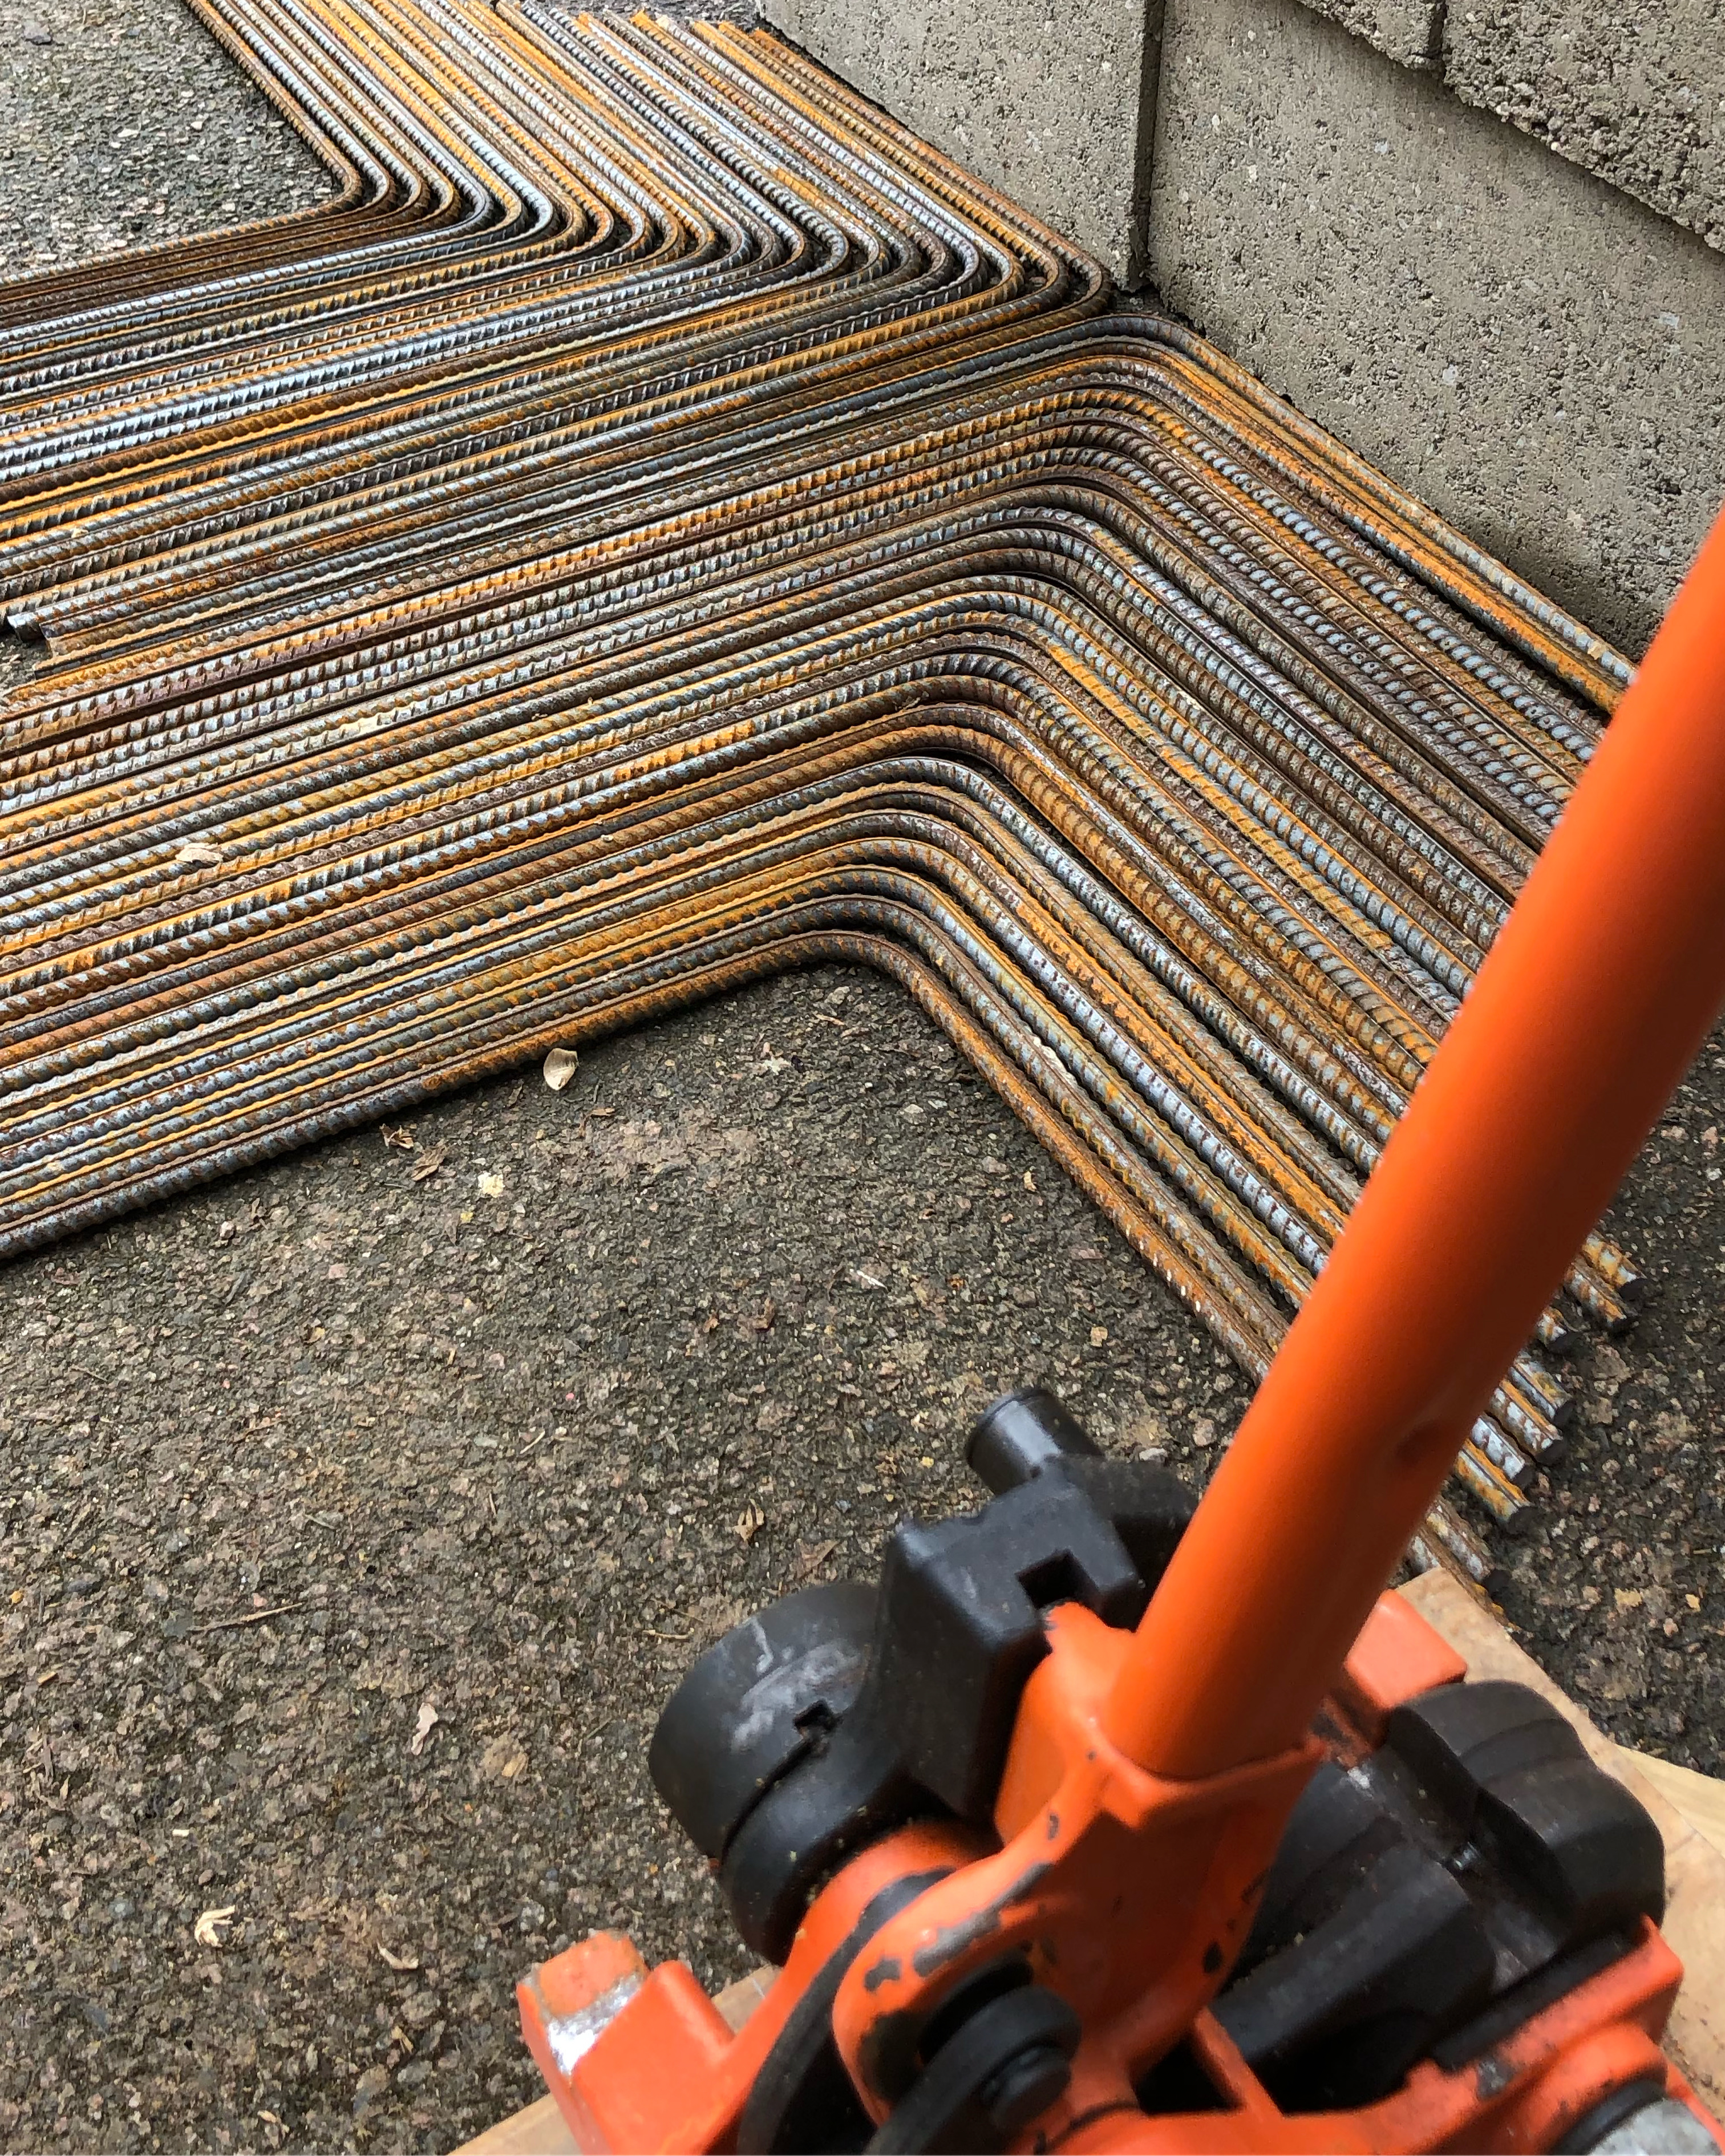
800 concrete blocks each weighing 25kg, hundreds of lengths of rebar, countless tons of spoil removed, goodness knows how many cubic metres of concrete poured (including the huge dollop I spilled with my appalling aim!) After some hired help with the ground work and foundation, Tracy and I pretty much built the whole thing apart from the roof and the render. (yes, yes Luke, I know you helped a bit, oh alright and thanks Lou for shifting so many blocks from the drive, oh and Tilly and Timor for smashing old tiles into hardcore), It was a steep learning curve and there are lots of things we would do differently but a year on and we’re weather tight, warm, and ready to fit out the interior.
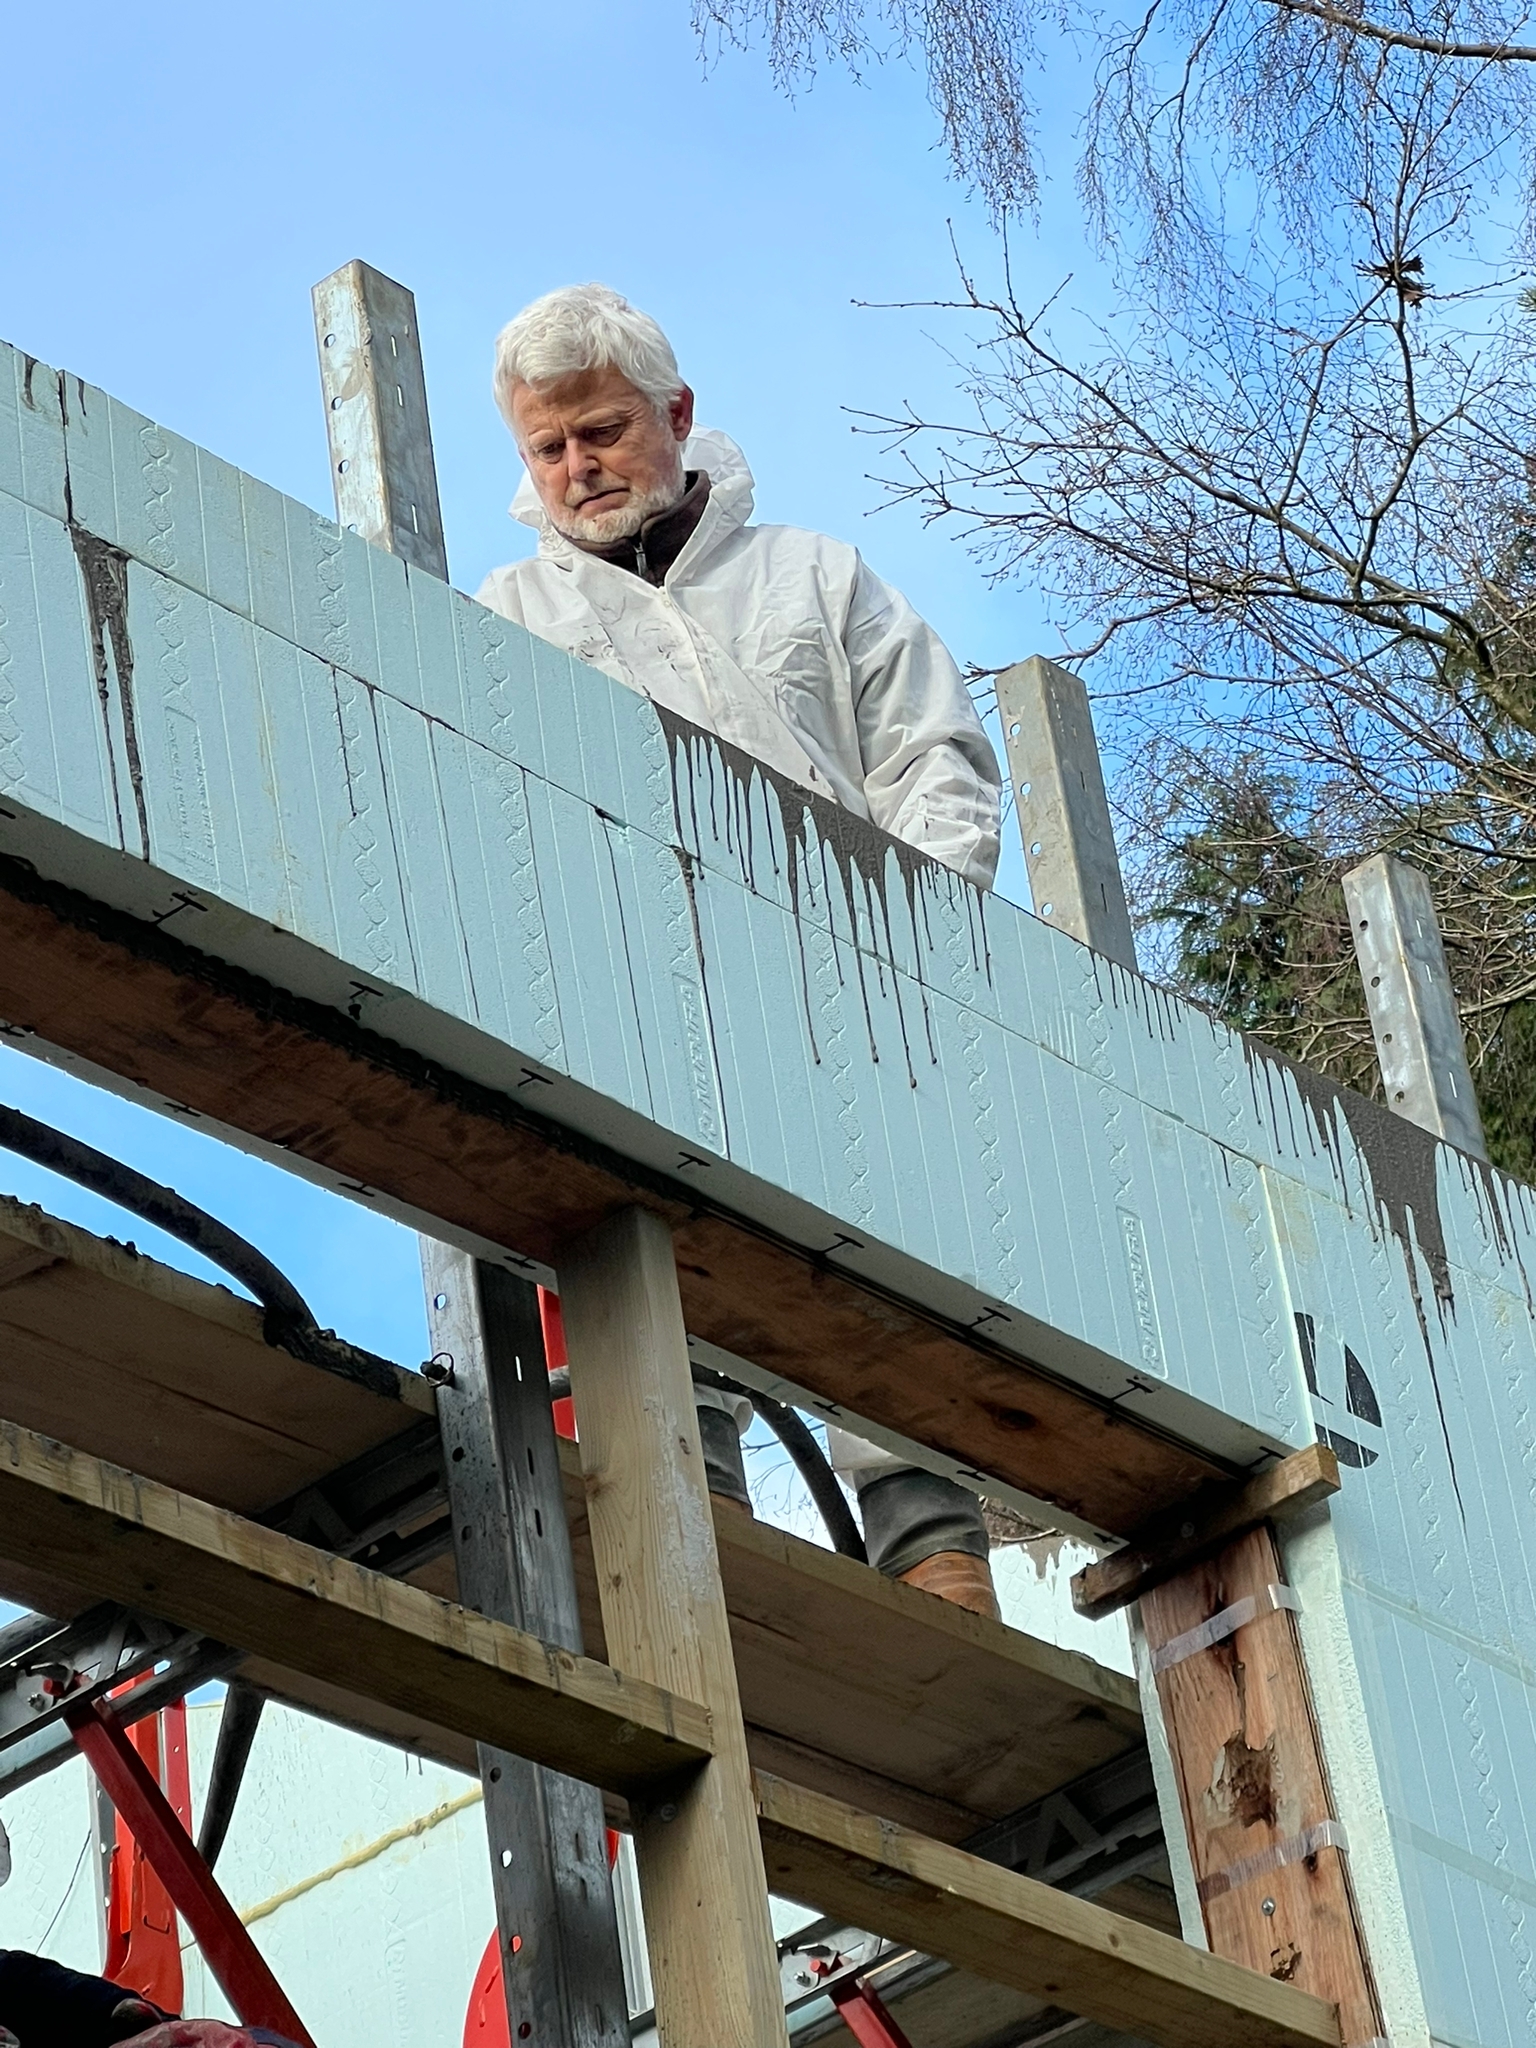
Insulated Concrete Formers
ICF (Insulated Concrete Former) is a brilliant construction method and it goes together like lego. Steel reinforcing where specified and then concrete poured into the cavity, or in my case all over the nice clean scaffold! If you’re starting from scratch and not trying to match an existing bricks and mortar building you can save a lot of time and materials by designing to suit the sizes of all the various elements of the system, and in terms of complexity, we did a 1 day course, read the manual and watched a few YouTube videos so its not rocket science!
The Irony!
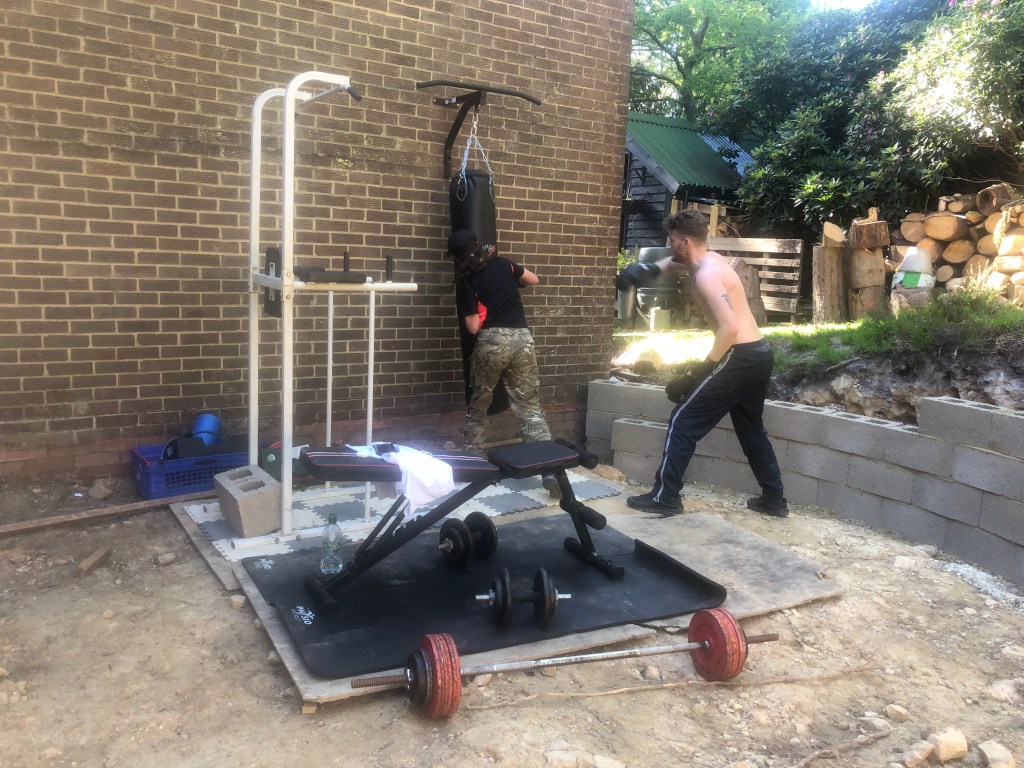
While Tracy and I are lugging 25kg concrete blocks around and constructing the Great Wall of Crowborough or Stalag Scharlings as we fondly christened it, Luke and Tilly were staring down the eye of the tiger, working out in their ‘jailhouse gym’ …. Oh the irony!
I’m going with the extension as my main excuse for the deplorable lack of progress on Flamingo as it’s about the same floor area as a 2 bedroom flat, and laying those concrete blocks was seriously hard work!
Of course there were lots of other goings on, mountains to climb, boats to sail, boards to paddle, apples to pick and press and work to do.
That’s about it for this catch up on a nearly 3 year hiatus…(!) I think I’ll save something for future posts to give the illusion that lots is happening from now on… though that sentence may have given the game away…
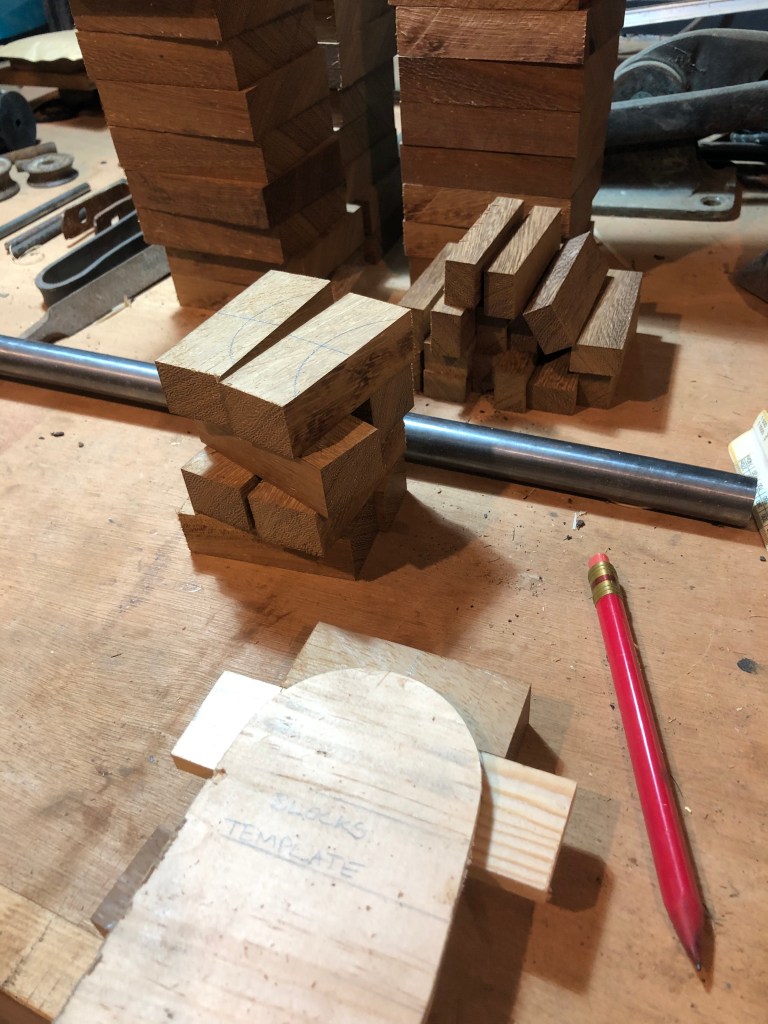
So it proves as hard as ever to spend time down at the boat and what little time I do spend there seems to be taken up with clearing the latest storm debris or propping up the lean-to that is a bit lean-too-much. Chester took great delight in discovering a couple of plump little field mice nesting in the anchor chain box as I moved various bits of boat from the leaky shed to the new, less leaky bowshed. Despite this lack of progress on the fabric of the boat I’m feeling more organised down there and have been working my way steadily through the process of making blocks. Traditional blocks for a yacht of Flamingo’s age are readily available from several sources. They are miniature works of art, and consequently are prohibitively expensive. Faced with a cost of about £1700 for 15 blocks I resolved to make my own. No one seemed to be able to supply the various components in the exact size I wanted so it really has been a ‘from scratch’ mission.
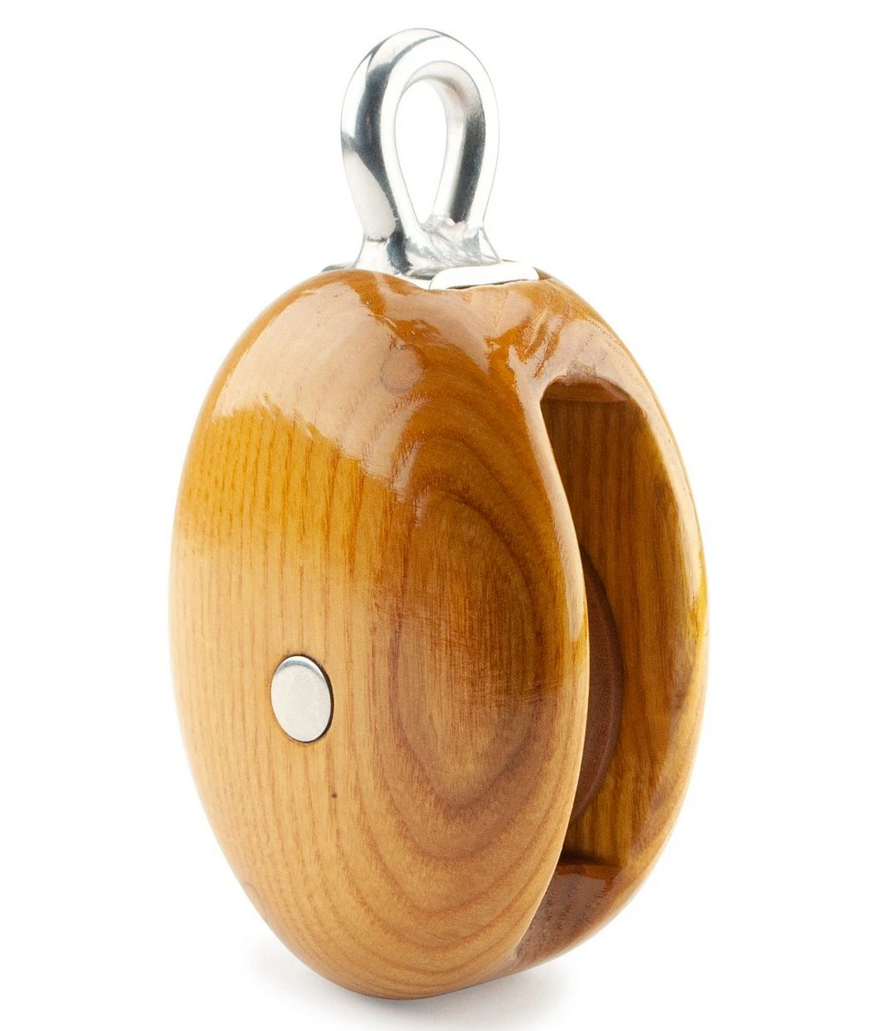
These Davey & Co blocks would set you back about £115 for the single and £140 for the double!
I decided to use Delrin (a very dense, acetal plastic) for the sheaves, stainless steel for the bindings and pins, and luckily father had some lengths of Iroko, poor mans teak, going spare for the cheeks.
Delrin blanks
Faces machined and pilot holes drilled.
Turning the groove on the lathe.
Making the Delrin sheaves.
For the sheaves, the method was saw the rod to lengths, face them off on the lathe and then, with a purpose made profile chisel cut the groove. A little sanding bobbin from an old Dremmel came in handy to sand out the tooling marks.
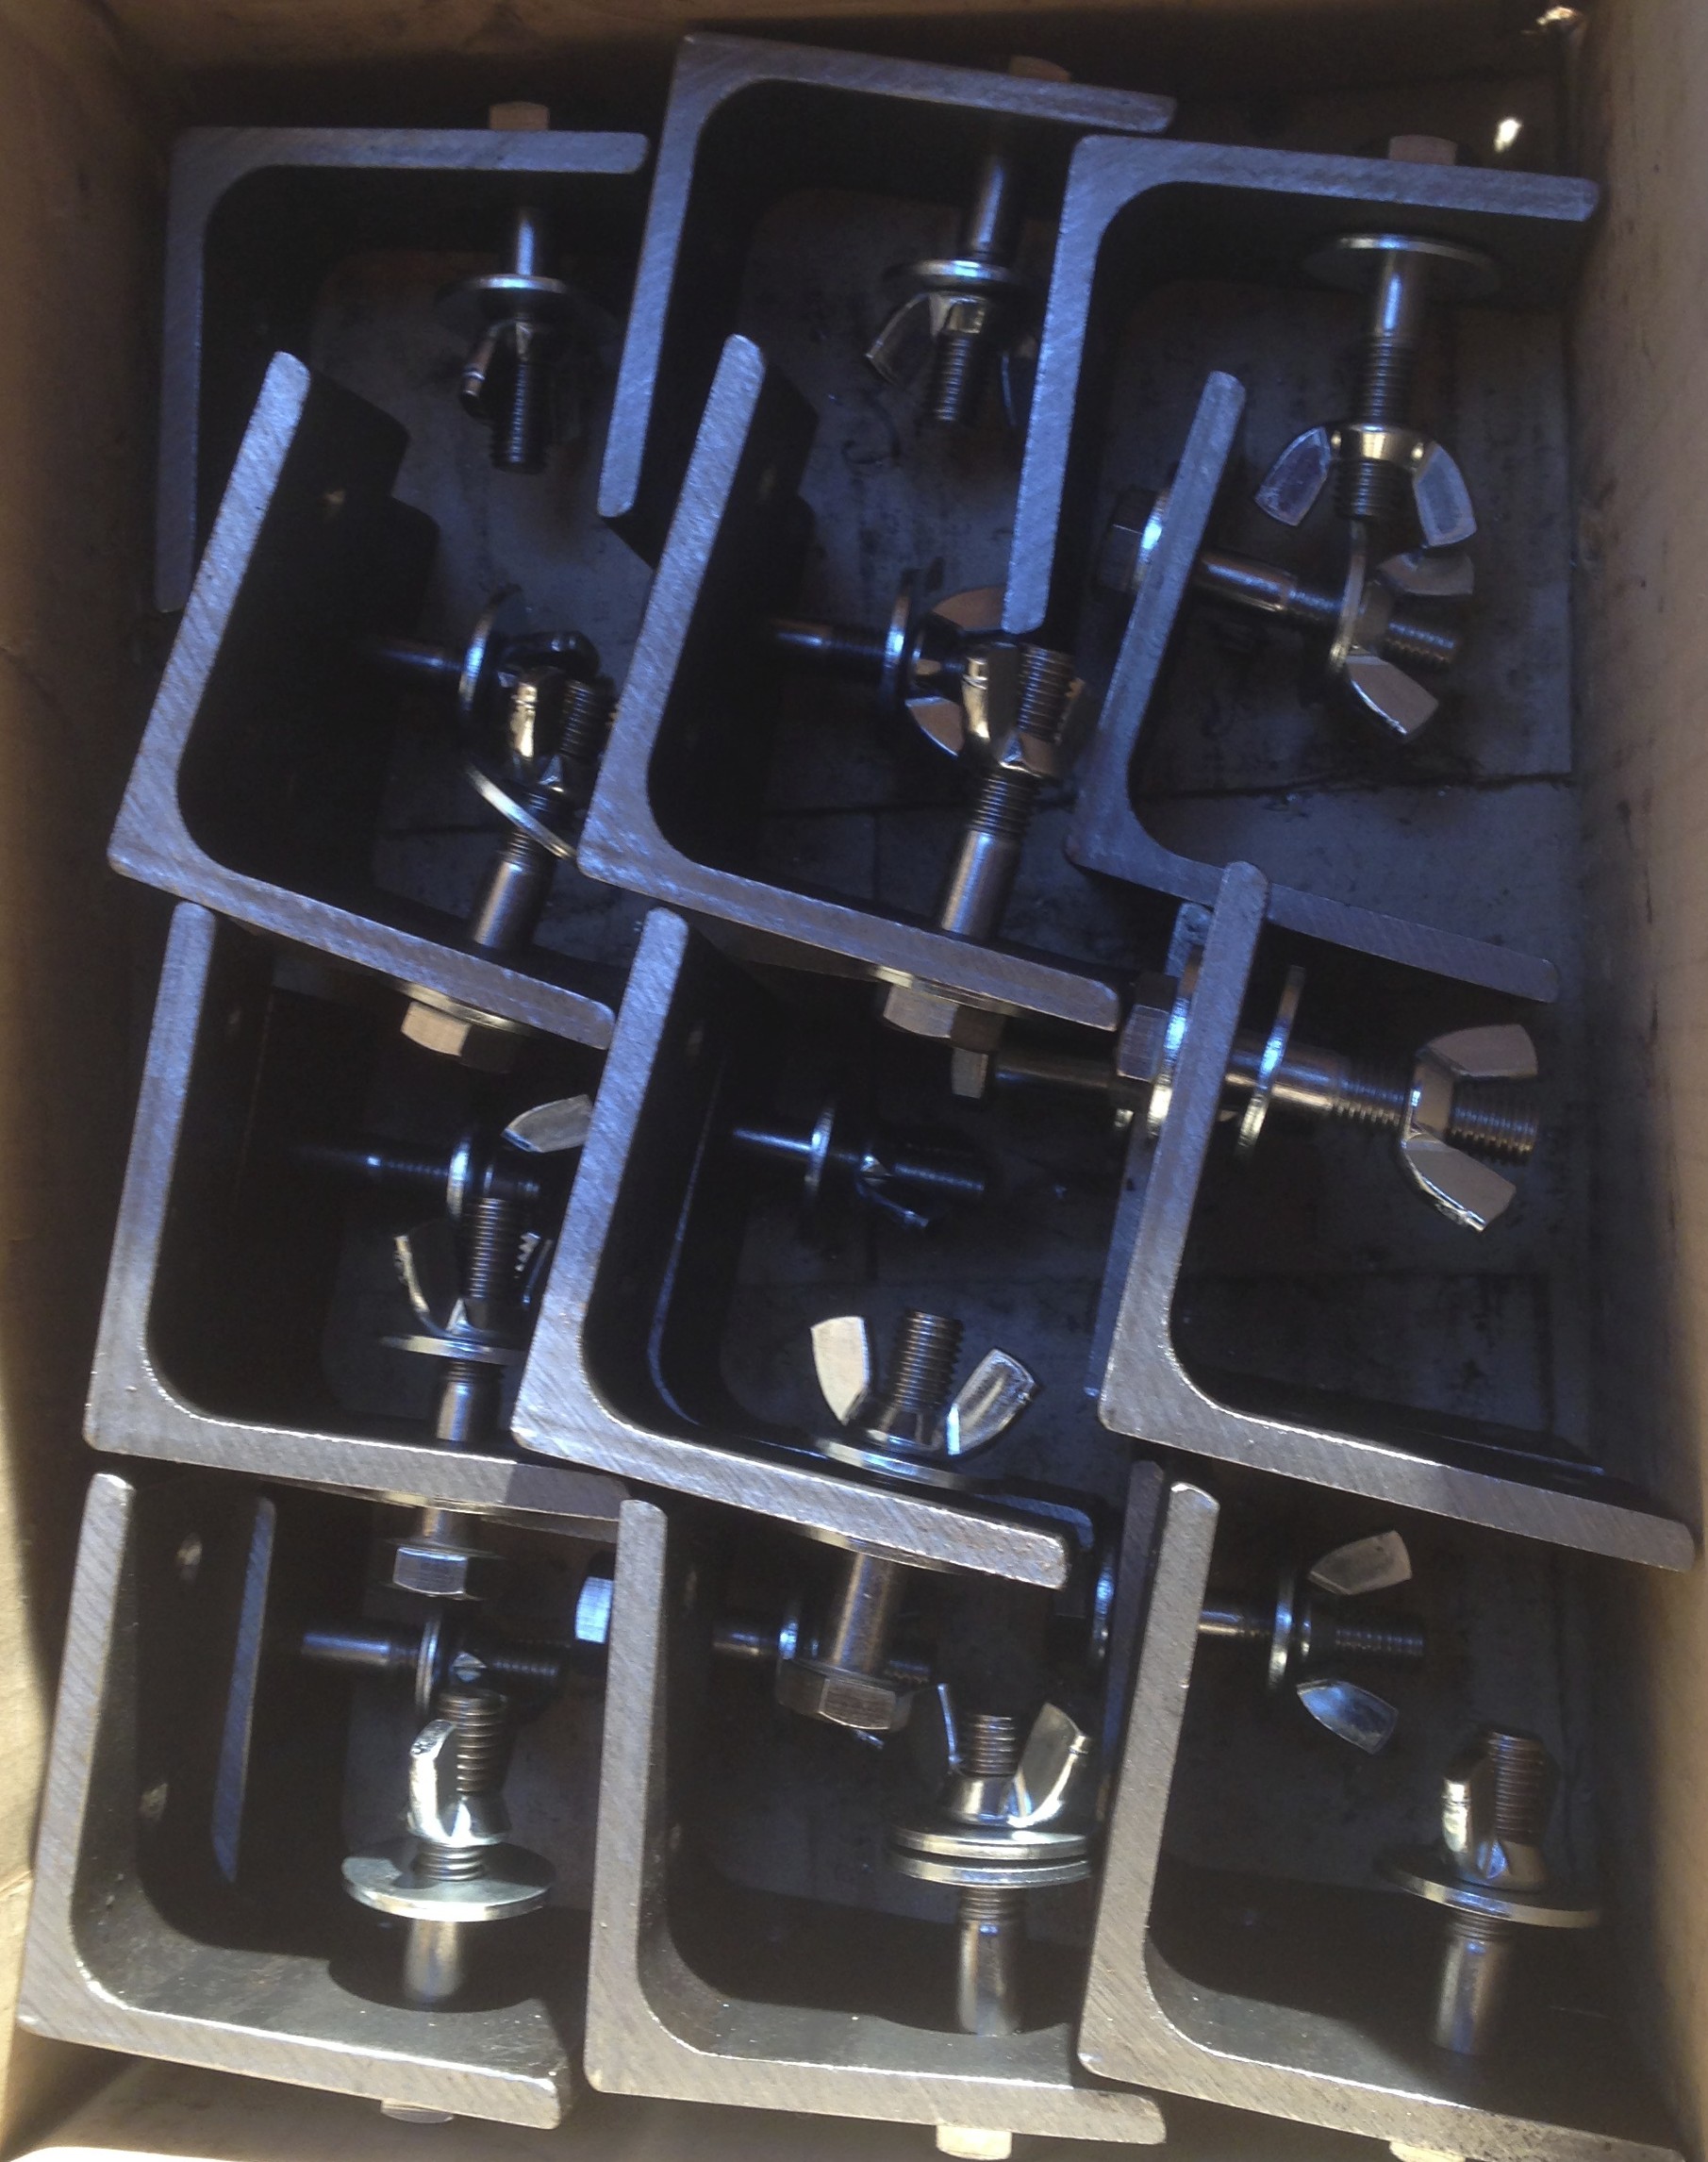
The bindings are 20mm x 3mm stainless steel flat, bent around a former in a jig made from scrap angle iron. As you can see it took a few test runs to get them to come out an even length. More test runs were needed to get the cold forging of the bends right. I tried hot forging it but ran into the classic problem of, too much YouTube watching (thanks Torbjorn, https://www.youtube.com/channel/UCSFaYYQzNMLo2U6rSNLpghg) not enough experience or skill. No matter how much I pounded and swore at the hot metal nothing would persuade it to form the shape I wanted and the roar of the gas forge lends a sense of urgency, almost panic to the whole process! Cold forging, though louder and harder work was infinitely more controllable, at least in my amateurish hands.
Iroko stock
marking out
cutting the insides
machined ready for assembly
tea break on the routing jig…
the ‘kit’ of parts
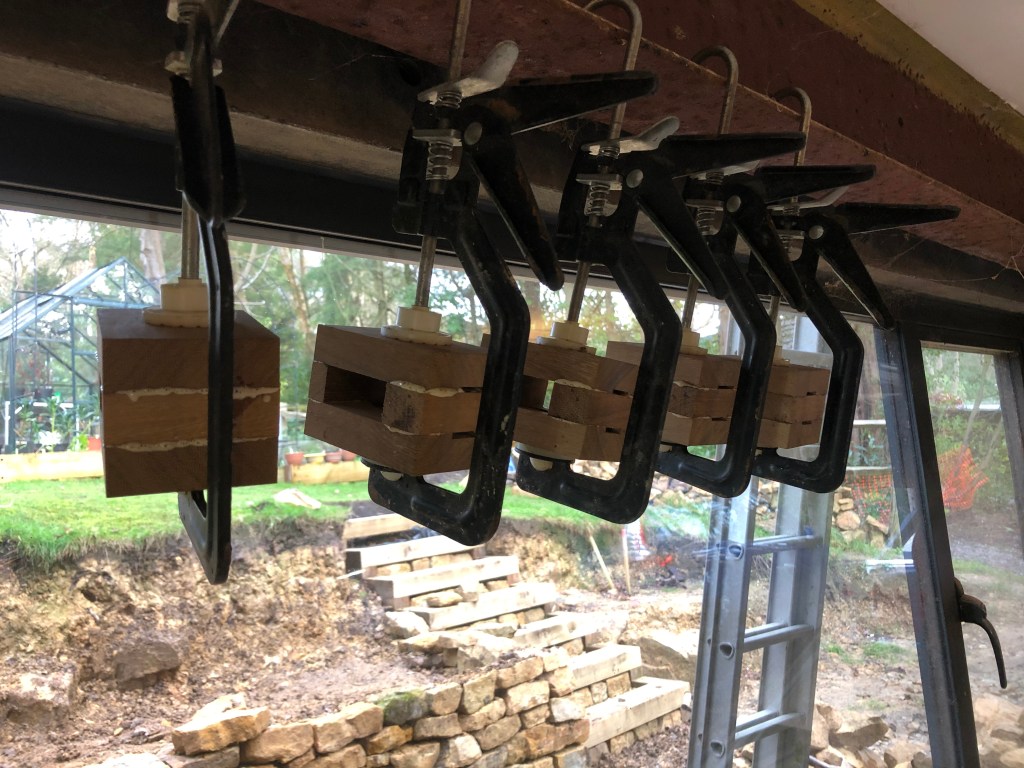
gluing up in batches
Machining the Iroko into blocks.
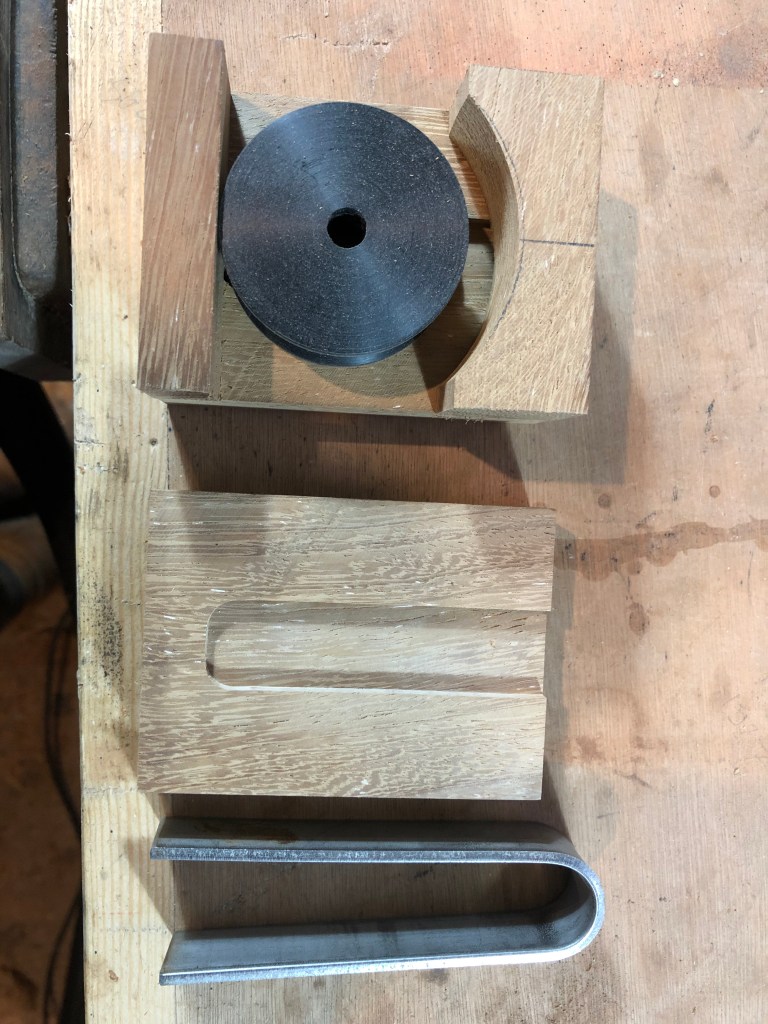
Eventually batch producing parts came to an end and it was time to assemble and finish the first one as a ‘hot’ prototype, ‘hot’ meaning if it worked out and I was pleased with the result, I’d use it, if not, I could excuse myself on the basis that it was ‘only a prototype’.
assembled and sanded to shape
setting in the penny
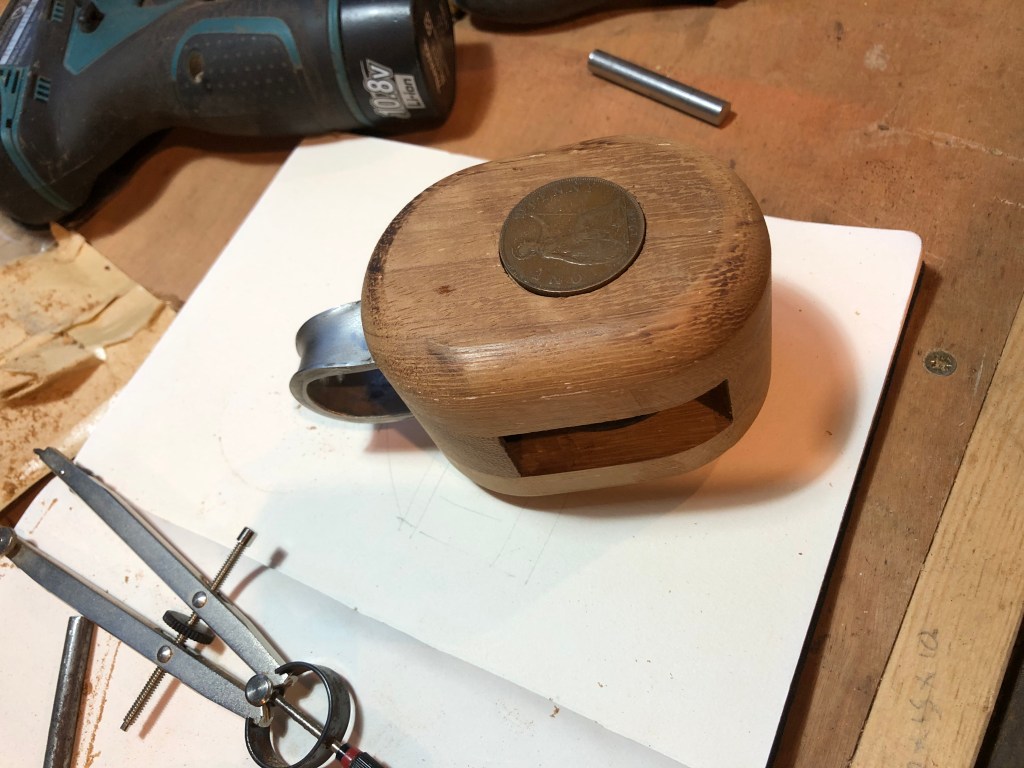
ready for oiling
the oiled block
The pin is peened over one end to stop it working it’s way through and then held in place with the penny that will be screwed on. The stainless steel bindings are cold forged at the bend enabling it to move on the shackle more easily and thicken the material where it will get most wear. The pennies are a batch of 1930 (year of her build) ones I bought online, the original blocks had the monarch’s head facing out but I rather like the idea of Britannia facing out, trident and shield in hand gazing out to sea.
Every now and then I am joined briefly in the workshop by one of my offspring with their usual inquiry; ‘wotcha doin’ dad? (shades of Leo Goolden here https://www.youtube.com/c/SampsonBoatCo/featured with his “hey Pete, what are you doing”) My answer is usually, making a jig, or making something to help make the jig. This invariably causes raised eyebrows and the comment; “What… you’re making a thing, to make another thing, that isn’t even the thing you’re actually making….?” exit stage left, shaking head at sad old man covered in sawdust.
I’m so misunderstood… sobs quietly into dusty rag…..
Of course, all the jig making and batch production experience means I can now reproduce lots more blocks to the same design, though given the time it all takes I doubt I’ll be setting up the Flamingo Block Emporium any time soon!
Getting organised in the new Bowshed.
After reinforcing the downhill side of the Bowshed where the legs are longer, therefore a bit more flexible and storm Bella had taken her toll, I installed some shelving and a workbench. Moved the rudder and companion way steps from the damp leaky lean to and swapped the slightly too short aluminium ladder for a slightly too long wooden one. The new one is ex GPO (giving a clue to its age) and weighs so much I can barely lift it. As such it is a completely impractical tool, so far better to conscript it to a life of stationary service at the stern.
That’s it, looking forward to sunny lockdown free days filled with the sounds of progress……. 🙂
It scarcely seems possible that it’s been nearly two years since Flamingo last felt the tread of my work boots on her swept teak deck. A quick glance at previous posts sadly reveals this to be true and I’m slightly ashamed of her abandonment. She has waited patiently in the orchard, her tarp frayed at the edges, hull and deck gently greening as the weeks, months and years go by. Of course there are myriad excuses that I won’t bore you with but the chief drain on my time these days is our new home, a 1960’s gem of a house on the edge of the Ashdown Forest. It needs a lot of work, inside and out, hence the time drain.
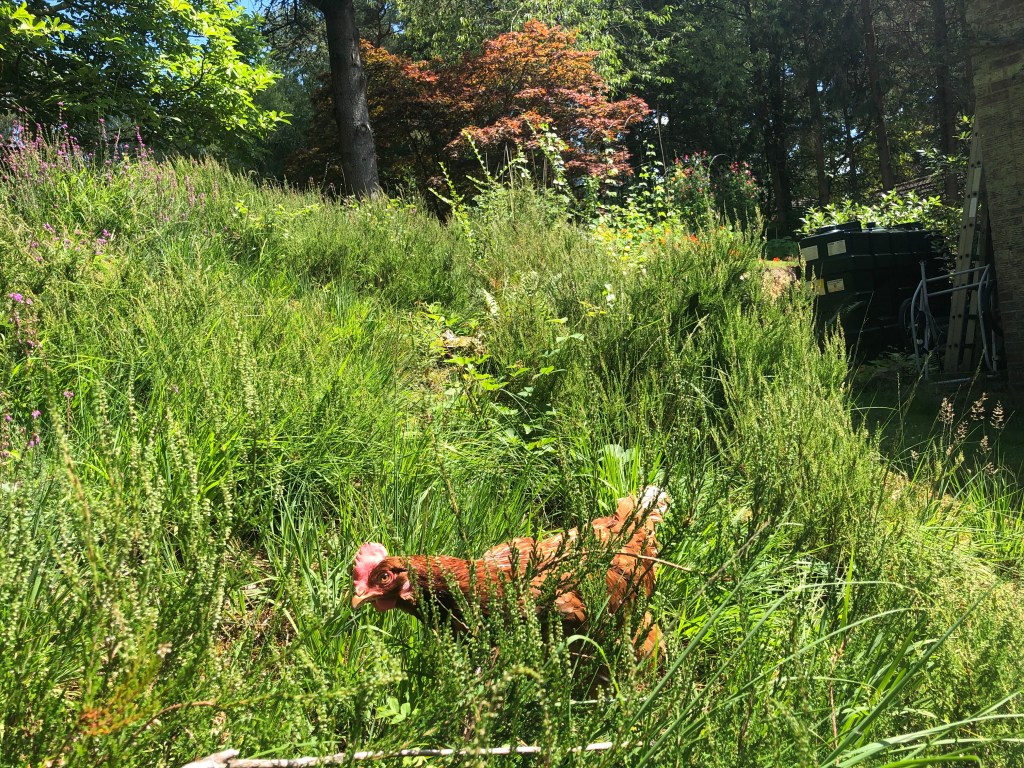
Sun on the TerraceOur ‘new’ home.hide and seek chickenpotting shed nearly finishedslash and burn gardeningOur new home in the sunlit uplands of East Sussex
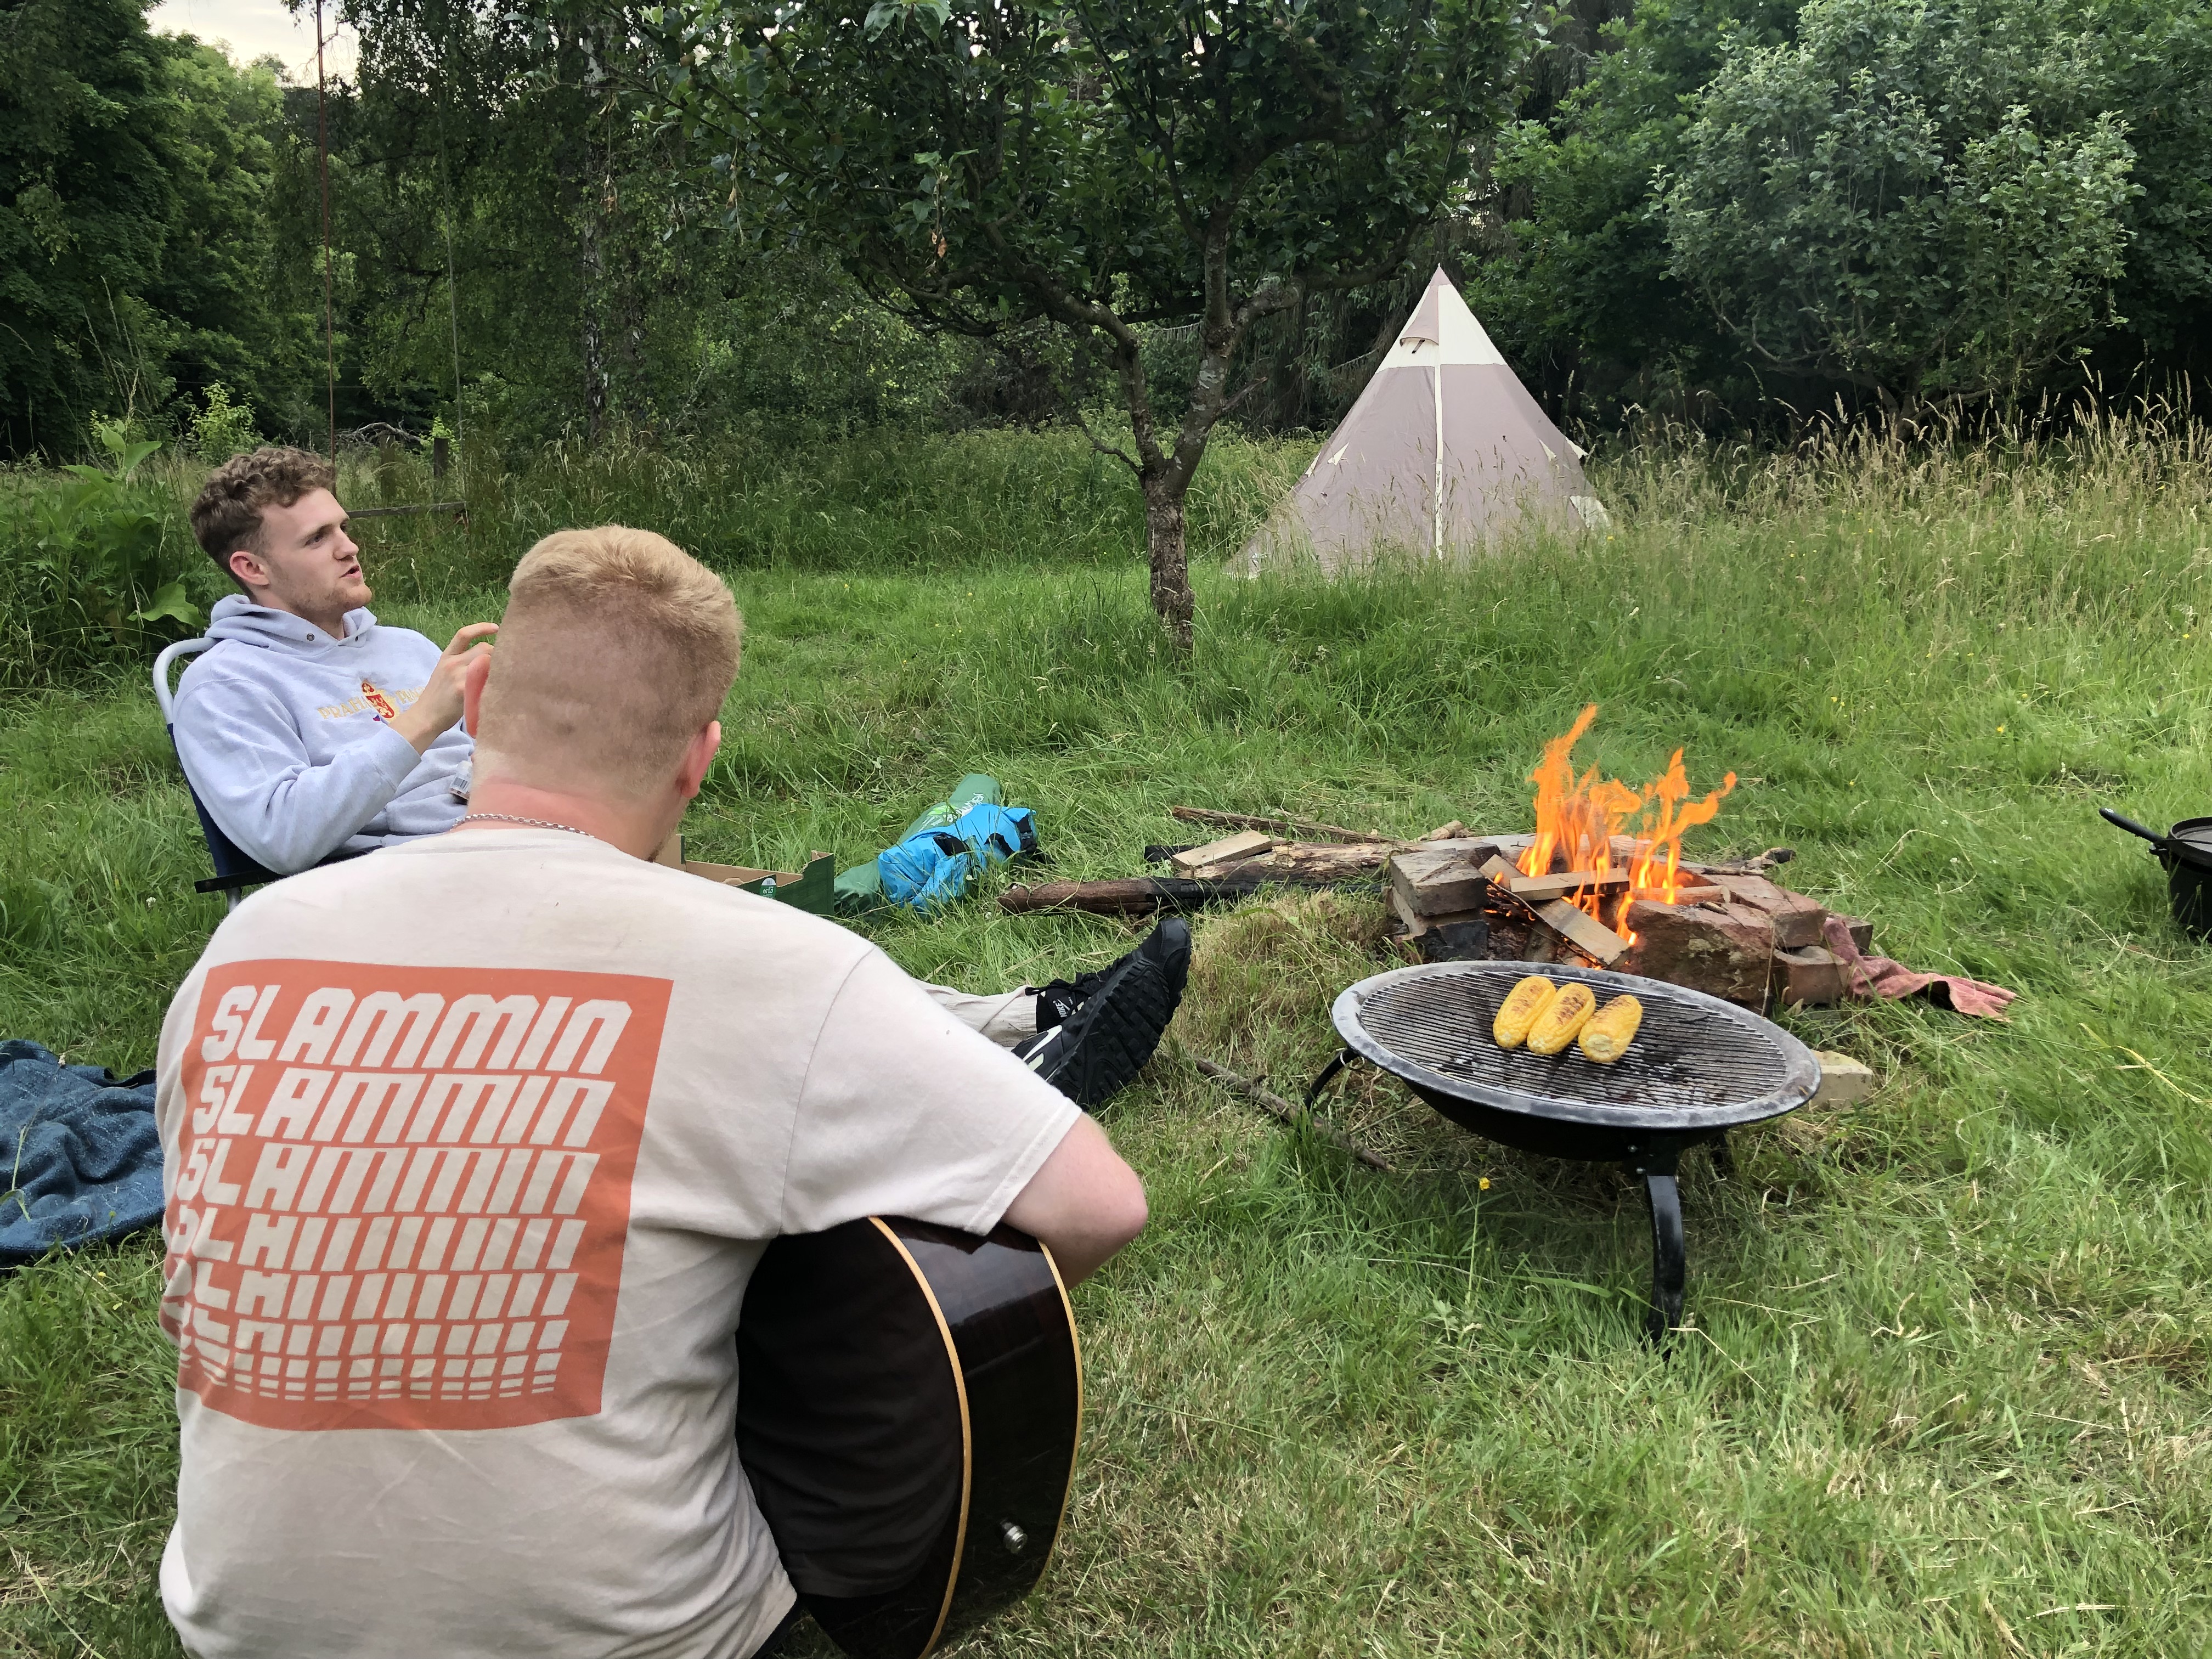
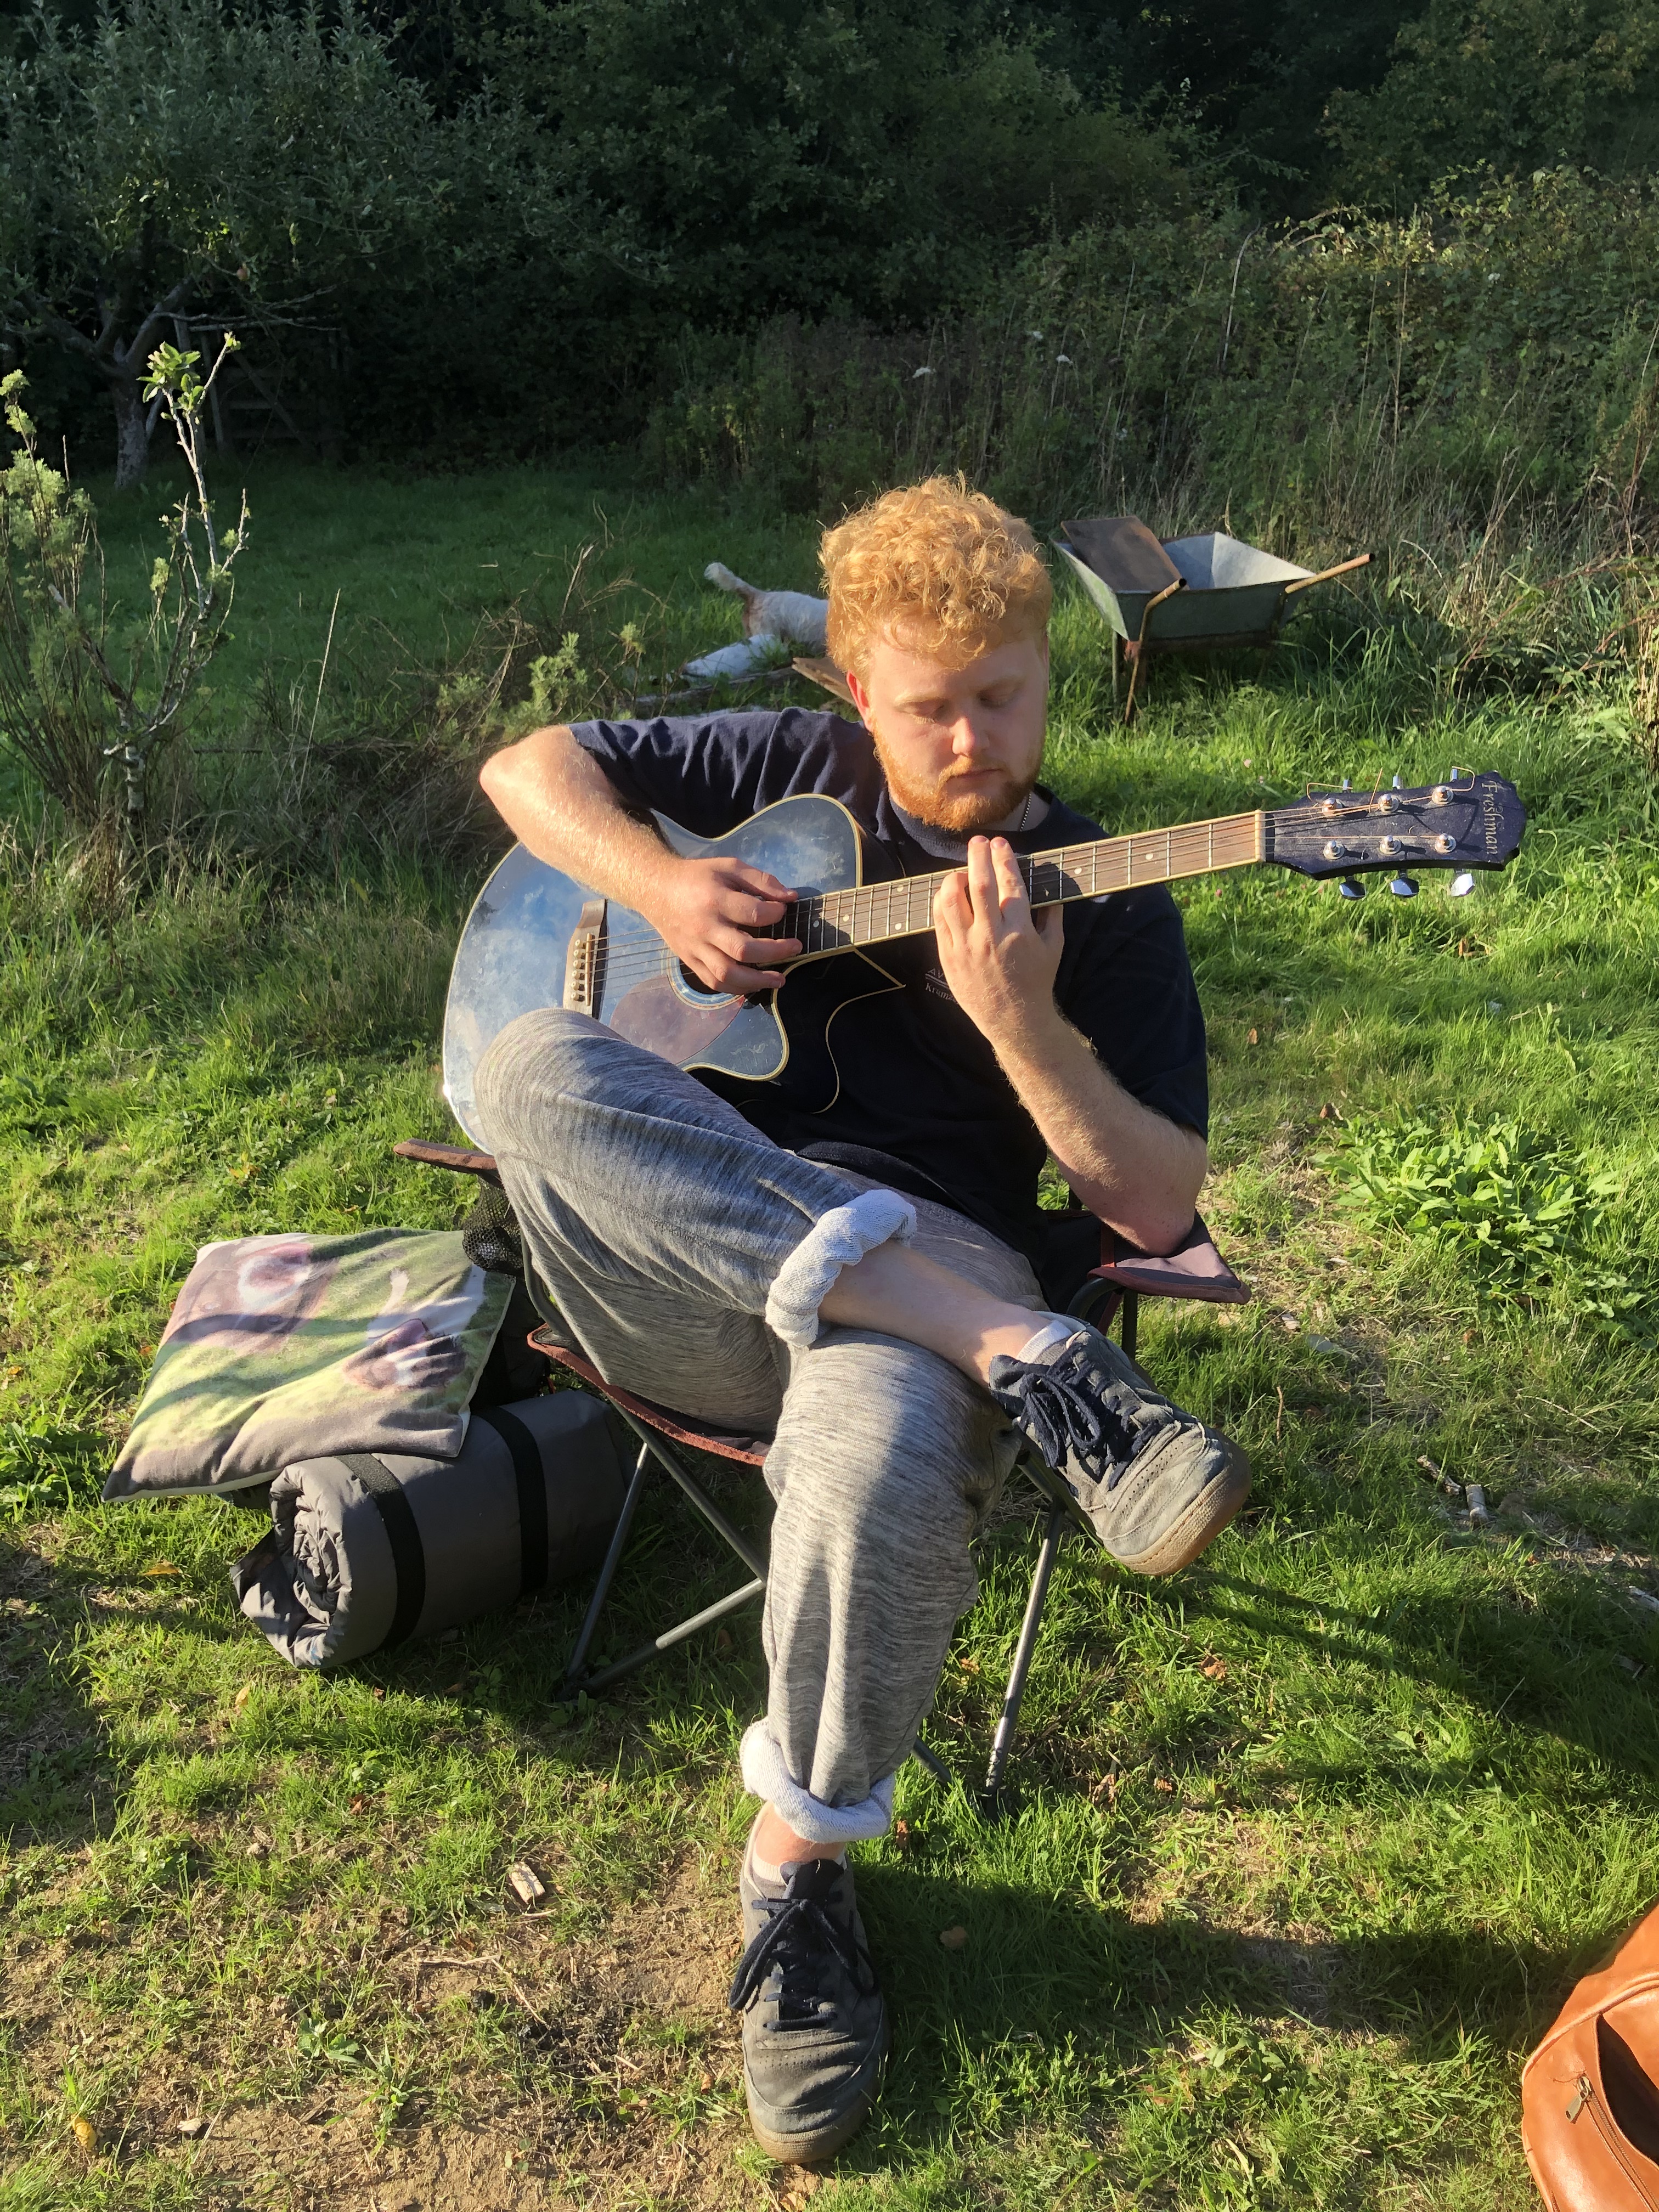
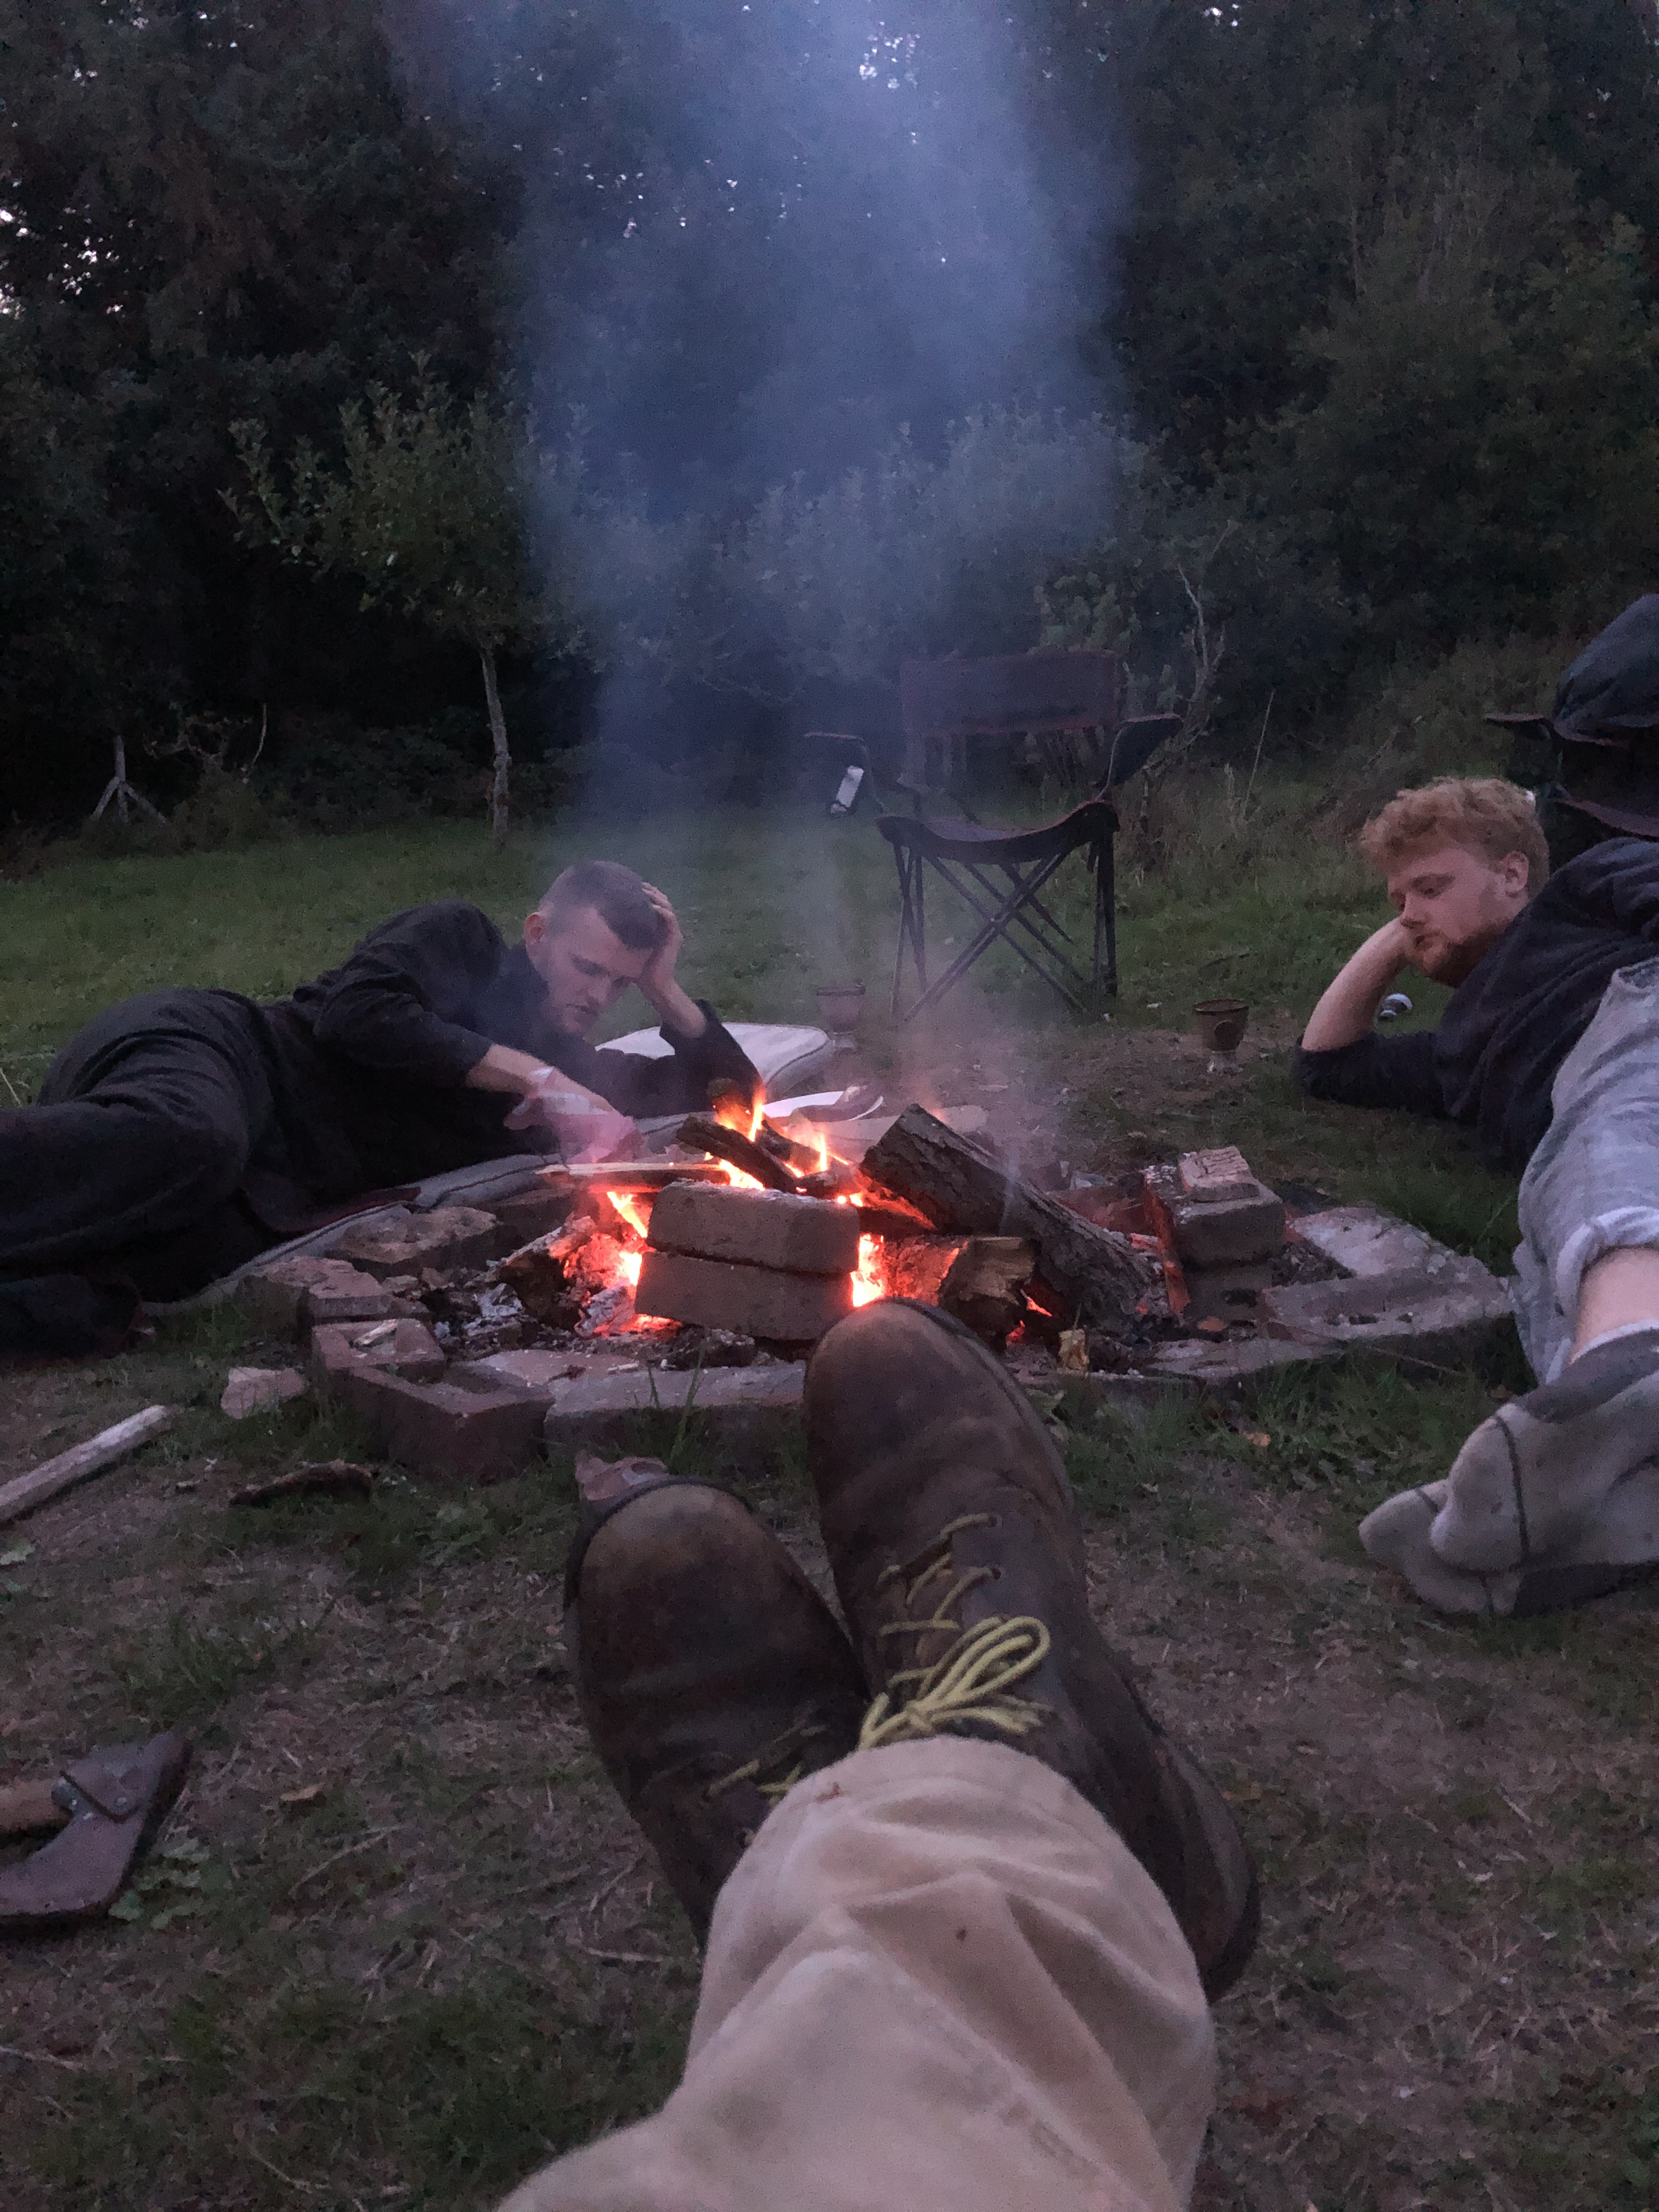
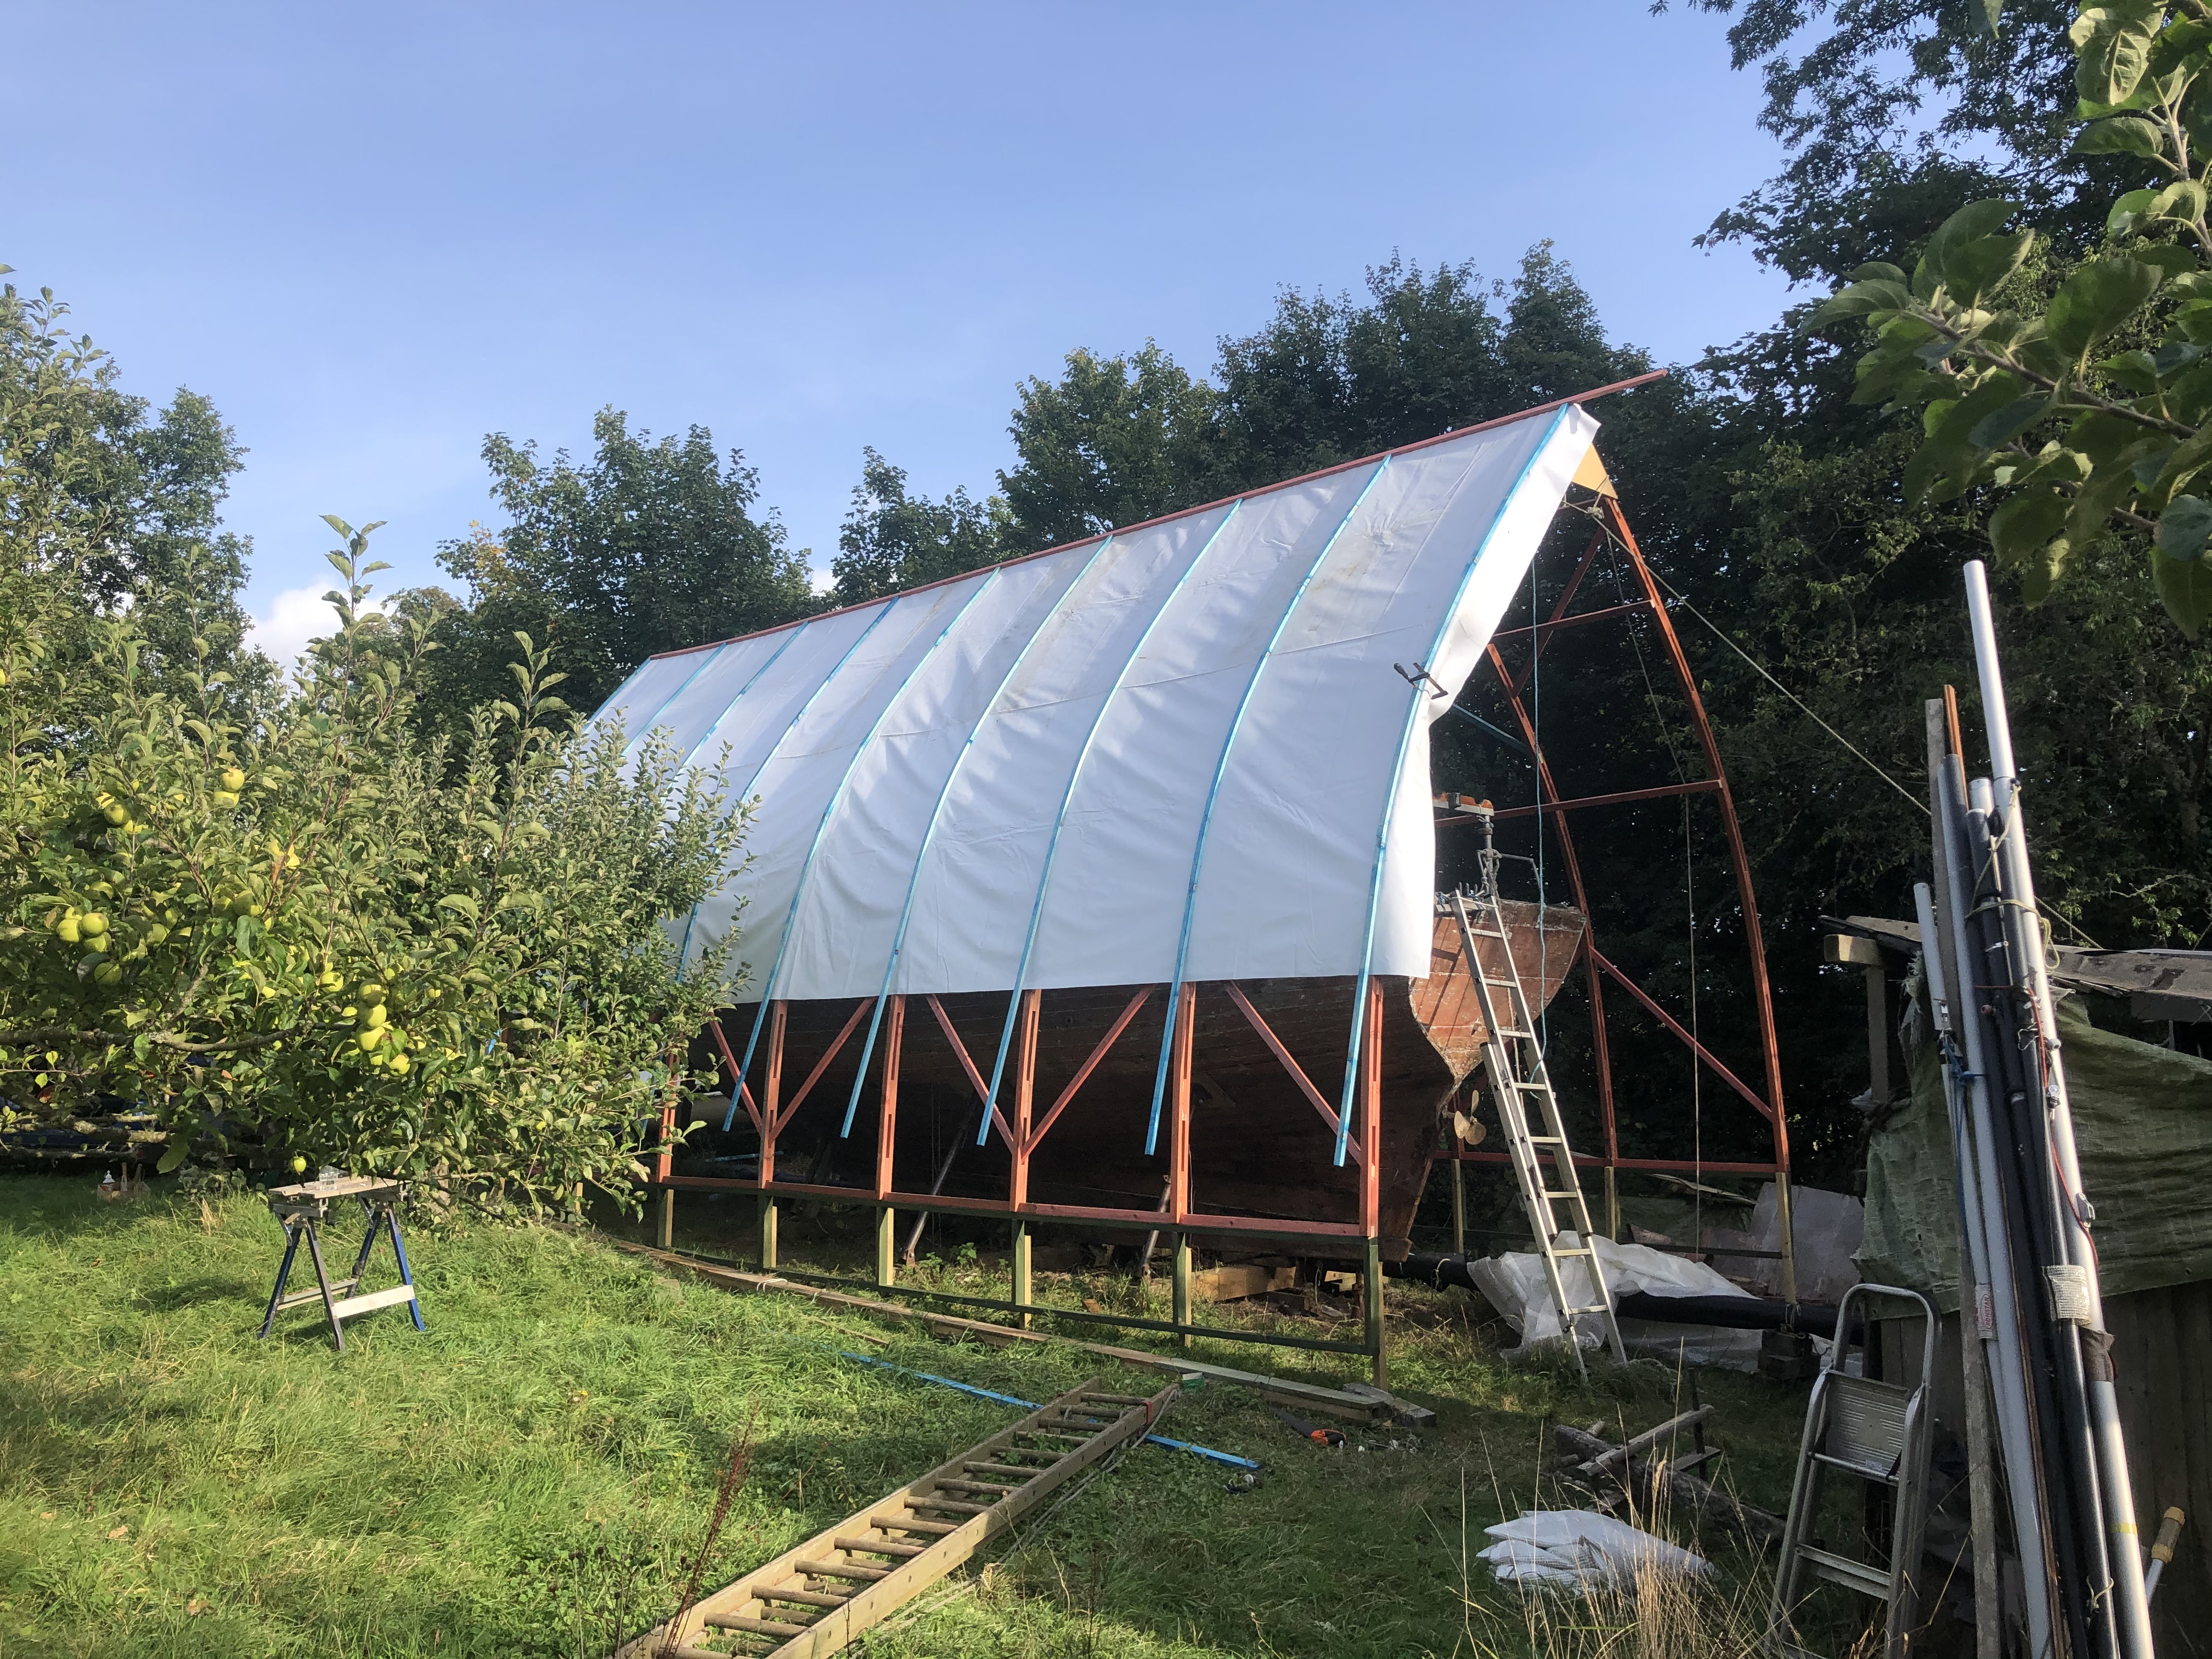
But now the old tarp is off and the new Bowshed shelter is well under way with help from Toby and Luke. We camped out for a weekend and, alongside lots of campfire chatting, cooking and star gazing we got quite a lot done.
Triangulation in progress
The following weekend saw another camp out, this time with an old college buddy too, slightly more fuel was needed in the form of pale ale, and the mornings hangover meant Sunday sloe picking (and boy was it slow picking) was about as strenuous an activity as we could deal with. Despite this slight handicap the three of us managed to get half the tarp cover on and battened down. I say tarp, in reality it’s a large graphic banner that was about to be thrown away from work. I have taken pity on my neighbours and put the vivid blue and green Ashes Cricket graphics on the inside. Recycling an old set made me wonder if it’s possible to link work and boat restoration….
Client: “So, tell me again why we’re using teak gratings as a background for the new Sports News Studio?”
Me: “Well………”
Client: “and lovely though they are, I’m wondering if the shiny bronze cleats and natural hemp rope are quite the thing for holding up our new Touch screen?”
Perhaps not… if only we still had the rights to The America’s Cup…. that would be a far easier sell!
Our lovely house came with a car port that has now been transformed into my first ever actual workshop! This necessitated the building of a workbench which was very satisfying, and prompted Rupert (aforementioned college buddy) to pass on a little lathe that he got for free but never used. With a shiny new Record chuck I tried my hand a wood turning for the first time in many years. Quite pleased with the result! A small Yew bowl and a knock down caulking mallet.
The drawback of boat building in an orchard is any piece of scrap wood left on the ground for more than a week seems to become a home for wildlife.
hopefully the owner of this sweet little nest (Field mouse?) will be able to cunningly fashion another one after I cleared away the scrap bit of wood that was the roof.
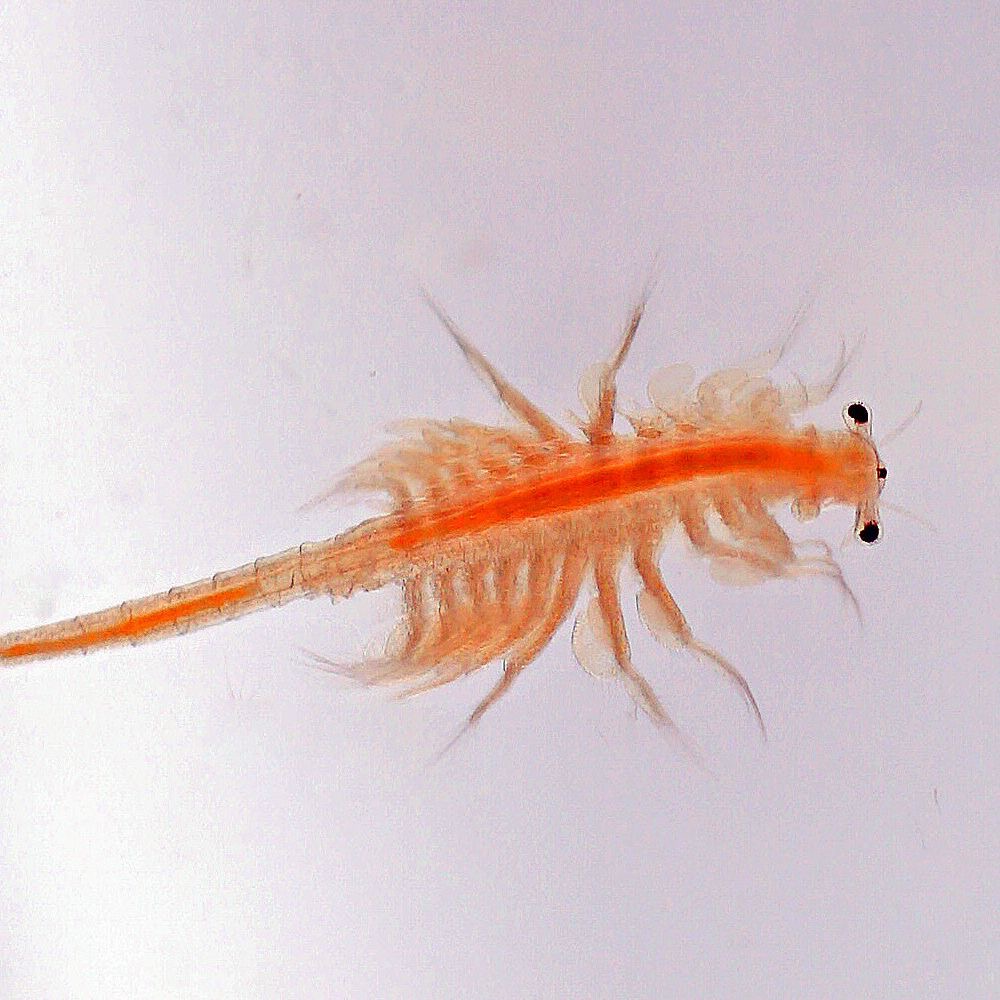
Stoic on her stands, starved of affection, attention and not to mention, a diet high in alpha and beta carotenoid pigments, including canthaxanthin, (huh?) Flamingo has sadly suffered from the neglect of the last couple of years. I was shocked last weekend, to see a new patch of rot on her rubbing strake, nothing that can’t be remedied but it did make me realise how important this new shelter is. So, before the winter sets in and in between apple pressing, meadow mowing, and landscape gardening (oh and holding down a job) I need to carve out some more time to get on with some actual boat renovation and make this the Year of the Flamingo!
I found this post squirreled away in my drafts from last year (!) and so before smashing out another brilliant episode 🙂 I thought I’d publish it….
Feathered friends
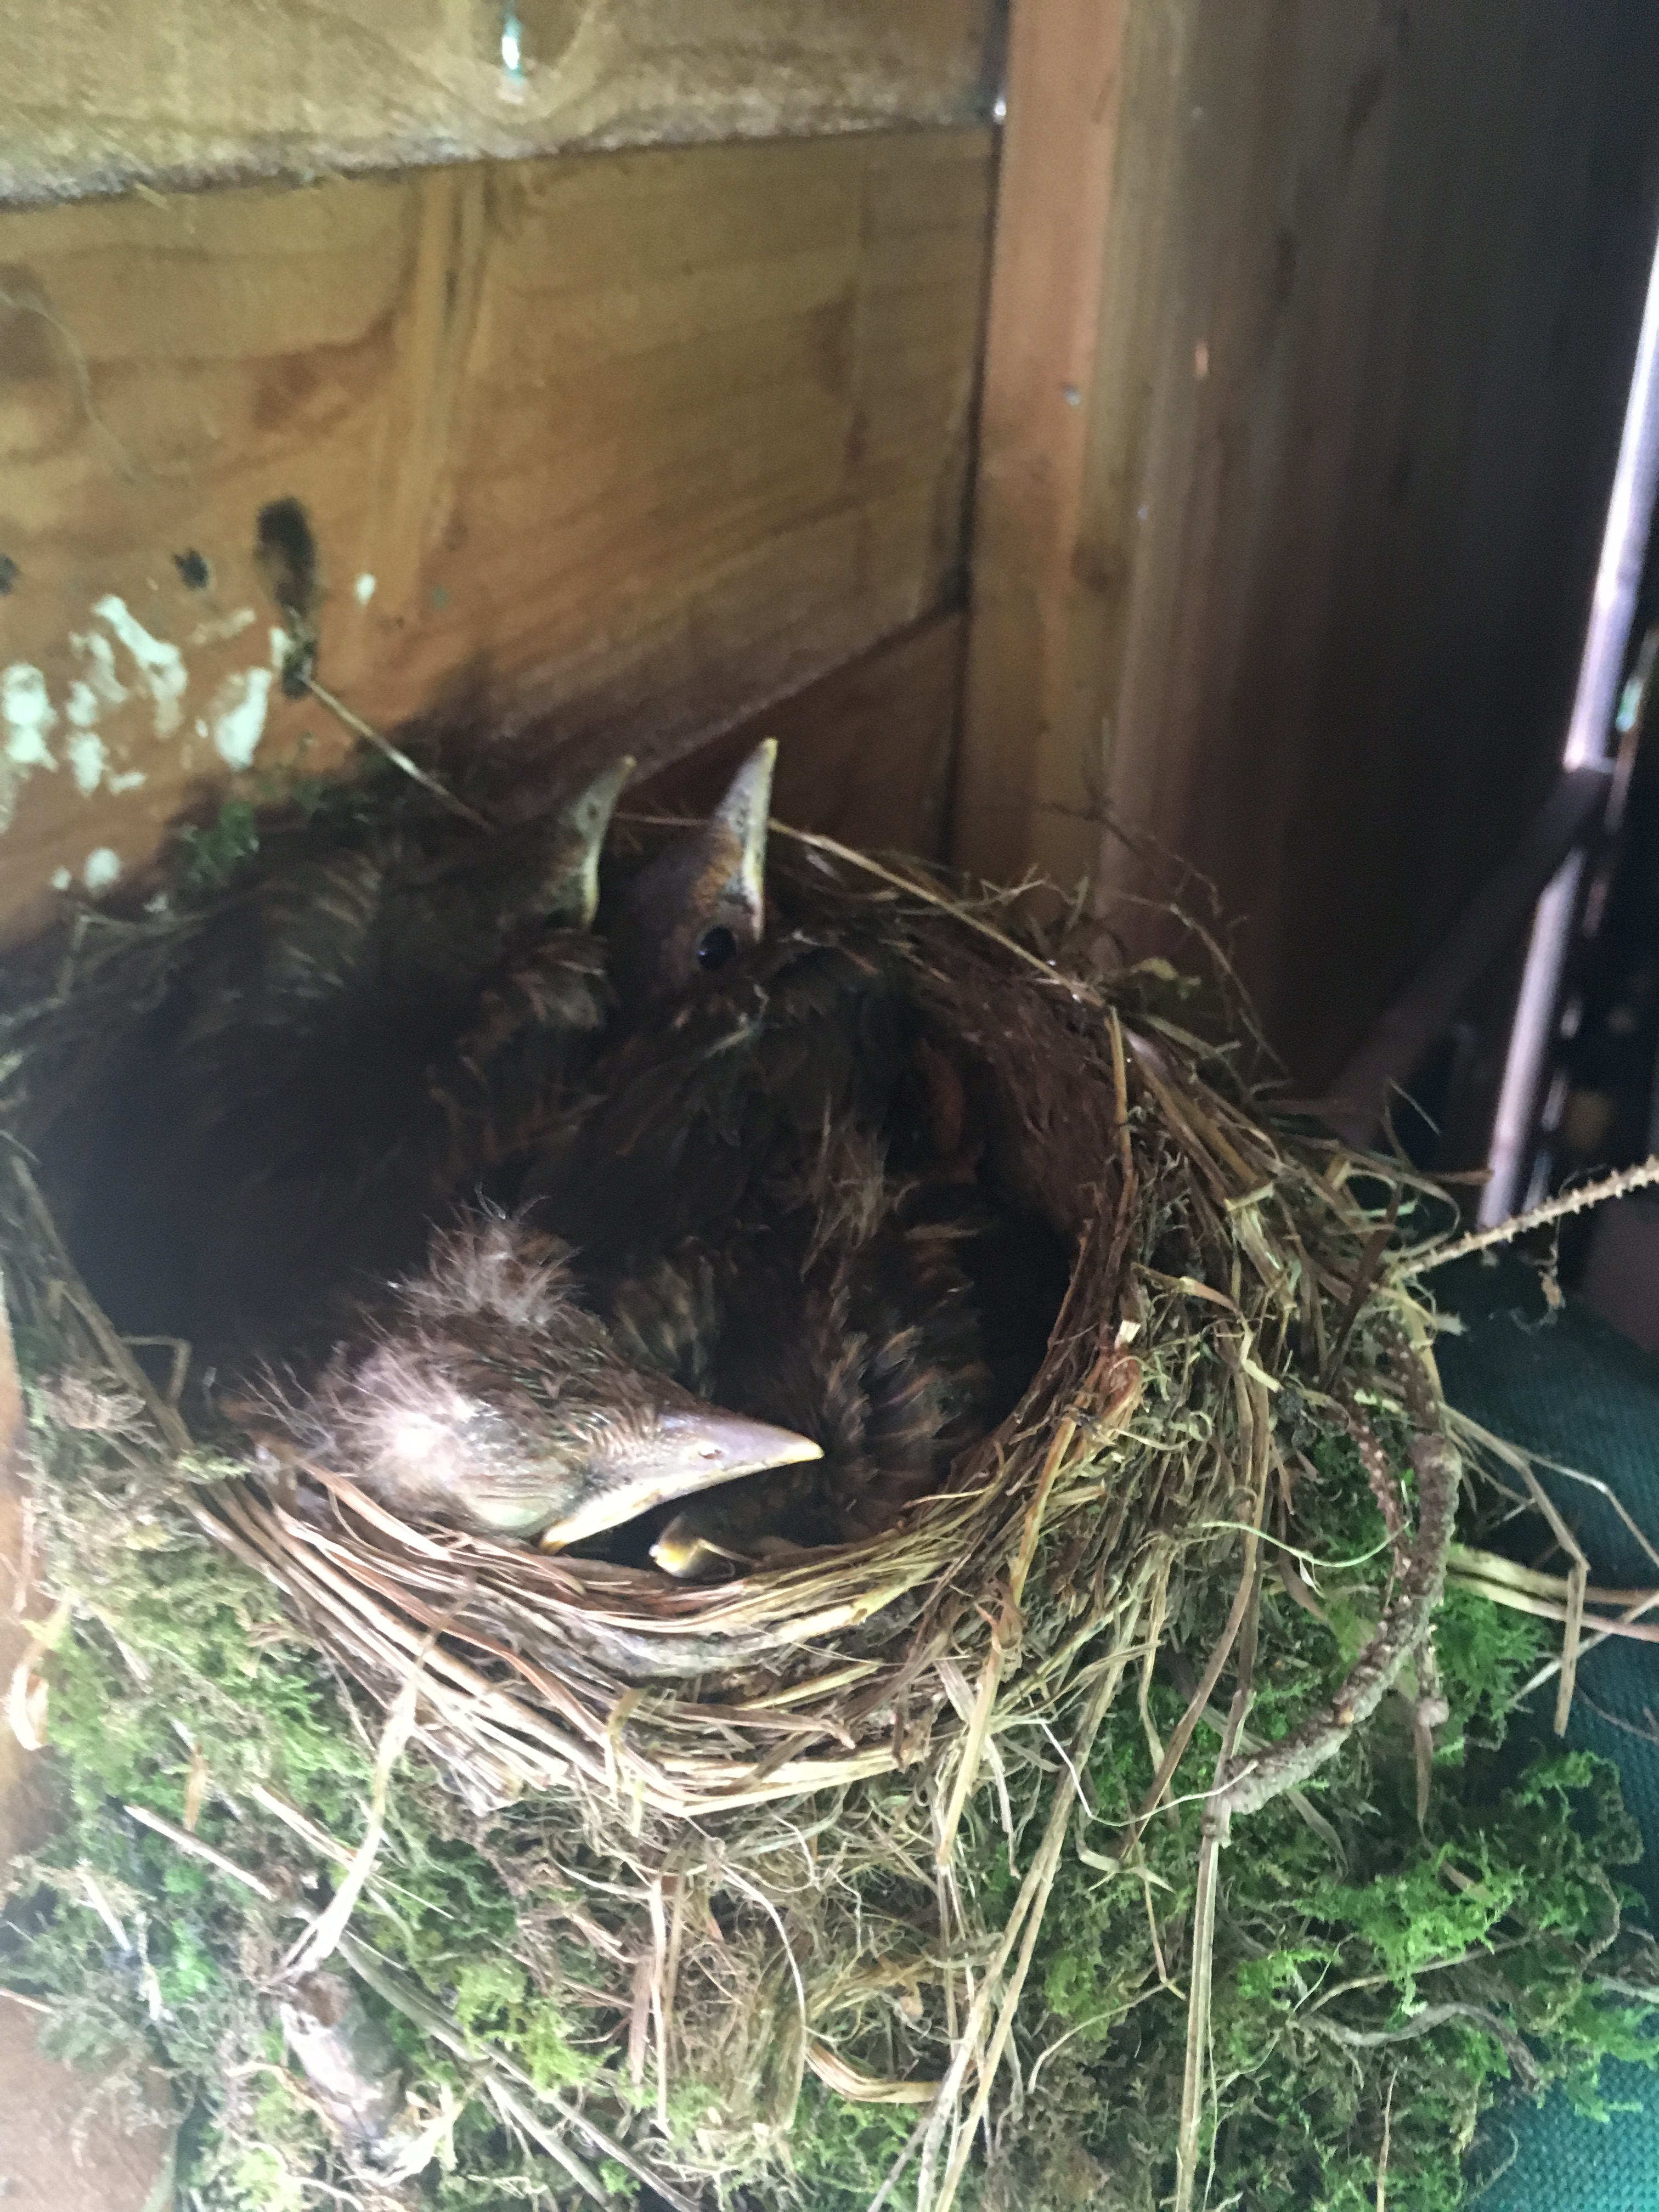
Finally this little brood have flown the nest and the shed is available for use again, not that I really minded my scruffy little squatters, in fact I’m flattered they felt it was safe enough to raise a family here despite the mowing and banging. Of course this means I have no excuse for avoiding tidying up in there…. Come on Mrs B, surely you can squeeze out another clutch before the summer ends!
Mr and Mrs Blackbird hatch family number two
On the level
The fecundity of blackbirds aside, I decided, what with the frames going in, that I should check the boat for level. She is only resting on baulks of timber set on paving slabs which in turn rest on the bare earth, and I thought there may have been some settling over the years. A water level seemed the easiest and most cost effective method so we made one and set about measuring. Now, science and I have never been happy bedfellows, my old Chemistry teacher never referred to me by name just ‘the laziest boy in the school’ and Physics remained a dark mysterious world to me for my entire school life. That said, I thought a water level was going to be fairly simple and the hard bit would be the actual levelling. How wrong I was! The idea of a water level is that water…. finds its own level…. hence the name… anyway, the water should always be level meaning that with one end of the hose at the stem and one at the stern I could check the scribed waterline was running true. “Nope” called Tilly from the bow, “it’s way too low.” I poured a bit more in my end, “Nope, still too low.” “Has it moved at all” I asked. “It’s lower” she called back. Was there a hint of merriment in her voice? Surely she couldn’t be mocking her dear old dad, who she loves and respects…? Much toing and froing ensued with water adding and pouring away and more and more mocking. Eventually we brought the two ends together and, it turns out sometimes finding its own level is a bit too much like hard work for water so it just hangs about wherever…
As soon as I wrote, toing and froing I thought that can’t be right, so I googled and found this on the Macmillan dictionary website.
The spelling of toing and froing causes problems for native- and non-native speakers alike, because it feels odd to put –ing after ‘o’, unless the sound you’re trying to create is ‘oi’ (as in the onomatopoeia ‘boing‘). Often people spell it ‘to-ing and fro-ing‘ to make the distinction clear, yet we have no trouble understanding I’m going now, and feel no desire to hyphenate it. So where to and fro are being used as verbs, like go, there’s no need for hyphens, and as odd as it may look toing and froing is perfectly acceptable.
Lackadaisical water and annoyingly pleased child
This rambling explanation is not a feeble attempt to justify why I went and bought a laser level…. honestly!
Tools for life?
My wife often mocks (hang on I’m sensing a theme here) my belief that things really should last longer than they do. There’s a lot of interest in the idea of a circular economy, where goods are designed not with built in obsolescence but with repair, reuse, recycle in mind however, most industries have a long way to go. When it comes to tools though, I thought that if you choose a good brand and buy the best you can afford you should be ok and with hand tools that have no moving parts, well really, what can go wrong?
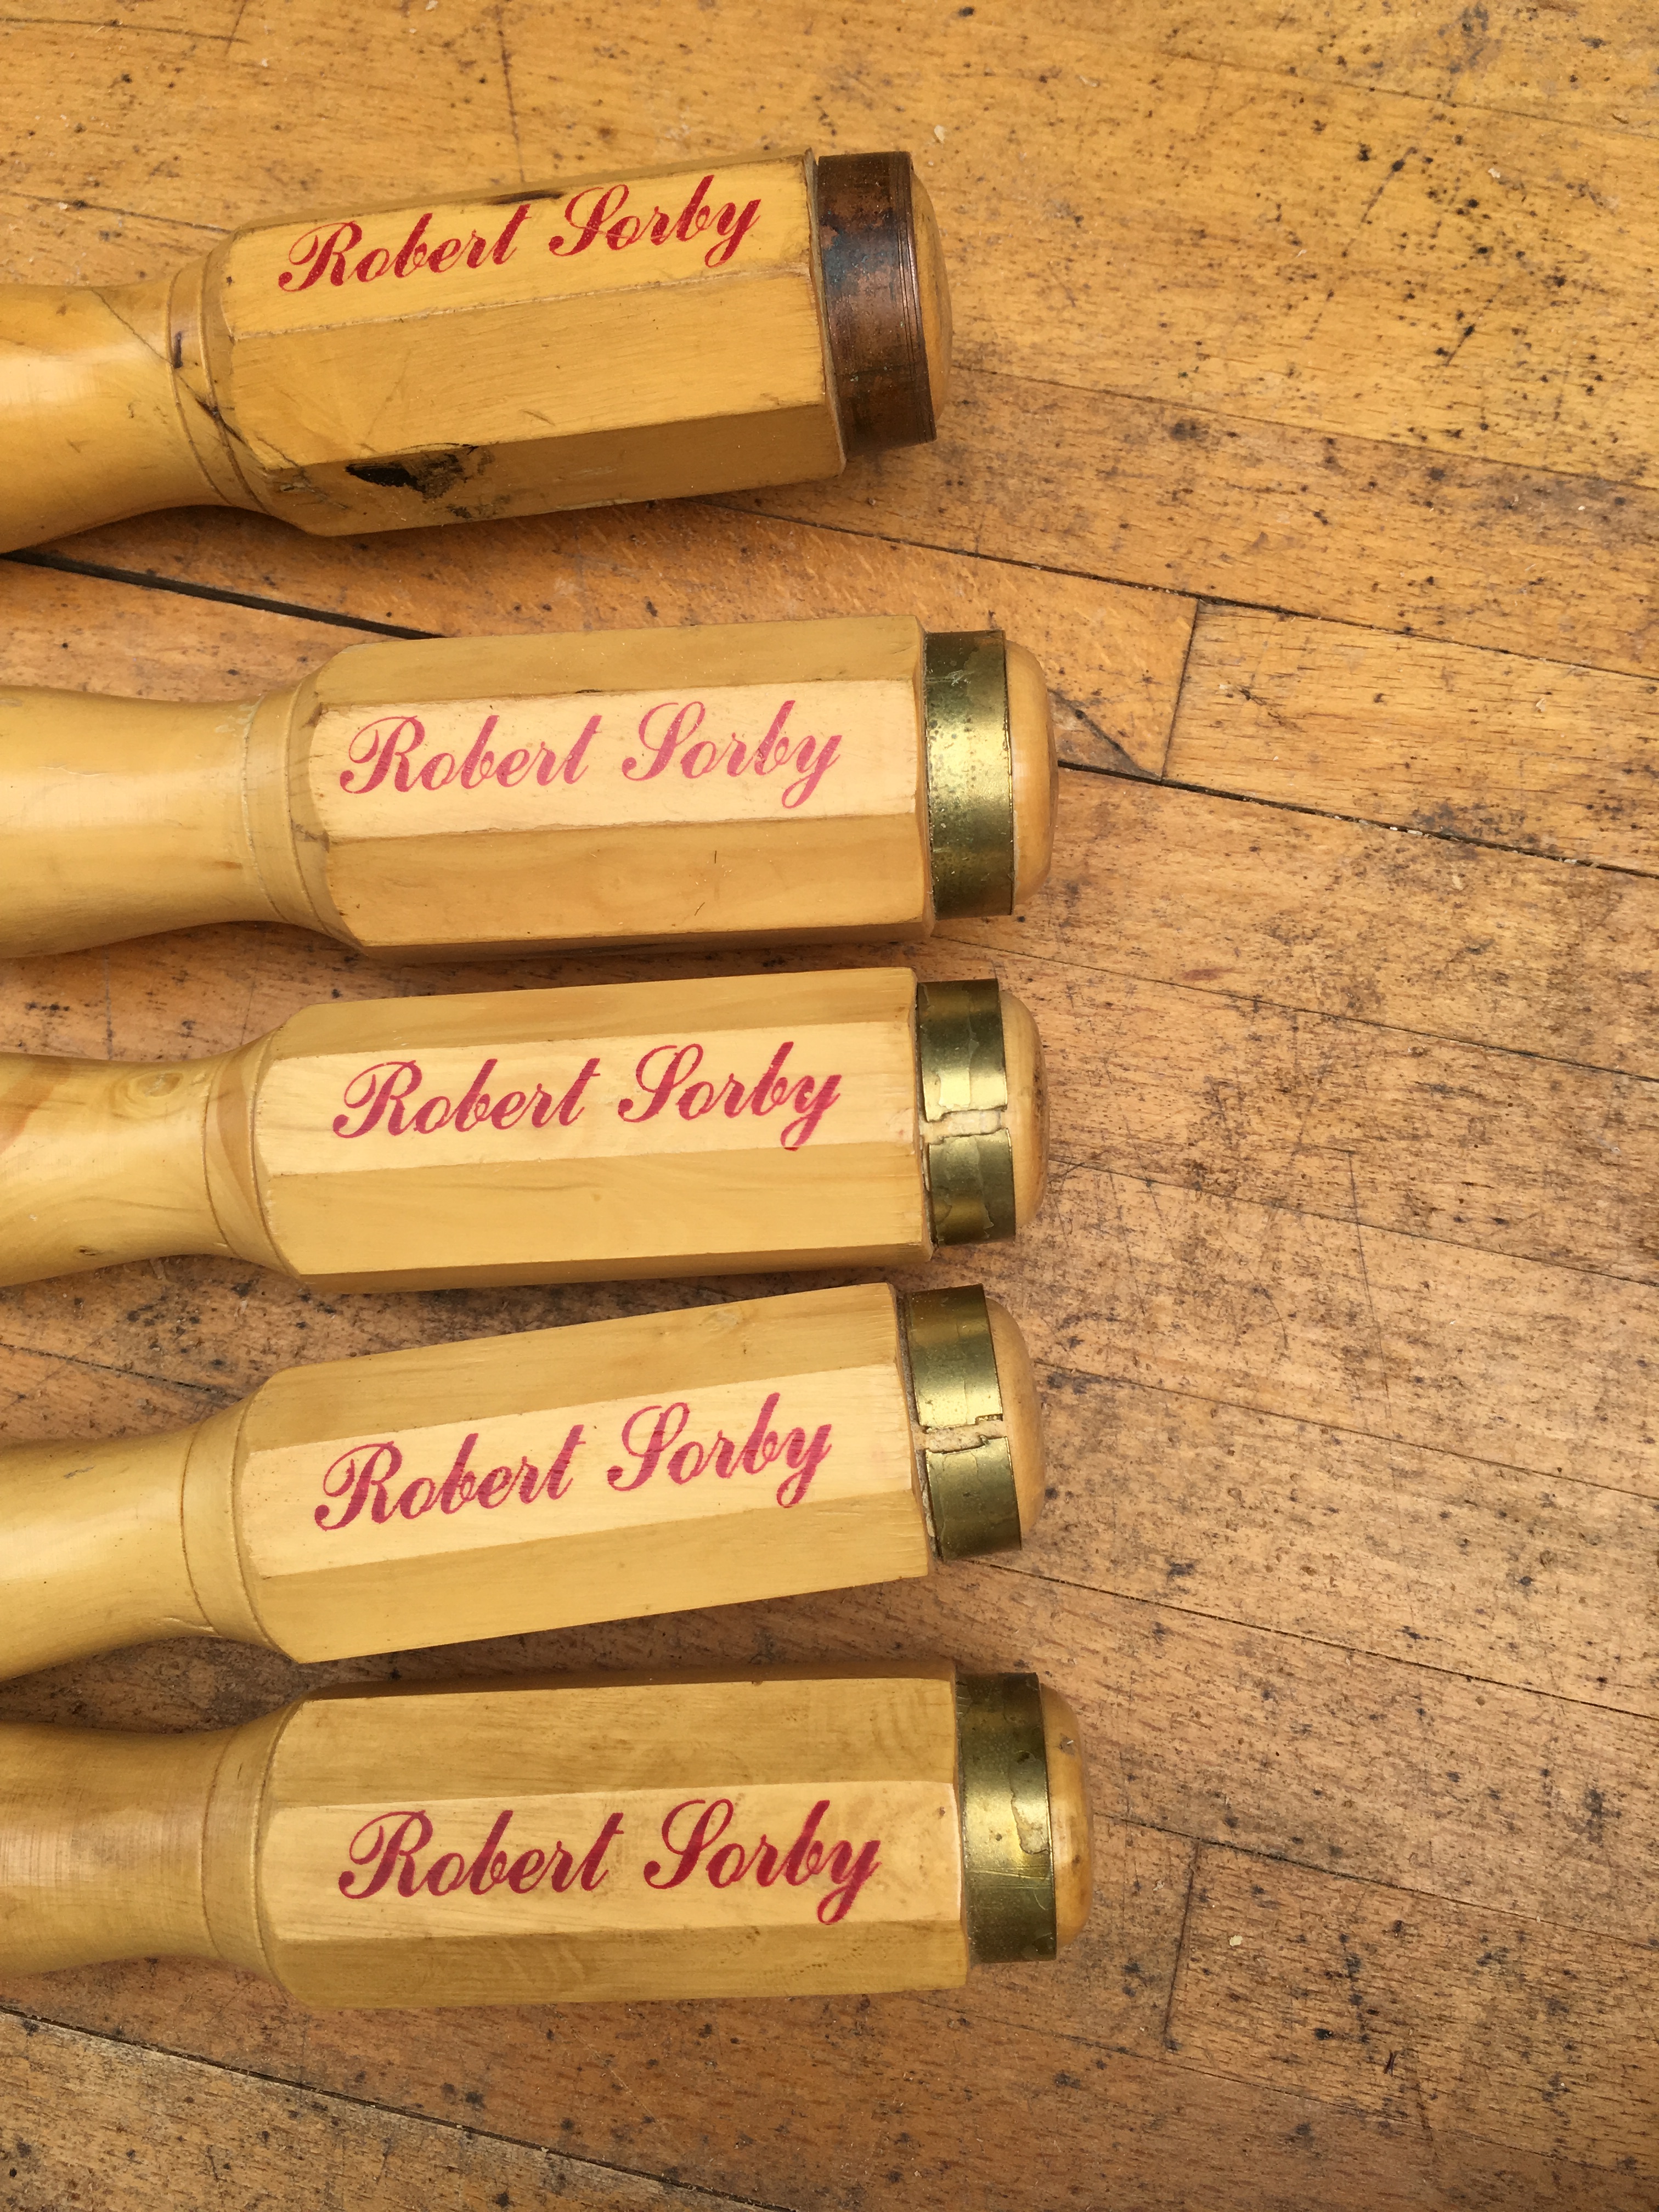
This can. All the brass hoops on my chisels have split! Now the nice man at Robert Sorby sales tells me they are just there for decoration really, serve no practical function and aren’t under any pressure or stress….. which begs the question why they split. I wonder if he has ever used a chisel? Anyway he sent through some replacements free of charge, but the point is the chisels are sold as high quality, traditionally made tools and should use good quality materials then, with care, they should last a lifetime, several lifetimes. But if you import cheap brass hoops with no knowledge of how they’re made, this is the result. Can you tell I’m a bit grumpy about this?
disappointed of Tunbridge Wells
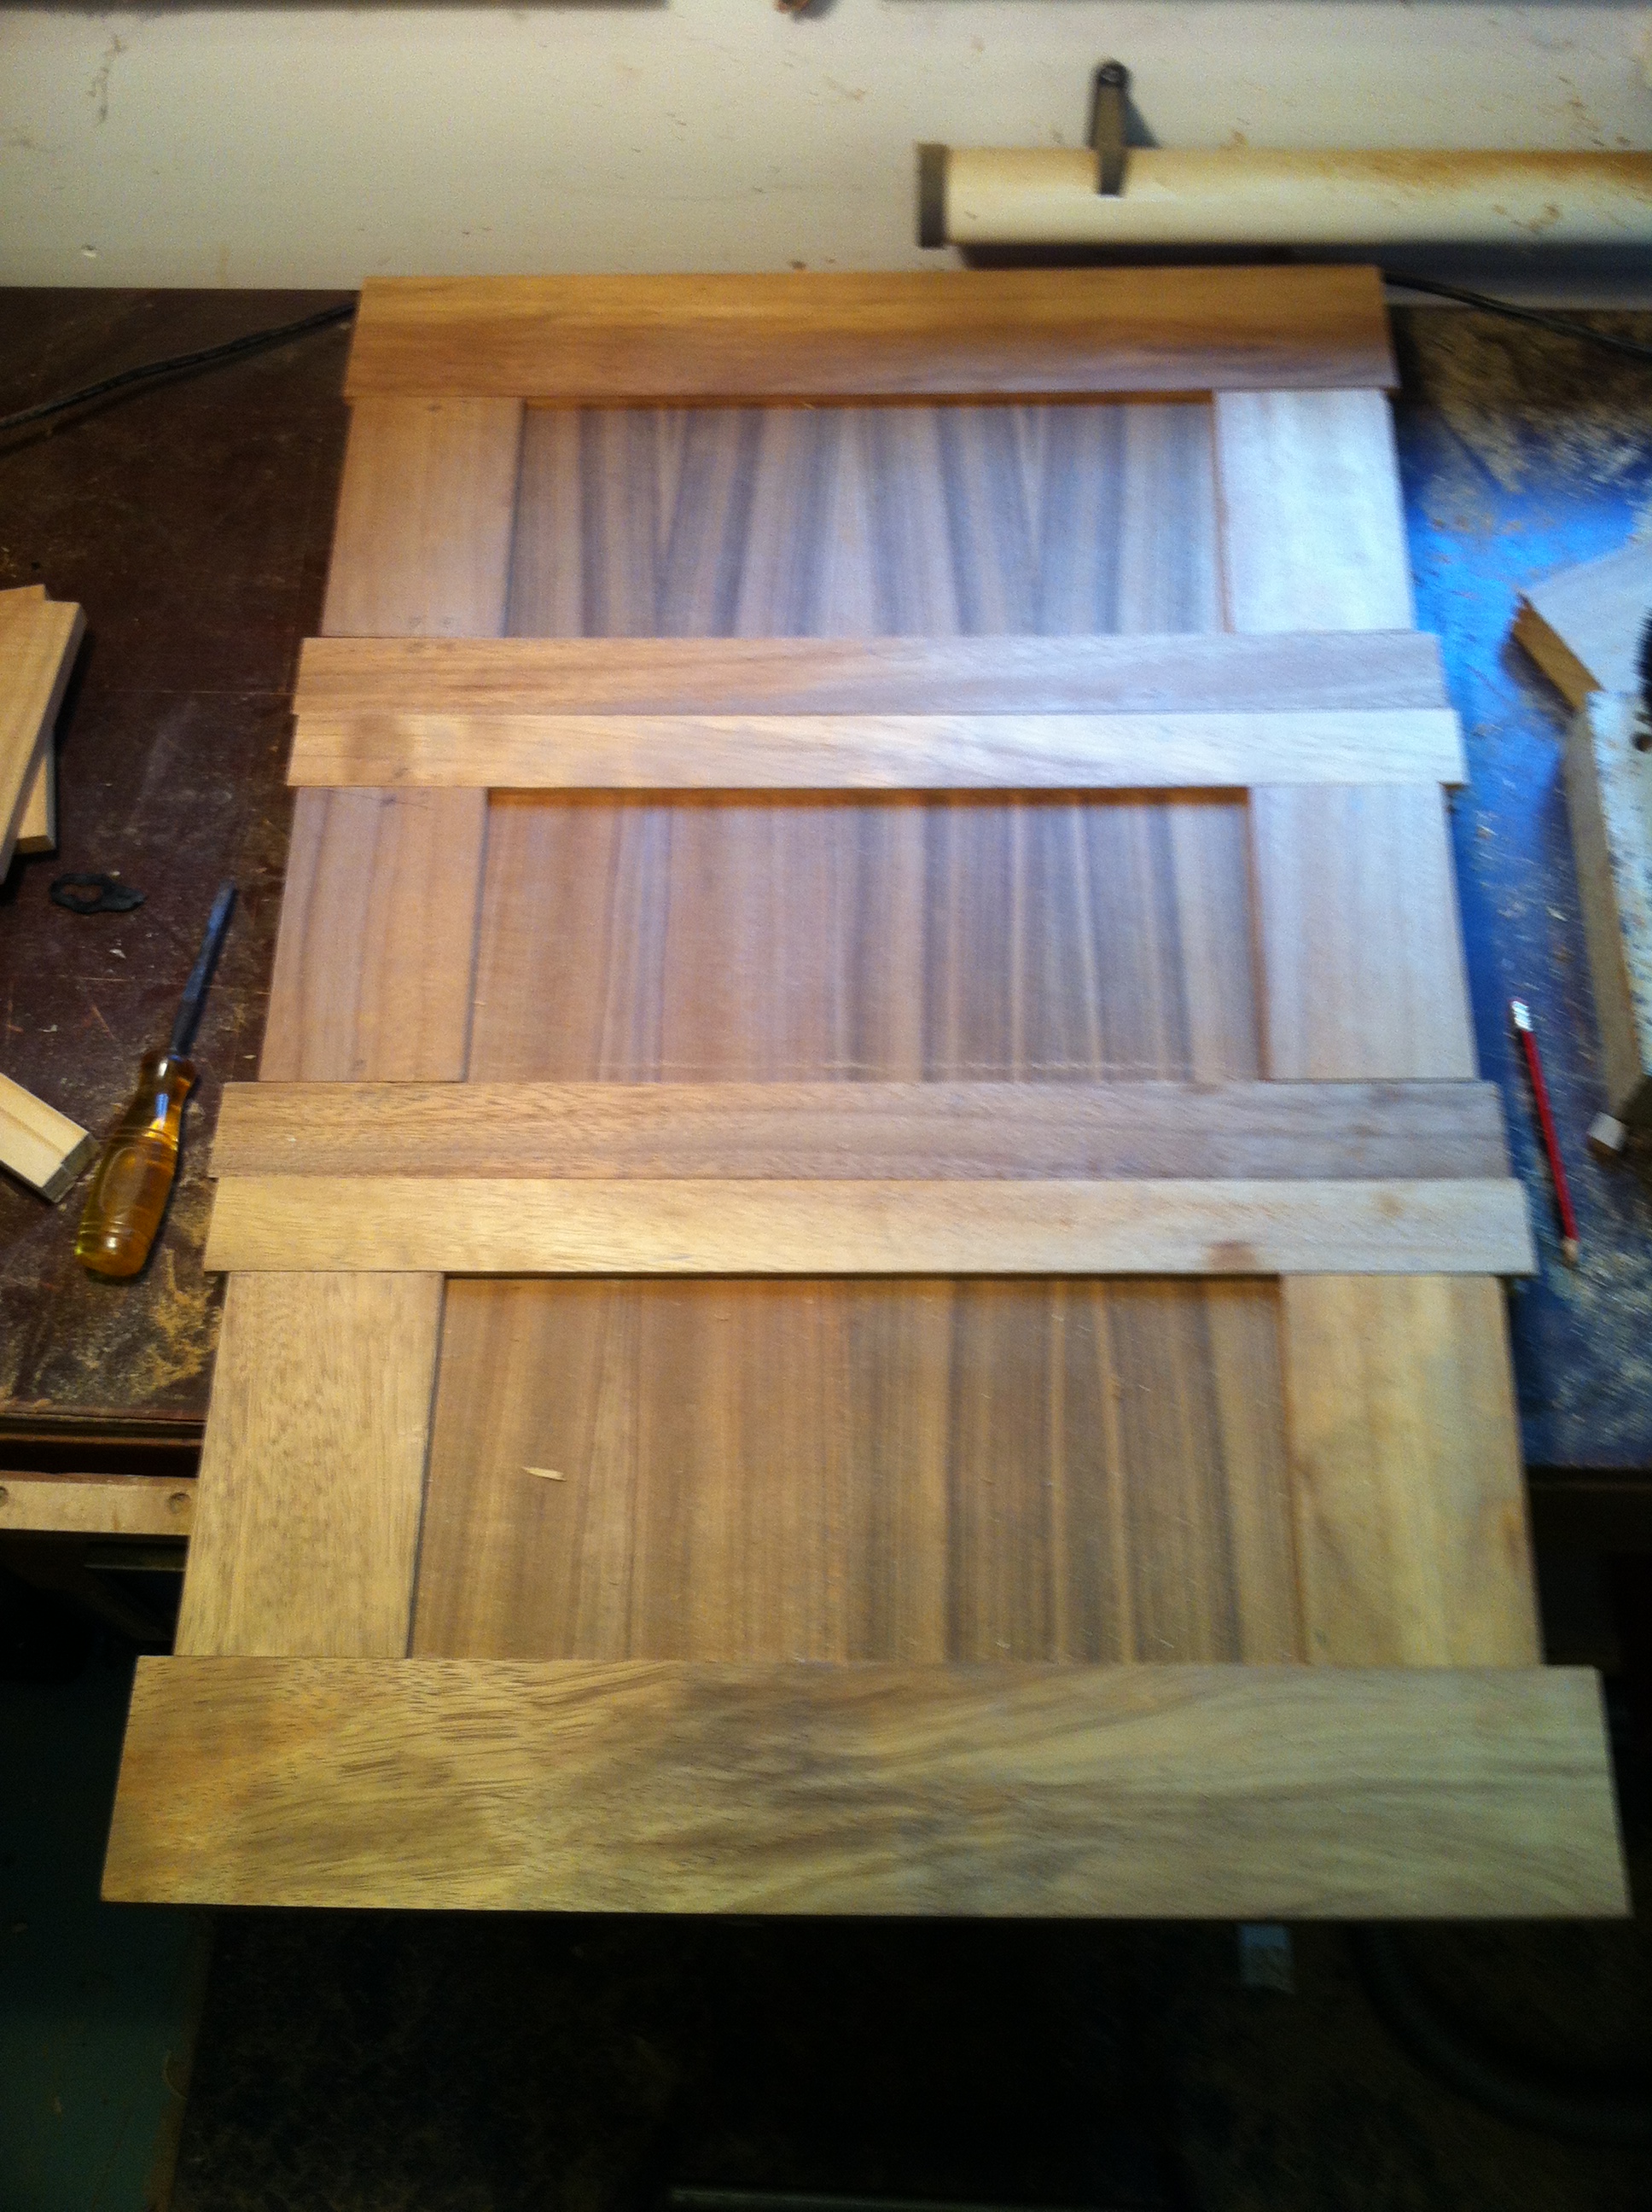
Floors
Four oak floors in position ready to be fitted
starting to look like progress
Last but not least, I spotted these handsome fellows… a new figurehead perhaps?
a new figure head for Flamingo?
So that was an old post from last year. There was little progress on Flamingo until a few weeks ago but hopefully your appetites are whetted for the next exciting installment….
P.S. if you were wondering why a pavlova at the top… there’s no reason other than Tilly has become a past master at creating them so I thought I’d bask in some reflected glory.
After the disappointment of the badly welded steel floors I’ve decided to make new wooden floors. The mixture of steel, oak and saltwater was a recipe for corrosion anyway and I have never been keen on the through-the-hull bolts that held the whole lot together. That’s my excuse anyway, and it has nothing to do with the fact that constructing wooden floors means more time spent in father’s cosy work shop with its steady supply of tea, biscuits and soup and less time out in a chilly, damp orchard… nothing whatsoever…
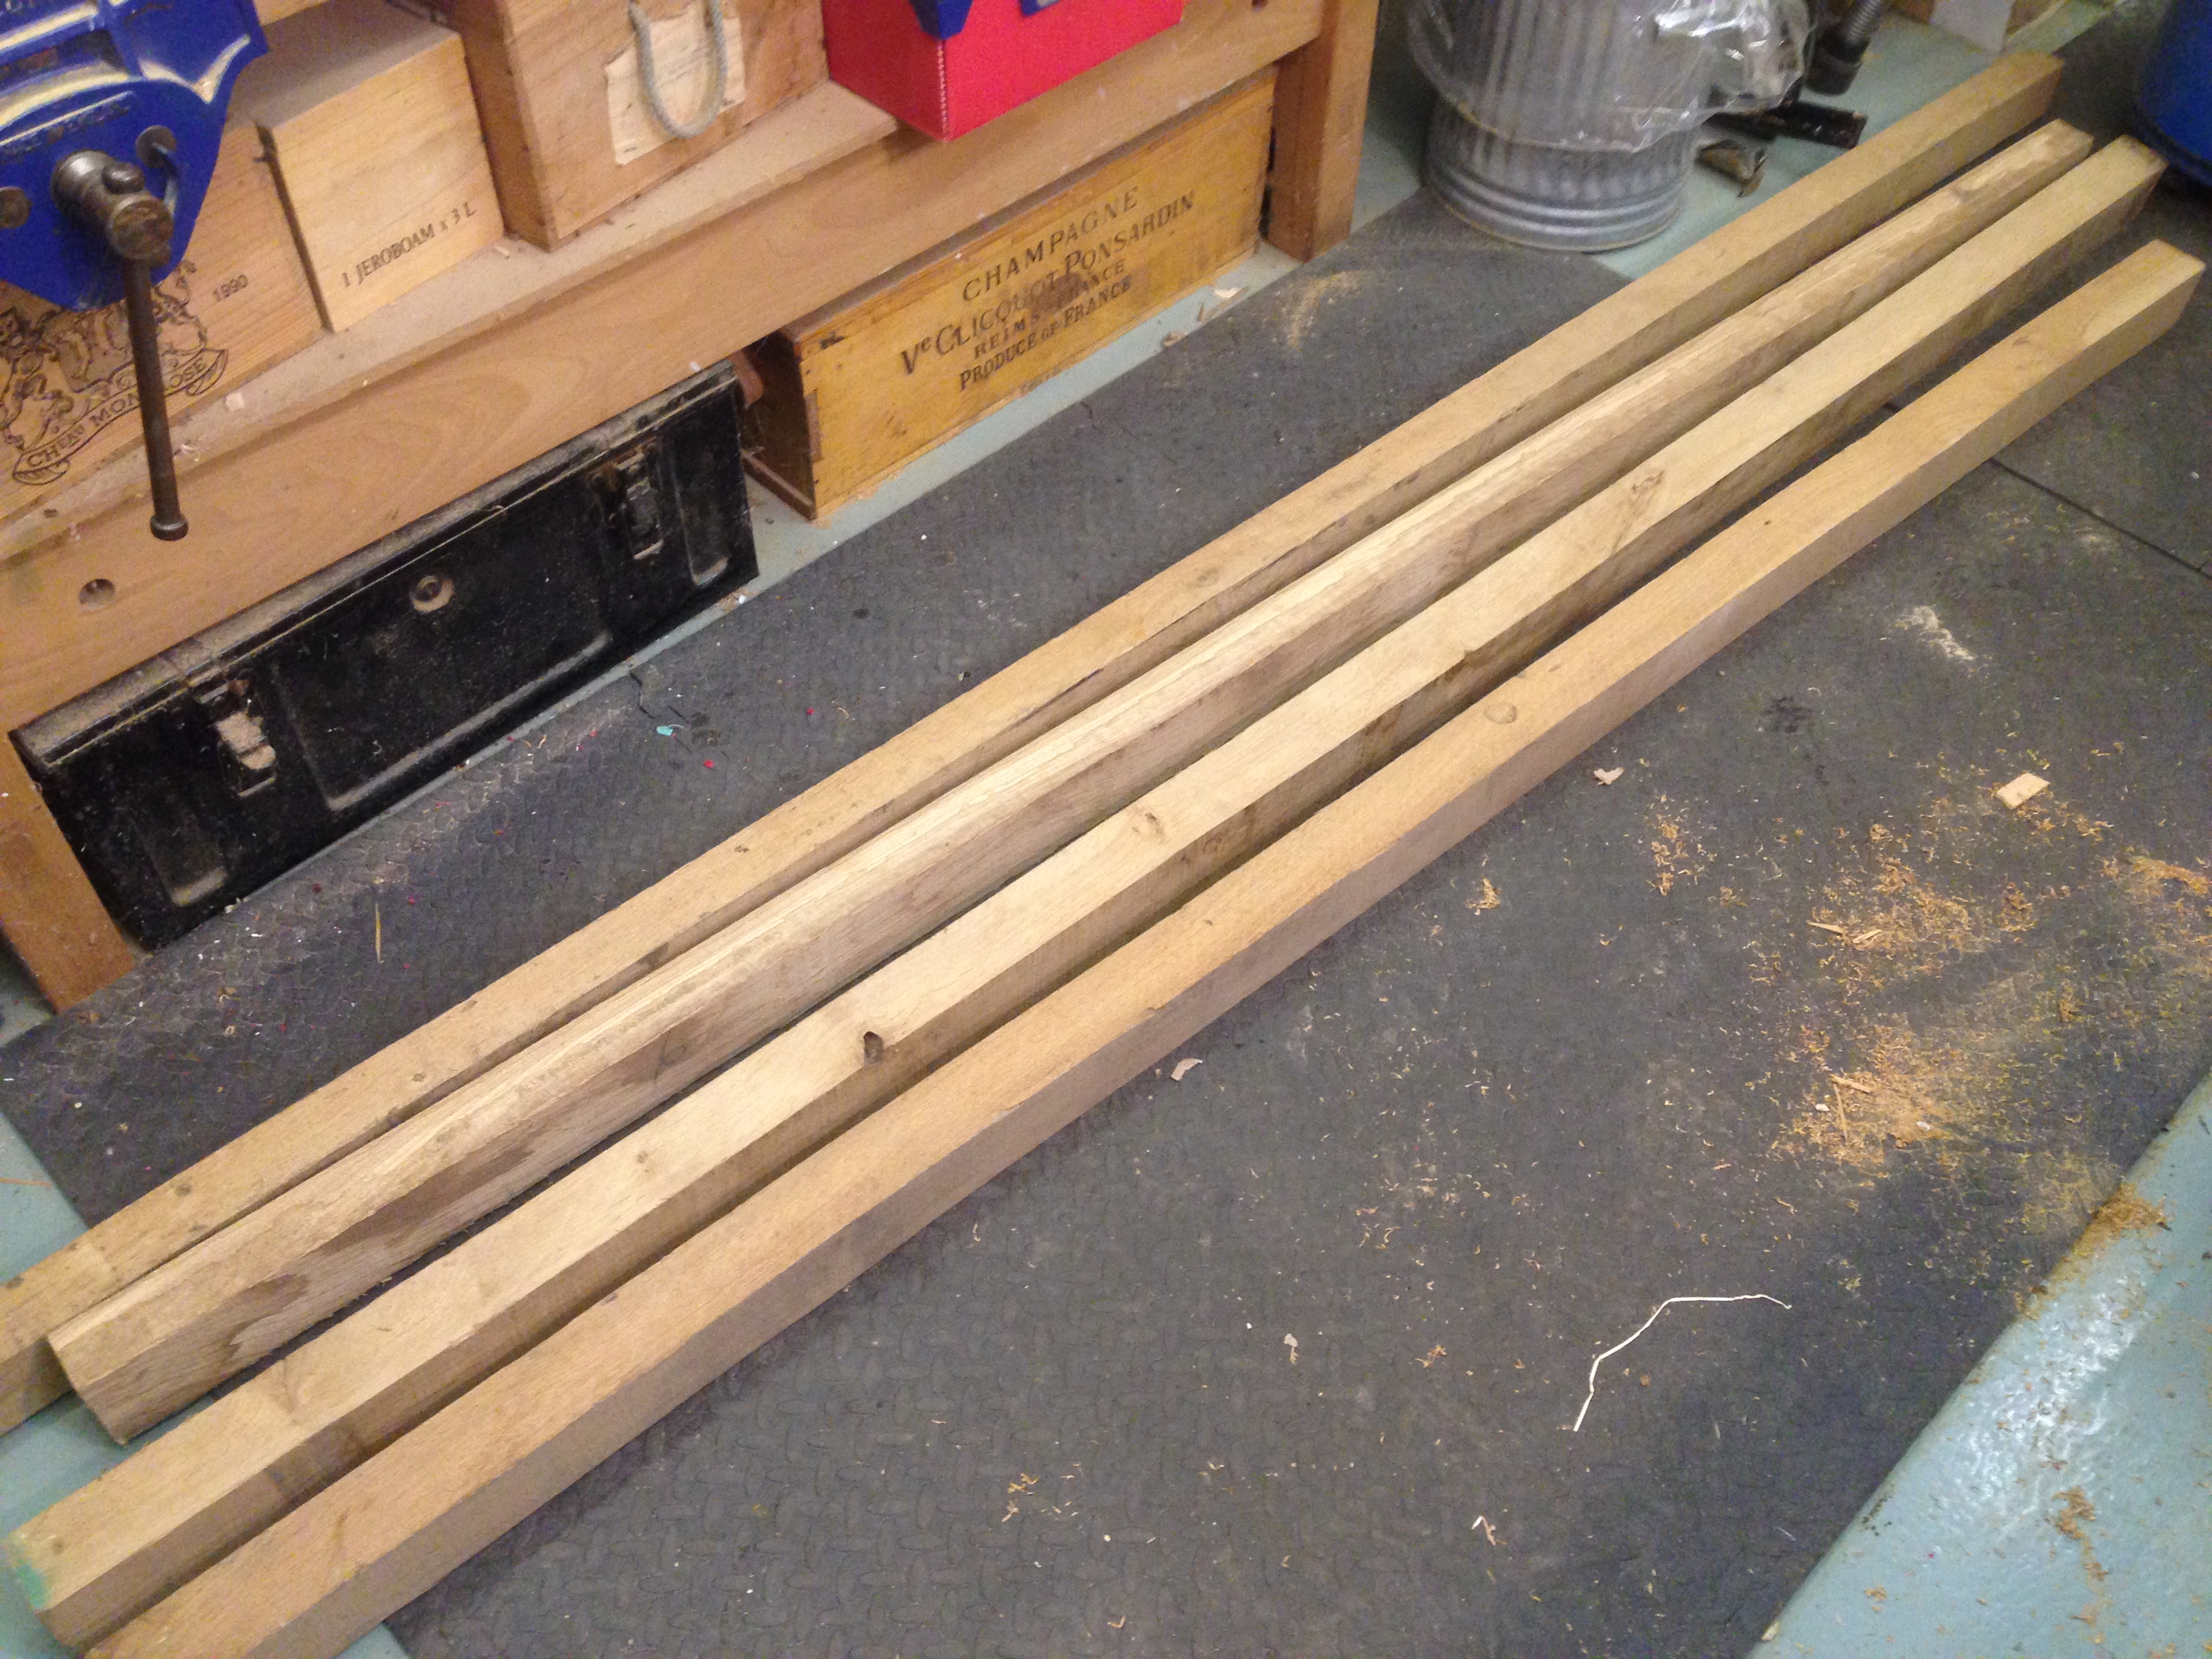
Off cuts of oak ready to made into floors
‘Impoverished’ boat restorers get their supplies from wherever they can find them. This oak, some of which will be used for floors, some of which is probably only good for the fire, came from raised bed off cuts, an old friend (thanks Rupert) and Wealden Oak.
Plywood templates and Oak floors in the making
Halving joints will be glued and screwed
The floors gluing, lots of cleaning up to do!
Where the keel bolts have compressed the Elm keelson over years of tightening, the timber has become compressed and more and more steel washers have been used to pack them out. Together, #1 Son and I squatted in the bowels of the boat and chiselled out the old timber to let in some new Oak blocks. Good to sit and chat whilst working together, despite the pins and needles.
letting blocks into the keelson for the keel bolts
Meanwhile disaster struck in the workshop. The trusty bandsaw guide mechanism snapped. Calls to the supplier proved fruitless, the part is no longer stocked and no, we can’t suggest an alternative. Faced with buying a new bandsaw, inspiration struck and cousin Kerry (modelmaker extraordinaire) was called into action,
The casting was not really up to the job.
the renewed blade guide
and that which was broken became whole…
Nesting birds
Away from boat building spring is in full swing, the never ending mowing marathon has started again, hampered slightly by the presence of a blackbird’s nest in the mower shed. I was so excited to see the eggs a few weeks ago but worried my regular intrusions might put Mrs B off her incubating duties. Luckily she just hunkered down and carried on and subsequent visits showed 4 healthy looking chicks!
Three eggs laid, one to go.
Four hungry chicks
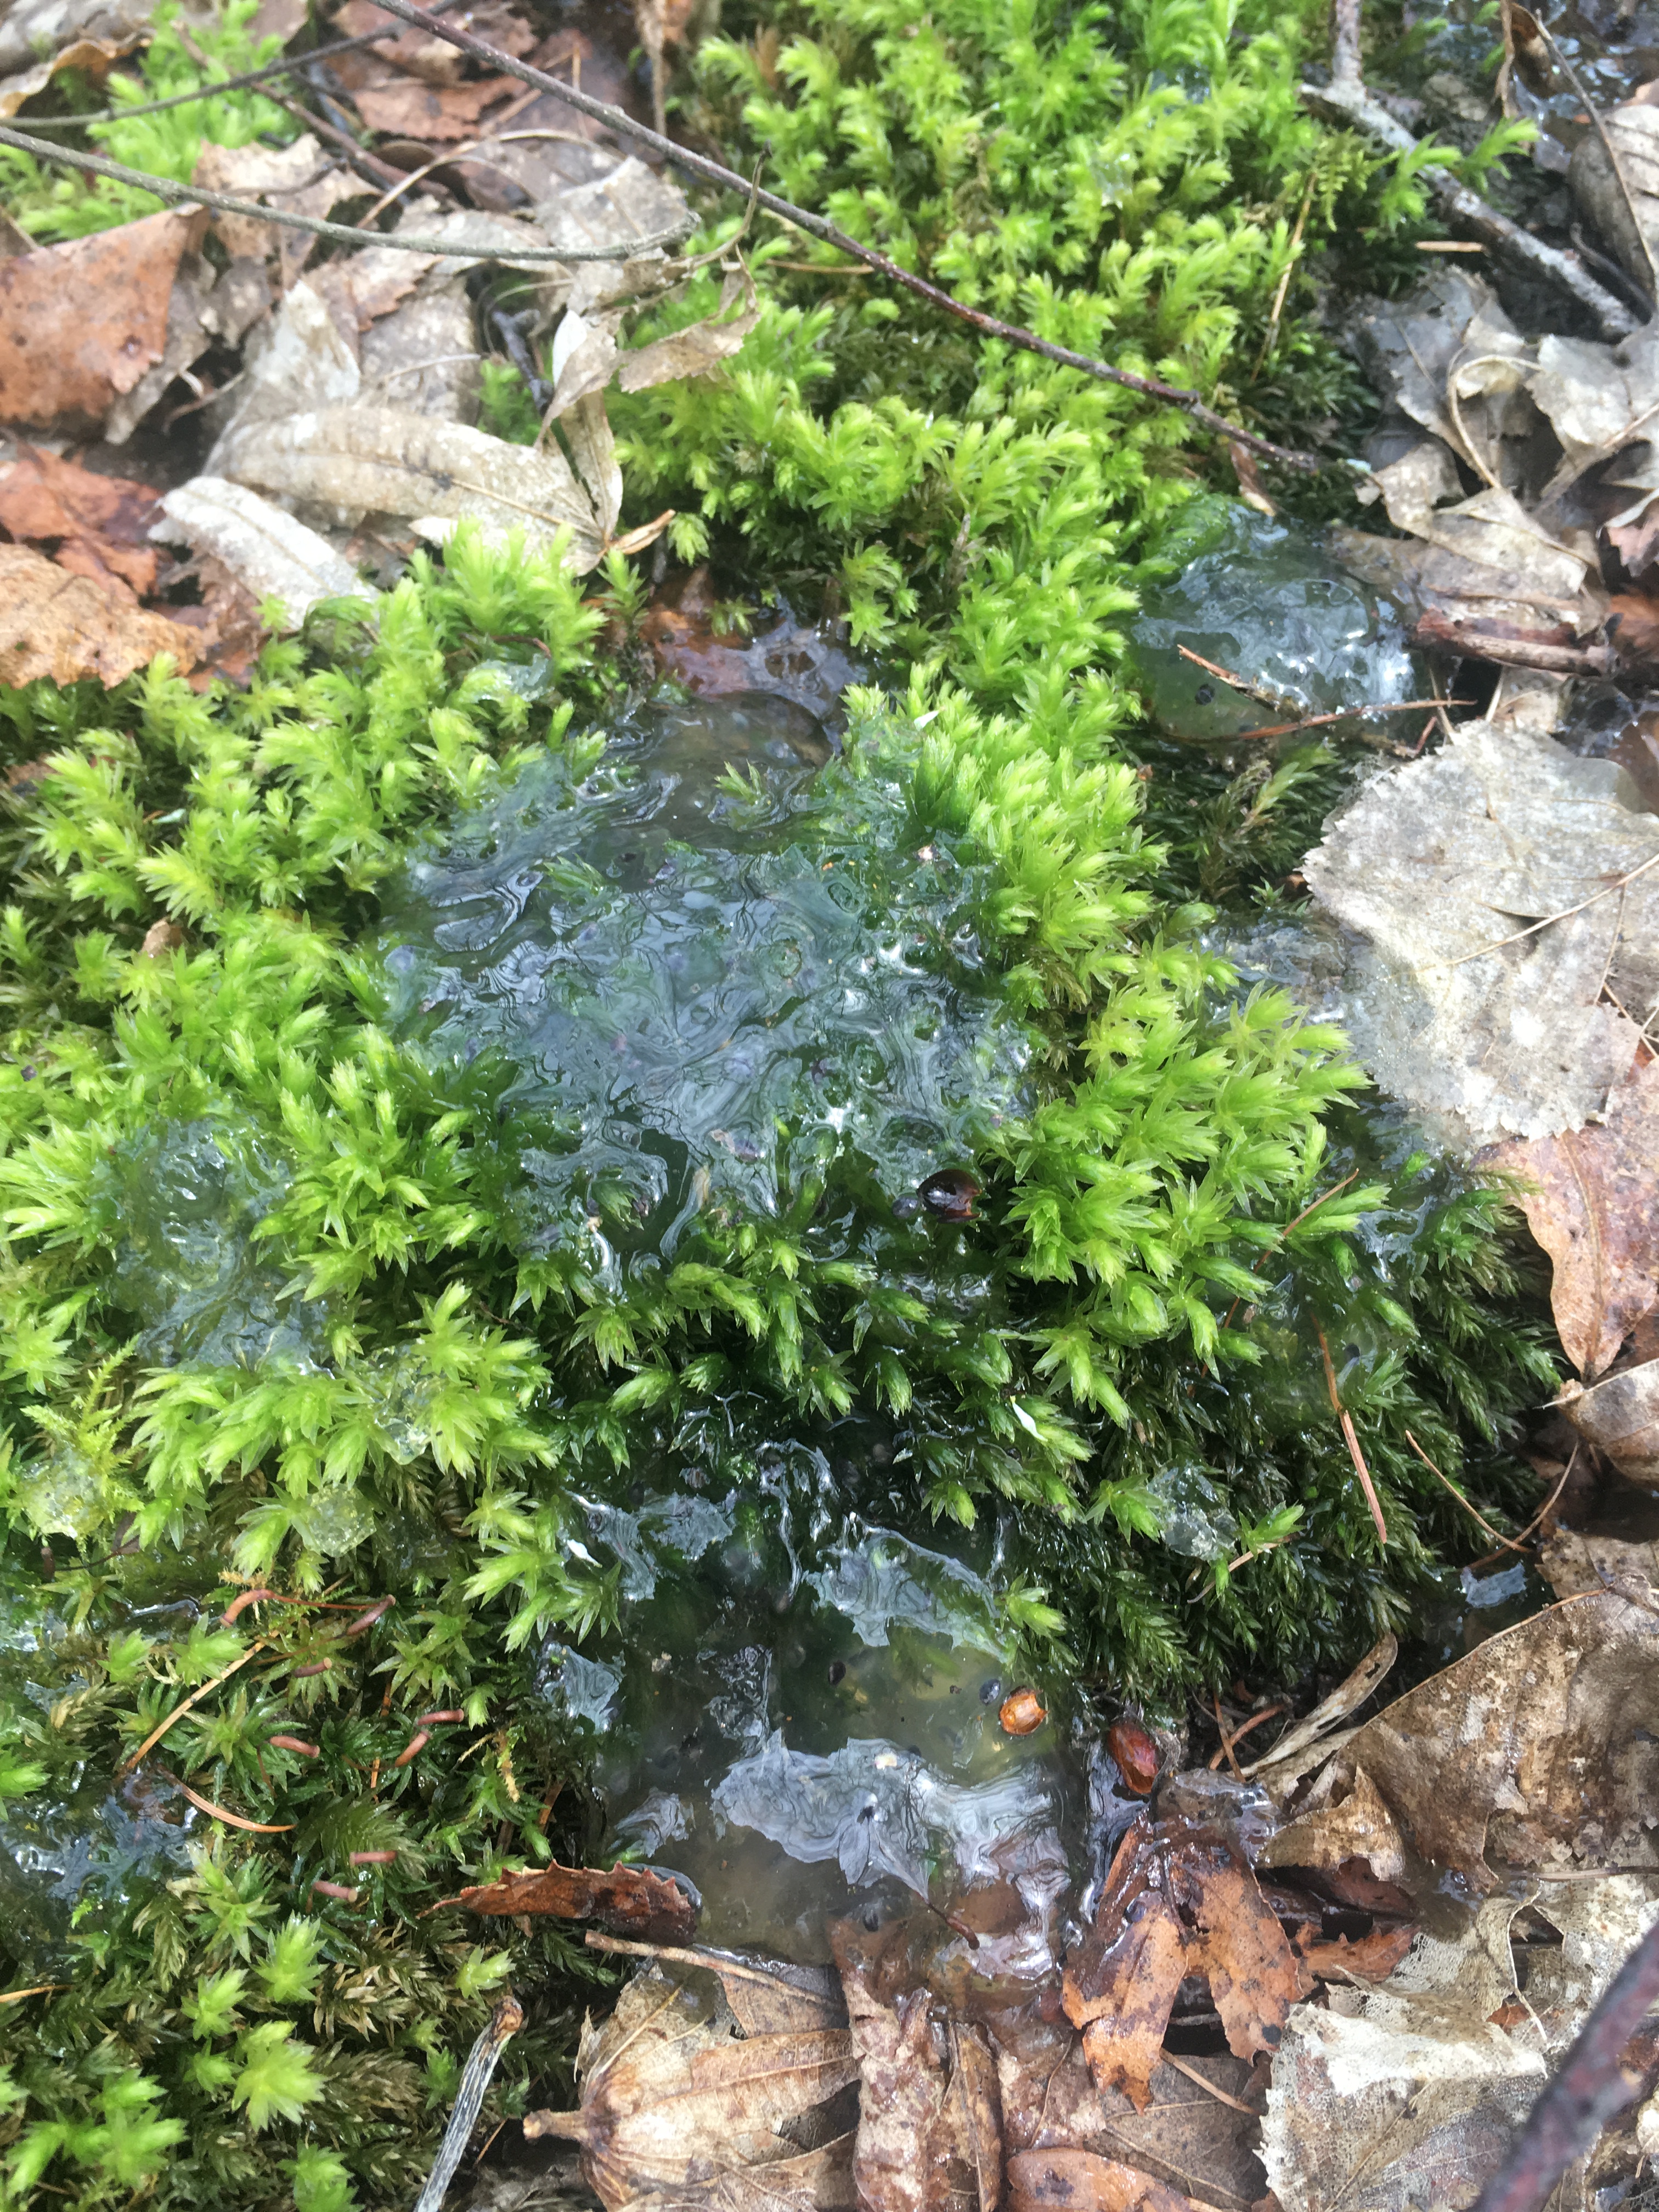
Frog spawn
Tilly spotted this in the woods by the pond. Confused frog who thought the damp moss was water, or do some frogs or toads spawn on the ground? If so how do the tadpoles survive? Who knows… anyway we put some in the pond and left some where it was. We’ll see what happens.
and of course there is always homework… today’s project is brought to you by the word ‘tessellation’ Tilly decided this was a homework for the two of us (plus cousin Crissy) so many thin slices of hazel were cut and stuck in an semi-regular tessellation (with a bit of artistic license for the limitations of a natural material that gets smaller along it’s length).
Inspiration
Inspiration comes from many sources, whether it’s someone’s comment on this blog, a beautiful old photograph of a classic, or a YouTube video of someone’s project. Here’s a selection of a few things that have inspired me recently.
Watch any of Leo Sampson Goolden’s posts about his restoration of Tally Ho and you can’t fail to be inspired by his enthusiasm in the face of the massive project he’s taken on.
Joshua Slocum’s round the world voyage in his homemade boat ‘Spray’ is the stuff off legend and it’s easy to forget what an achievement it was until you see how small and basic Spray was.
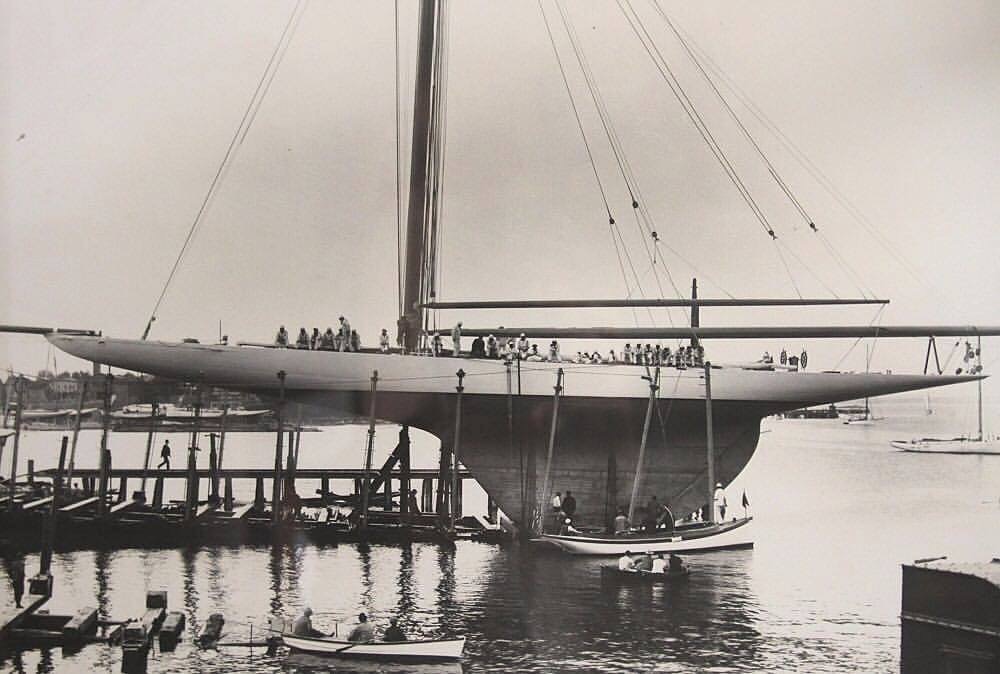
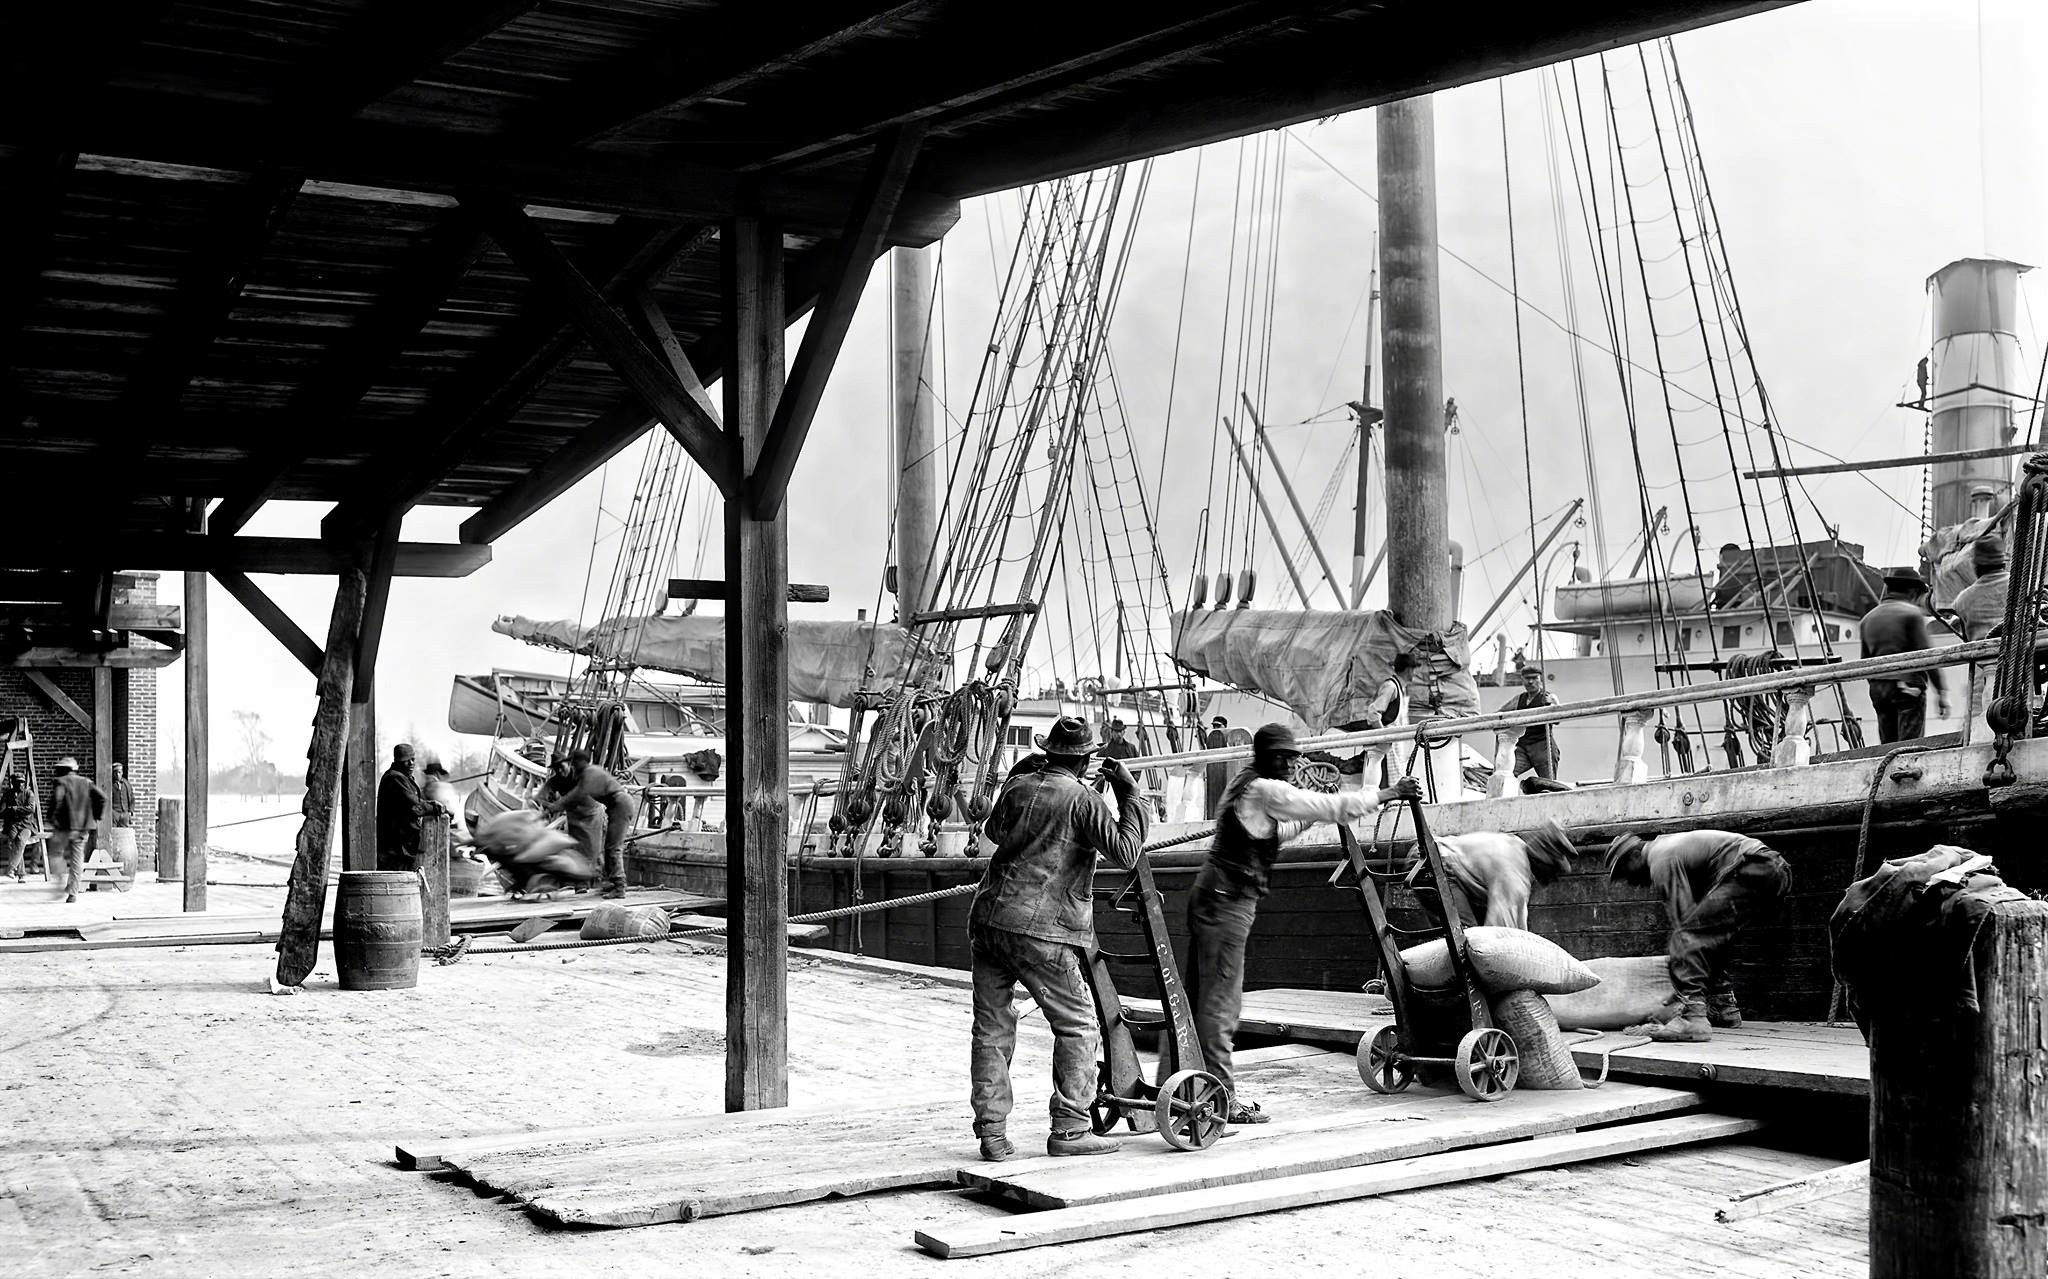
There is a wealth of information and talent out there and so much of it is free. Susan P Fino restores old nautical themed photographs and generously posts them on Facebook for us all to enjoy.
…and you thought modern Americas Cup yachts were extreme!
love these old images from the days of working sail.
Well , I started writing this about 3 months ago so I suppose I should publish it. Hopefully there won’t be so long before the next riveting update. 🙂
So much has happened since I last updated this site and it is hard to know where to start. It has been a summer of highs and lows and very little work on the boat. If you’ve logged on eager for spit and sawdust, tales of finely honed blades whisking wafer thin shavings from fine timber you’re going to be disappointed, but I hope you’ll indulge me as I spill a few of the aches, the pains, the losses and gains and the joys on to these pages.
Aches and Pains
My mother died unexpectedly after a short but beastly illness (when is cancer ever otherwise?) and her going has left a void that I’m reminded of daily. I think of her when I see larch trees, or an old fishing boat, or taste a particularly good apple. I think of her when I drive to work and I think of her on my return, I hear her voice agreeing that the sunrise really is beautiful today, or that there can be nothing more sweet than a blackbird’s song in the twilight. She has coloured my view of the world my whole life, and my actions are filtered through memories of her. Those memories are not sad though, more an acknowledgement of her passing and of how much she meant. An acceptance that everything fades and even the most stalwart succumb. During her illness I carved that sign for the woods I’d been promising her for months and after she was gone I filled her Shepherd’s Hut with her books on gardening, woodland, and fruit growing. It’s a place to sit and contemplate, as it was always intended to be, though sadly mum never got to sit there.
Mother
Weir wood sign finished
Shepherd’s Hut stocked with books
Carving the Weir Wood sign
I fixed the water pump that is nearly as old as me and connected it to the pond in the top field. Though she’ll never use it to draw water for the greenhouse I know mum would be pleased that it’s still going strong.
the old water pump
basic but long lasting
Filling the water butt every weekend was how we earned our pocket money back in the ‘good old’ days…. that and keeping the compost emptied, the rubbish burnt (yes I know, but we didn’t know about global warming then) feeding the chickens, collecting the eggs, letting the geese out, getting chased by the geese, oh yes, and getting in a couple of barrow loads of wood for the Rayburn…. kids today, don’t know they’re born!
They say death, divorce and moving house are the three most stressful things in life…. so, not content with just one out of three, and fingers crossed divorce is not on the horizon, we moved house, and despite swearing in the past, to never, ever move ourselves again… we decided to eschew the tea guzzling, box humping services of the removal firm we last moved with, and do it ourselves, one laborious van load after another! Next time we’re definitely, definitely, no really… definitely, not moving ourselves.
Losses and Gains
There was a little time for making, though not all of it related to ‘the big project’.
Trying out the speedy stitcher
making surfboard
homemade anvil
Useful expanding bit. Anebay purchase
The stitching on my Leatherman sheath finally lost its battle with gravity, but the speedy stitcher was pressed into service for the first time and proved easily up to the task. Youngest son had a ‘beach’ party so of course we had to make a surf board. I discovered the blacksmith (who I’ve praised in previous posts) had not been particularly careful about replicating the profile of the steel frames for Flamingo when repairing them. Annoying given how expensive his services were and though I managed to heat and bend one into shape on a makeshift anvil, the first blow of the hammer on the next one saw it practically fall apart! Better to find out now than mid ocean I suppose, but I now have to mark up templates for each one and take them back to be repaired properly.
The Joys
We took a much needed break and joined friends for a sailing trip in France where much Rosé was earned (those Atlantic swells are tiresome!) and consumed. There was time for reflection at Weir Cottage with some home brewed cider. The absence of the second glass of cider is a reflection of my wife’s rather more discerning palette.
Rosé in Saint-Martin-de-Ré
Cider at home
August saw the family embark on a fantastic Canoe trip across Scotland along the Great Glen. Armed with tents, stoves, waterproofs and a lifetime’s supply of snacks (consumed in three days flat) ten hardy comrades paddled and portaged and poohed in a hole, cooked on a campfire, surfed waves and swam in Loch Lochy, we marvelled at mirrored Lochs in the sunset, trembled at crashing waves and high winds the next day, we drank water from mountain streams, explored castles and shipwrecks, lathered ourselves in anti midge creams, potions and lotions and generally had a wet and wonderful time!
Despite the wet July, with Weir Cottage on the market, the summer saw a lot of mowing activity and the big power scythe had to be pressed into service to tame the long grass in the orchard. Wet summers, curious dogs and nervous frogs, this beauty had a narrow escape! The frog, not Chester…. though of course he is beautiful in his own special, hairy, Highland, slightly smelly way.
nervous amphibians
the big power scythe
We welcomed a new member of the family. Indy is a Spankie, the product of an unplanned union between a Yorkshire Terrier (Yorkie) and a Springer Spaniel! We’ve no idea what she’ll turn out like but she’s absolutely gorgeous.
So a mixed summer, hopefully there will be more boat restoration to report on soon, ’til then keep your blades sharp and your eyes on the dream.
So suddenly it’s spring and whole garden is a riot of blossom, and birds feverishly nest building.
the garden is blooming
The bank, vestigial remains of the millpond’s retaining dam is covered in milkmaids this year, as is the orchard and I’ve decided not to mow under the fruit trees until autumn thus releasing about two hours a week from mowing servitude to spend on boat building! In truth, I’m going to need every hour I can get as I have provisionally signed up for a sailing event next August! It’s the Old Gaffers Association 55th Anniversary and there is a regatta in Cowes on the Isle Of Wight. It is an improbable time frame but not impossible…..maybe. 🙂
A Shepherd’s Hut has arrived
The apple blossom in the top orchard is beautiful, notice the crab apple beyond the Shepherd’s Hut…. a Shepherd’s Hut!? I hear you exclaim, yes, mother has splashed out on a little wheeled retreat to retreat to or to simply sit and contemplate whatever it is mothers sit and contemplate when they’re not pruning, planting, watering and weeding. It took several hours of sweaty labour to get it from the road to its resting place as it weighs about 1.5 tons!
a trusty old bottle jack helped the levelling task
Another few hours of fossicking about underneath the chassis with an old bottle jack that, remembering the cobwebby, cedarwood garage of my childhood, I realised is older than me and still going strong, and the hut is level (ish)
Deer protection on some new fruit trees.
For some reason despite the plentiful supply of grazing, the local deer seem rather partial to young fruit tree bark. Something to do with the high sugar content I think. A bit of work with some old sheep wire and they are hopefully safe from the depredations of the rascally ruminants.
Crikey! I hear you mutter, I though this blog was about boatbuilding not a bucolic ramble through an East Sussex Orchard! Ok, so the warm spring weather and some time off over Easter meant some actual honest to goodness boat restoration got done! Here is (hopefully) the last laminated frame under construction.
the ‘last’ laminated frame underway
Having lovingly honed all my edged tools it was almost painful to plane the glue soaked wood, ‘poxy resin takes the edge off a blade very quickly!
Blunting my freshly sharpened plane on ‘poxy resin
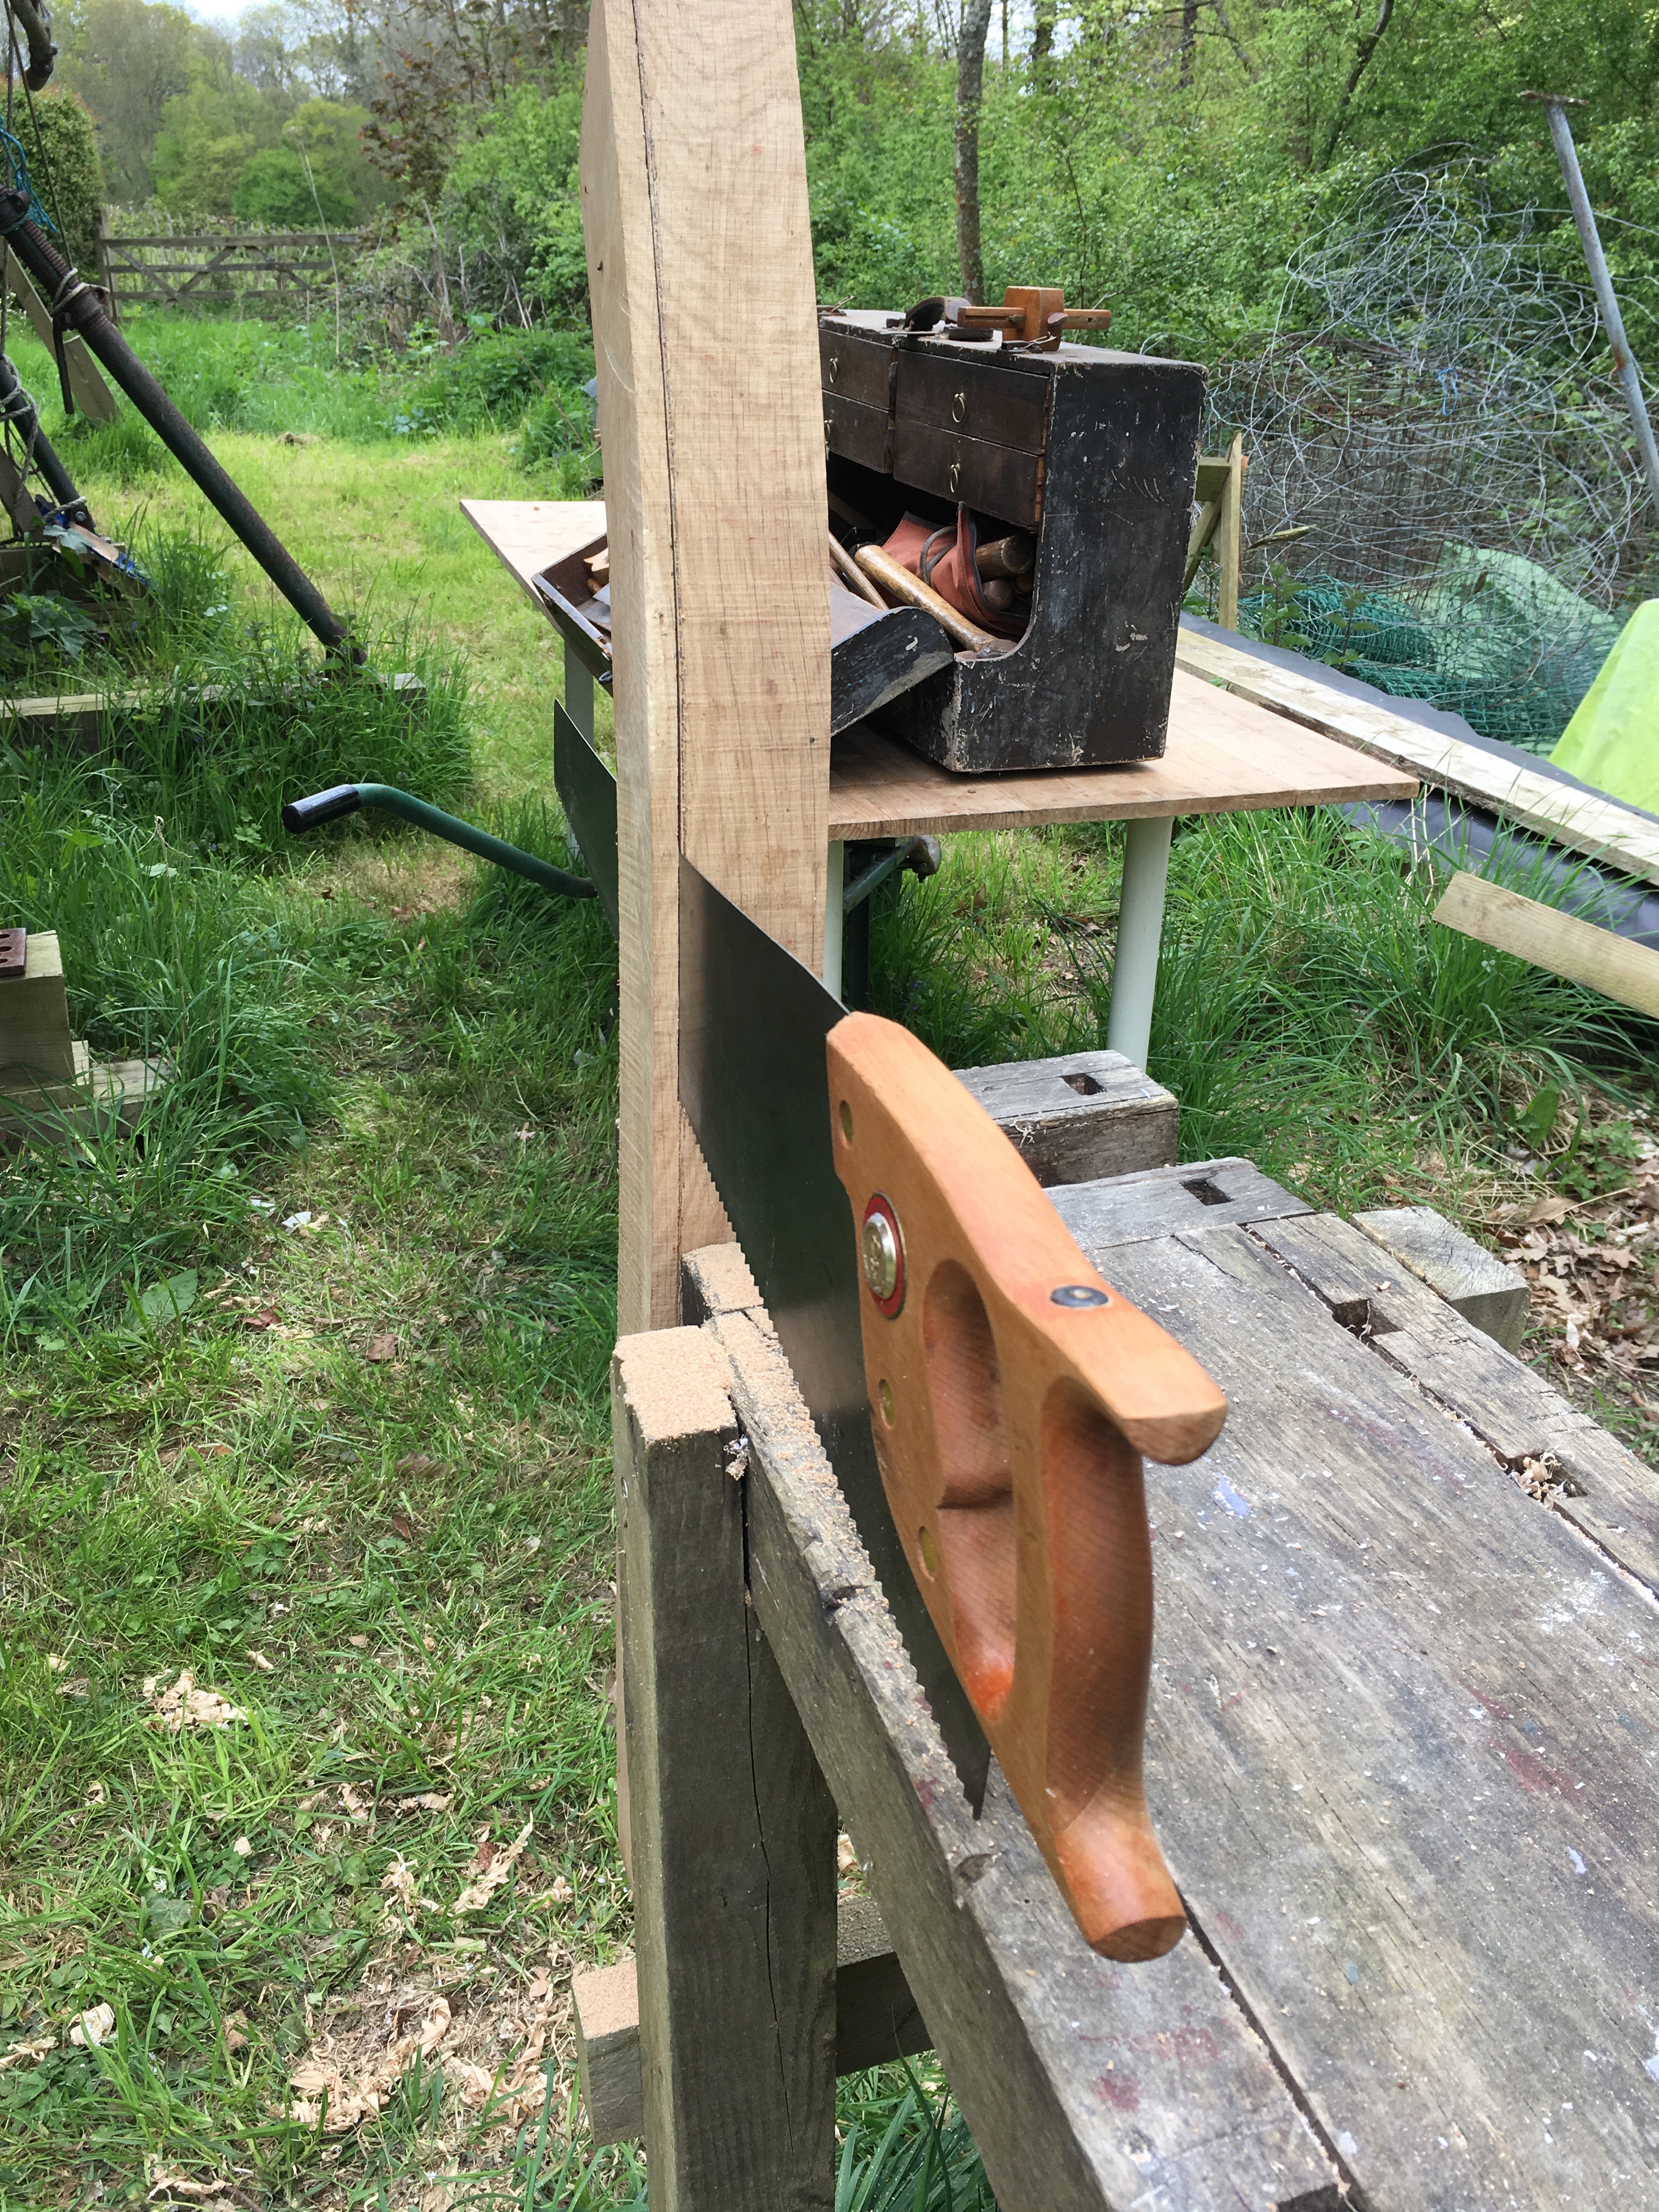
I’ve long been a convert to the church of hardpoint saws, they last so long if you take care to avoid nails and screws and they are so sharp and so (relatively) cheap it seemed nonsensical to spend time hand sharpening a traditional saw. That was until I bought an old carpenters tool box at a car boot sale. £12 bought me a nice old box with quite a few old tools still in it. I felt almost embarrassed to be walking away with such riches for so little, but the seller seemed more than happy. Anyway, remembering that one of the saws was a fairly coarse one, and that in a recent spell of displacement activity I had sharpened it, I got it out and ripped (quite literally) through this sawn frame to trim it down to the correct thickness. I’m now an evangelical convert to the church of the traditional sawyer and next time I’m faced with a tricky task on the boat I shall procrastinate and spend some time sharpening the other two saws (one fine, one medium)
It’s a real pleasure owning a traditional tool chest, I probably spend too much time working out the best order to store the tools and it’s almost impossible to pick up once it’s full, (in fact I’ve adapted an old wheelbarrow to transport it from the house to the boat to save my back) but there’s something about it, I feel some sort of connection to all the carpenters who’ve used similar chests, or even this very one. It has also made me more fussy about what tools I put in it. I’m using the William Morris test, it either has to be beautiful, or useful, otherwise it is consigned to the ‘junk’ tool bag. I’ve become so fond of it I’ve even sanded off the more obvious paint splatters (whilst carefully preserving it’s patina of age and authenticity of course) and given it a coat of wax!
Ripping down a sawn frame with a proper saw.
Planing the sawn frame is sooo much nicer than fighting through the glue of the laminated one.
The sunshine and warm weather has meant more time up at the boat and this little job patching in a hole in the keelson was satisfactorily knocked off the to do list.
preparing to fill in a rotten bit of keel
Glued and screwed
Next on the list is getting hold of some Polysulphide Bedding Compound to bed the frames in without breaking the bank, and working out how to repair some of the oversize bolt holes. I’m thinking some sort of router jig…..roll on Summer!
Very little work on Flamingo has been done since my last post 😦 it’s a common thread running through this blog… Looking back, instead of woodworking, boatbuilding and tool making there has been lots of displacement activity like parties, picnics, sailing and such. …. surprisingly few rhino though…. I’ve always maintained, no blog is really complete with a couple of these leathery skinned, quadrupeds so here are some rhino to redress the balance.
Putting the Rhino to bed with a last snack.
These two handsome beasts are being cared for as part of an endangered species breeding progamme at Manor Wildlife Park in Wales where we went for a half term holiday. Tilly even got to put Sudocrem on their sore bits!
Along with trips to Wales there have been lovely autumn walks
Gathering wood for the winter.
Making baseball bats for ‘The Purge’ Halloween costume.
Baseball bat making on the pole lathe
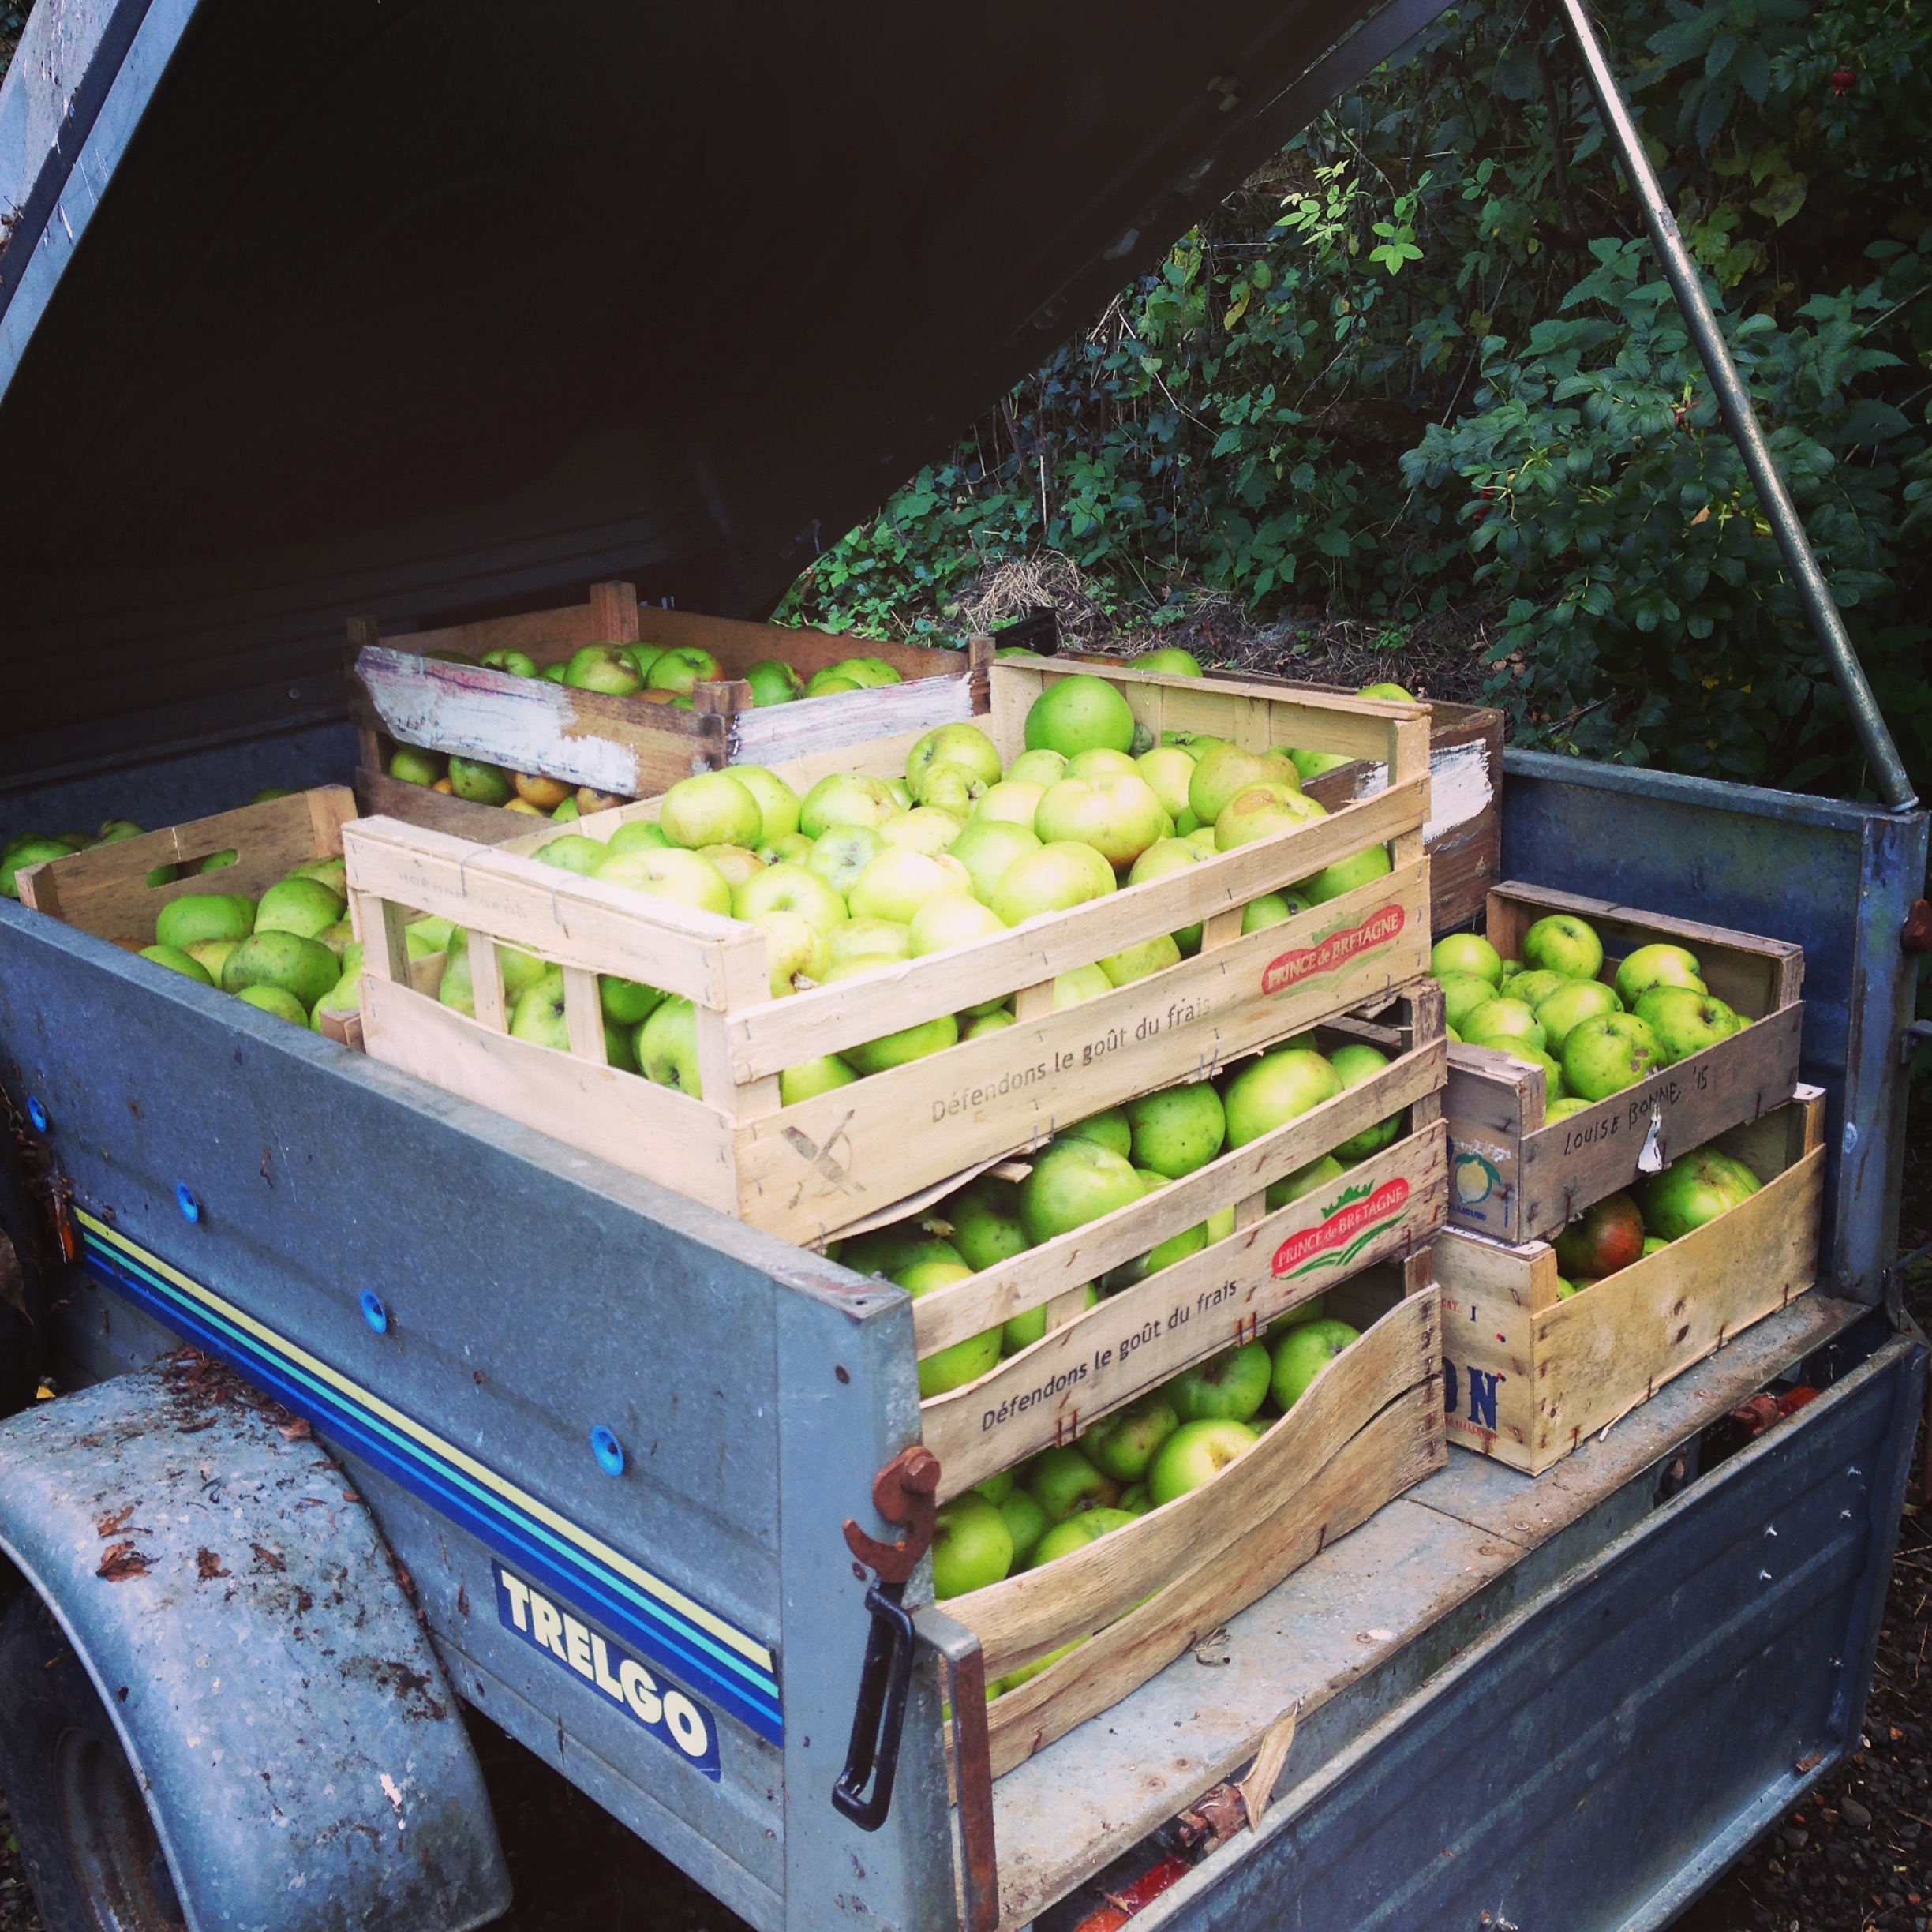
Harvesting apples
Apples ready to go to be pressed
In amongst this veritable cornucopia of displacement activity there have been a few, a very few boat relevant jobs. I finally managed to gather together all my bladed tools to take to father’s workshop to use his water cooled grindstone. All chisels, planes, spoke shaves etc need their bevel regrinding at some point and mine had been crying out for some attention for far too long.
Smoothing plane dismantled for de-rusting, sharpening and cleaning
Once I started sharpening I realised just how the damp atmosphere down in our misty little frost pocket has rusted my tools, so both planes were stripped down cleaned up and put back together. I spent hours sharpening and fettling and there’s still all the carving chisels to do!
It was lovely to be in a proper workshop with all the right tools in all the right places like a One Republic lyric.
Knocking out the bronze bolts that hold the steel floors in was harder than I thought as they seem to have been bonded in with some super sticky gloop. Consequently I got a bit impatient and over enthusiastic with a hammer rather than a more forgiving mallet…. the result was a whole set of bolts with crushed threads. Very poor!
Bronze bolts sadly misshapen after my over eager bashing
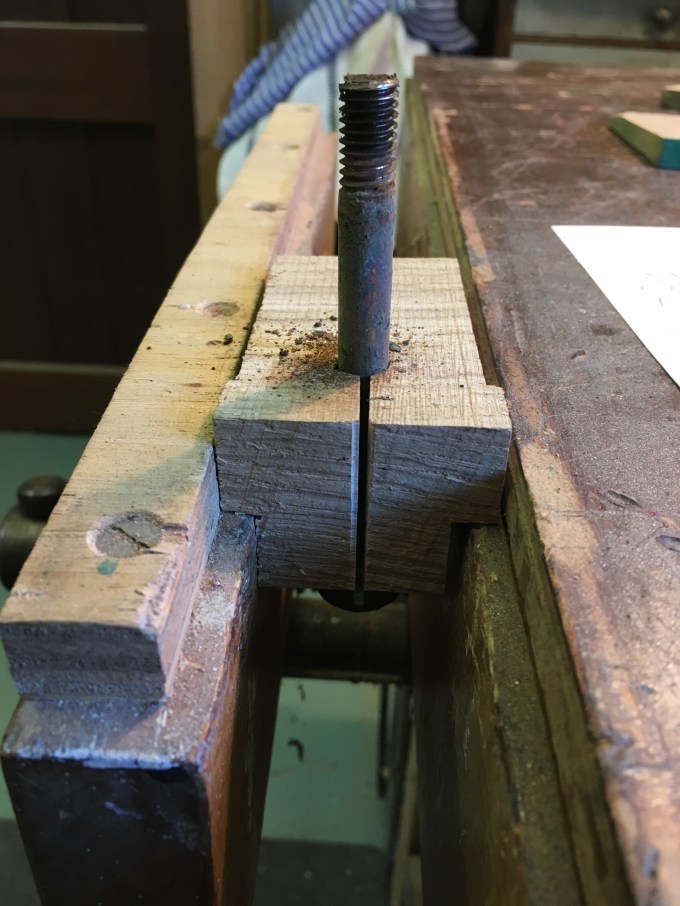
Luckily my father’s godfather Kenneth was thoughtful enough in 1959 to give him a set of BSW taps and dies… perhaps not with this exact job in mind but nevertheless, a wise, thoughtful and exemplary godfather.
Kenneth’s gift.
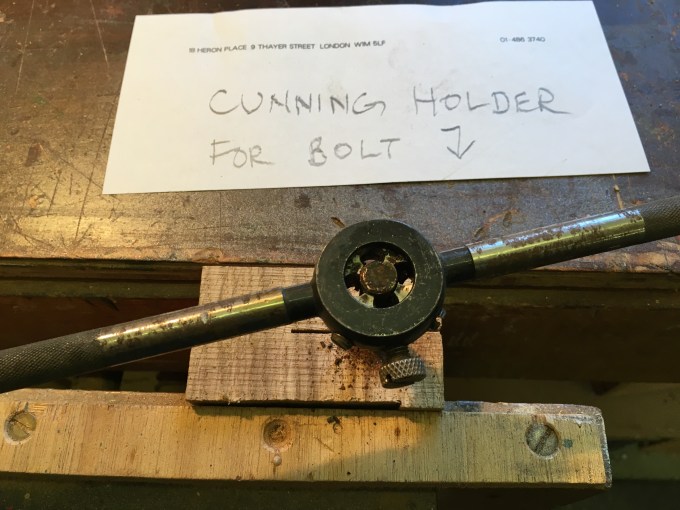
Cunning bolt holder
So with a bit of cutting fluid and a lot of care the threads were re-cut and the day saved. Helped along by this little gift that, in my absence, like a little workshop pixie, father made to assist better gripping.
side view of bolt gripping gizmo
I said it before and I’ll doubtless bang on about it until I get my own workshop…. it’s so good having all the tools and a proper space to work in.
No Autumn would be complete without a trip to ‘the Ladybird tree’. These tiny little bugs hunker down for the winter in the cracks and crevices of an old tree in the woods near us and always signify the start of winter for me.
the Ladybird tree
A trip to Bristol and a walk around the harbour was inspirational.
A pilot cutter underway at Underfalls Yard Bristol
As was a visit to Iron Wharf in Faversham
A lovely lady waiting to be rescued
Lengthening shadows and golden hues
So that was Autumn and now we’re through the festive season, out the other side and looking forward to spring, but with a house move in the pipeline I doubt the pace of work on Flamingo will be any faster, but she’s safe enough under her tarp until the days are longer and outside work more inviting…
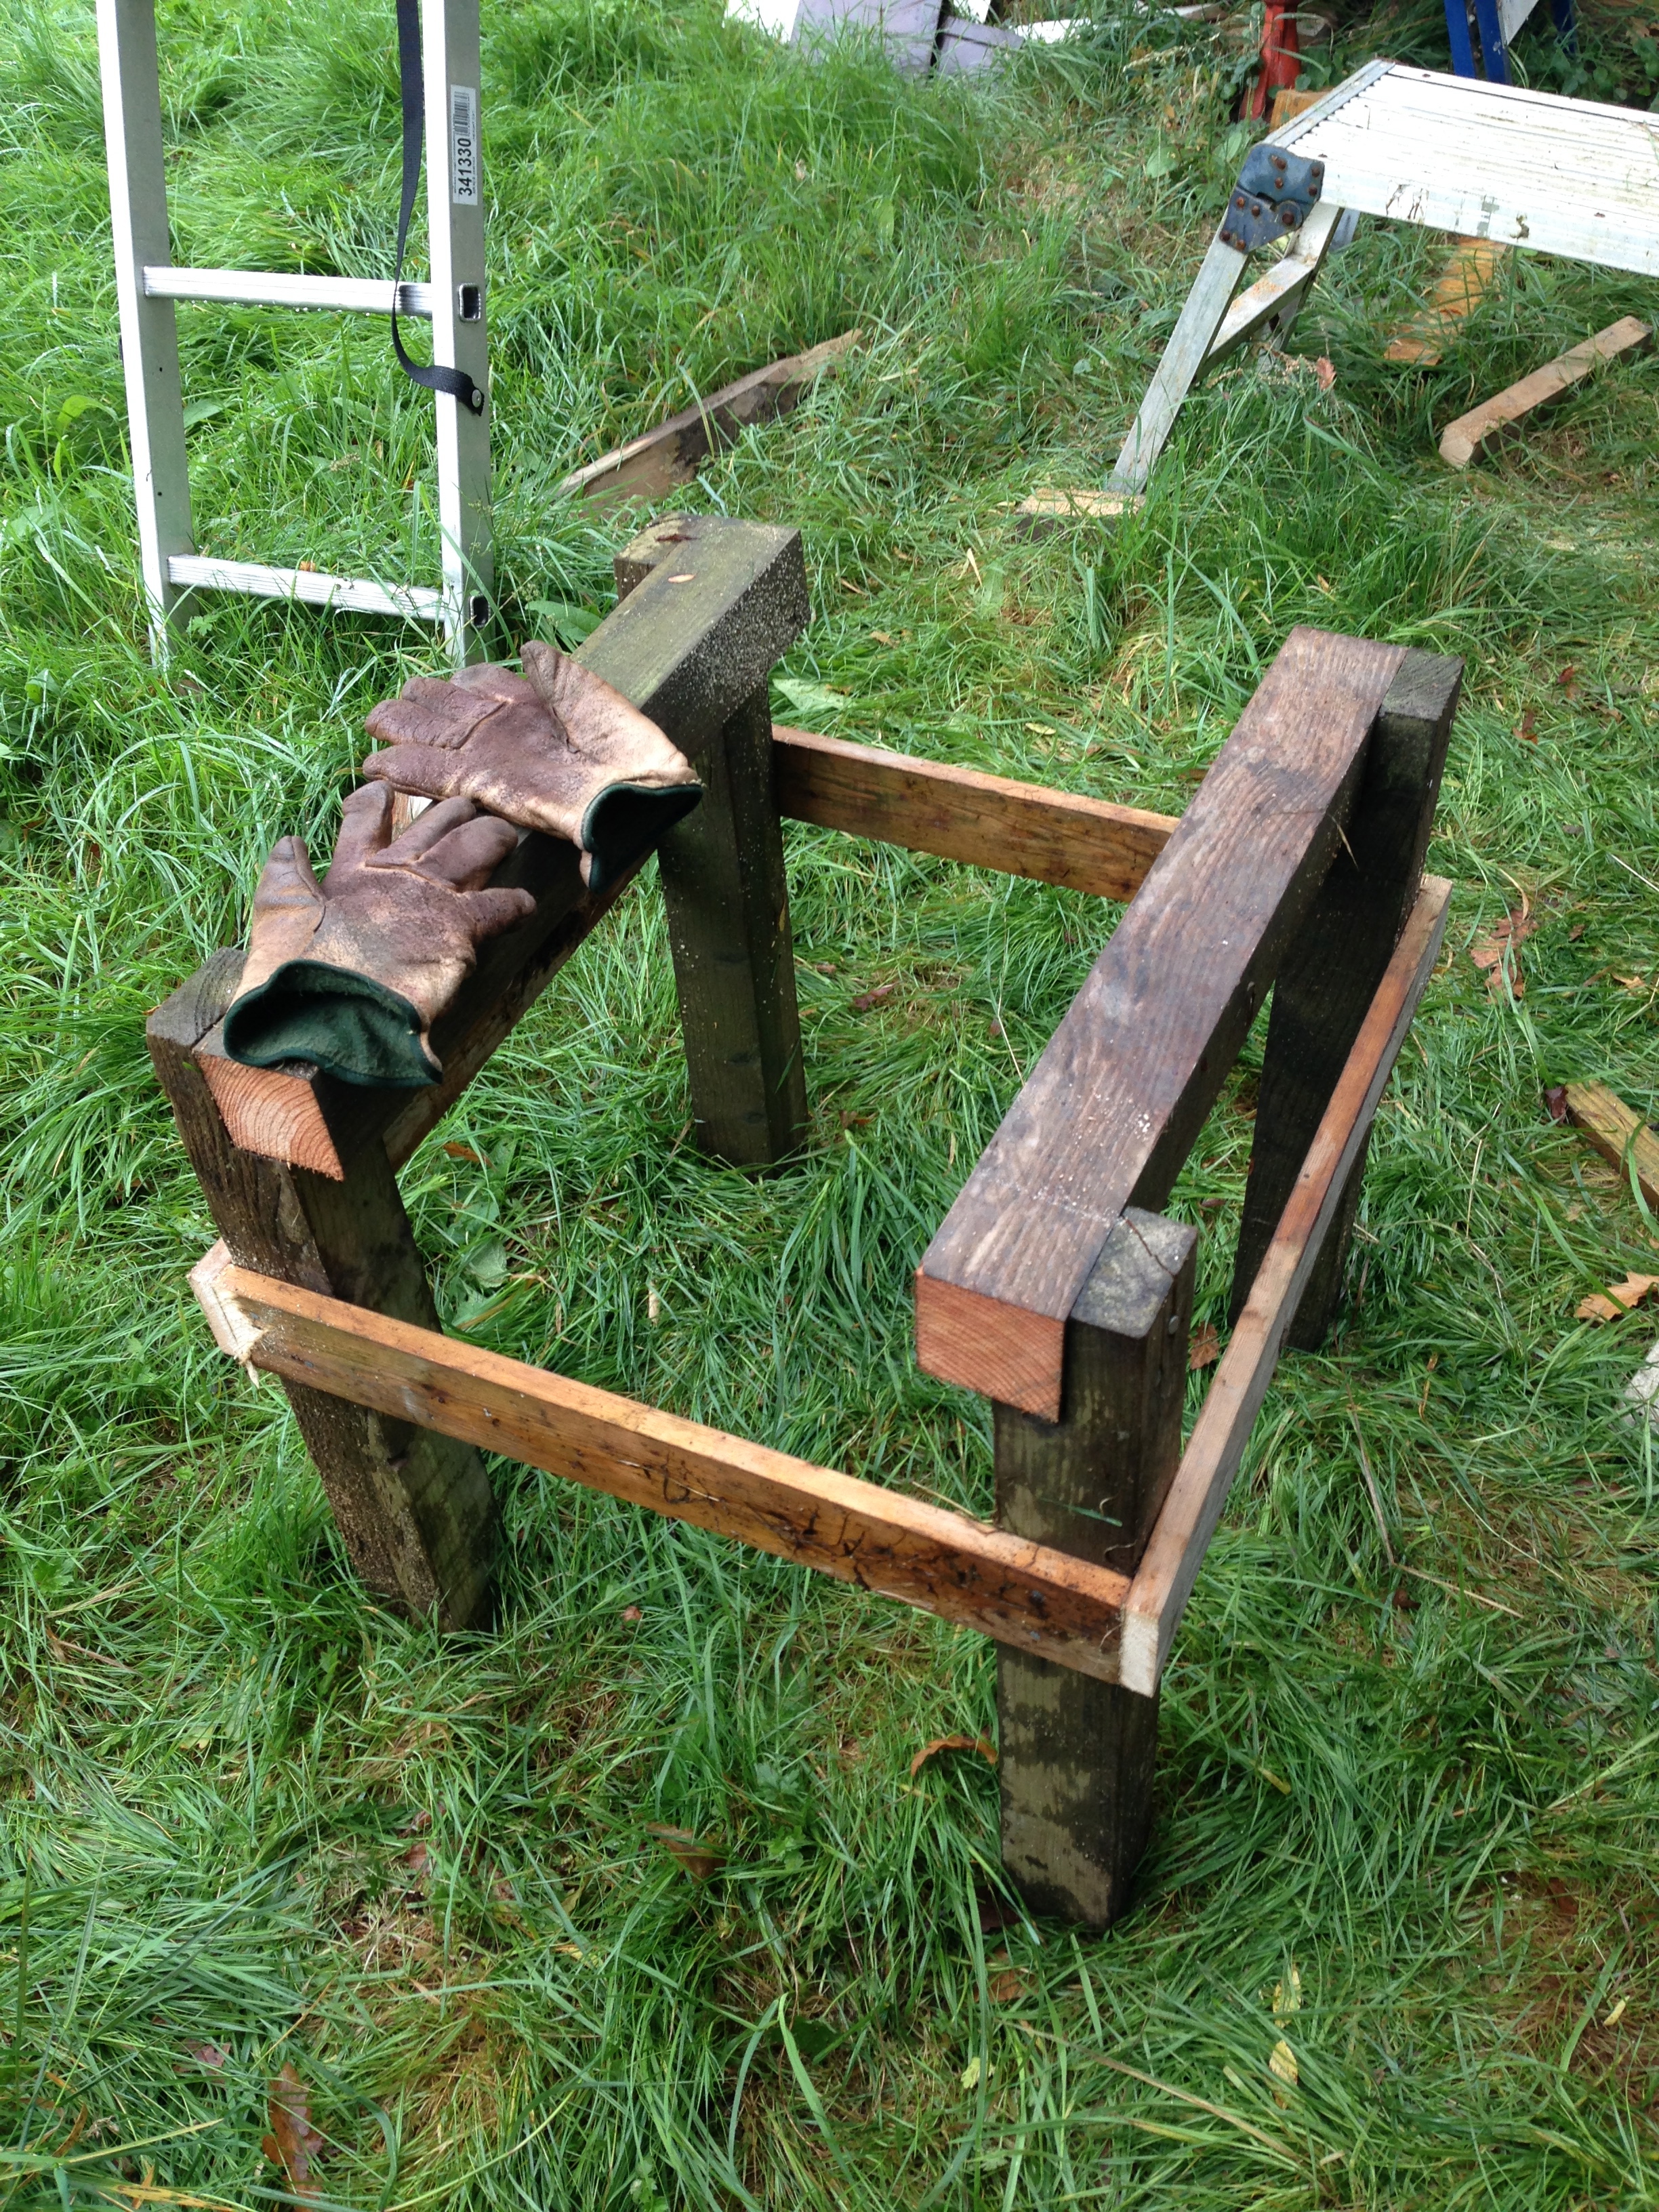
The summer seems to have slipped away in a haze of holidays and lawn mowing, but without much progress on Flamingo, and now, as we sink slowly into what Keats may have called the season of mists and mellow fruitfulness, but in our dark little valley is a time of mould and mildewed futility, I am slightly regretting the lost time. Still, the weekend saw me tackle a job that has been on my mind for a while, namely the engine. It is an almost new Beta Marine 14 that has spent the last two years languishing in the shed and before that a year or so in Peter Gregson’s (www.woodenships.co.uk) cellar. I was concerned that the damp and cold of yet another winter without starting would be having a detrimental effect. A quick query to ybw Forum and an email to Beta Marine reinforced this fear and I quickly knocked up a frame for it to stand on. Apparently turning it over by hand once or twice a month will be enough to keep it lubricated and moving freely.
Rustic, but functional.
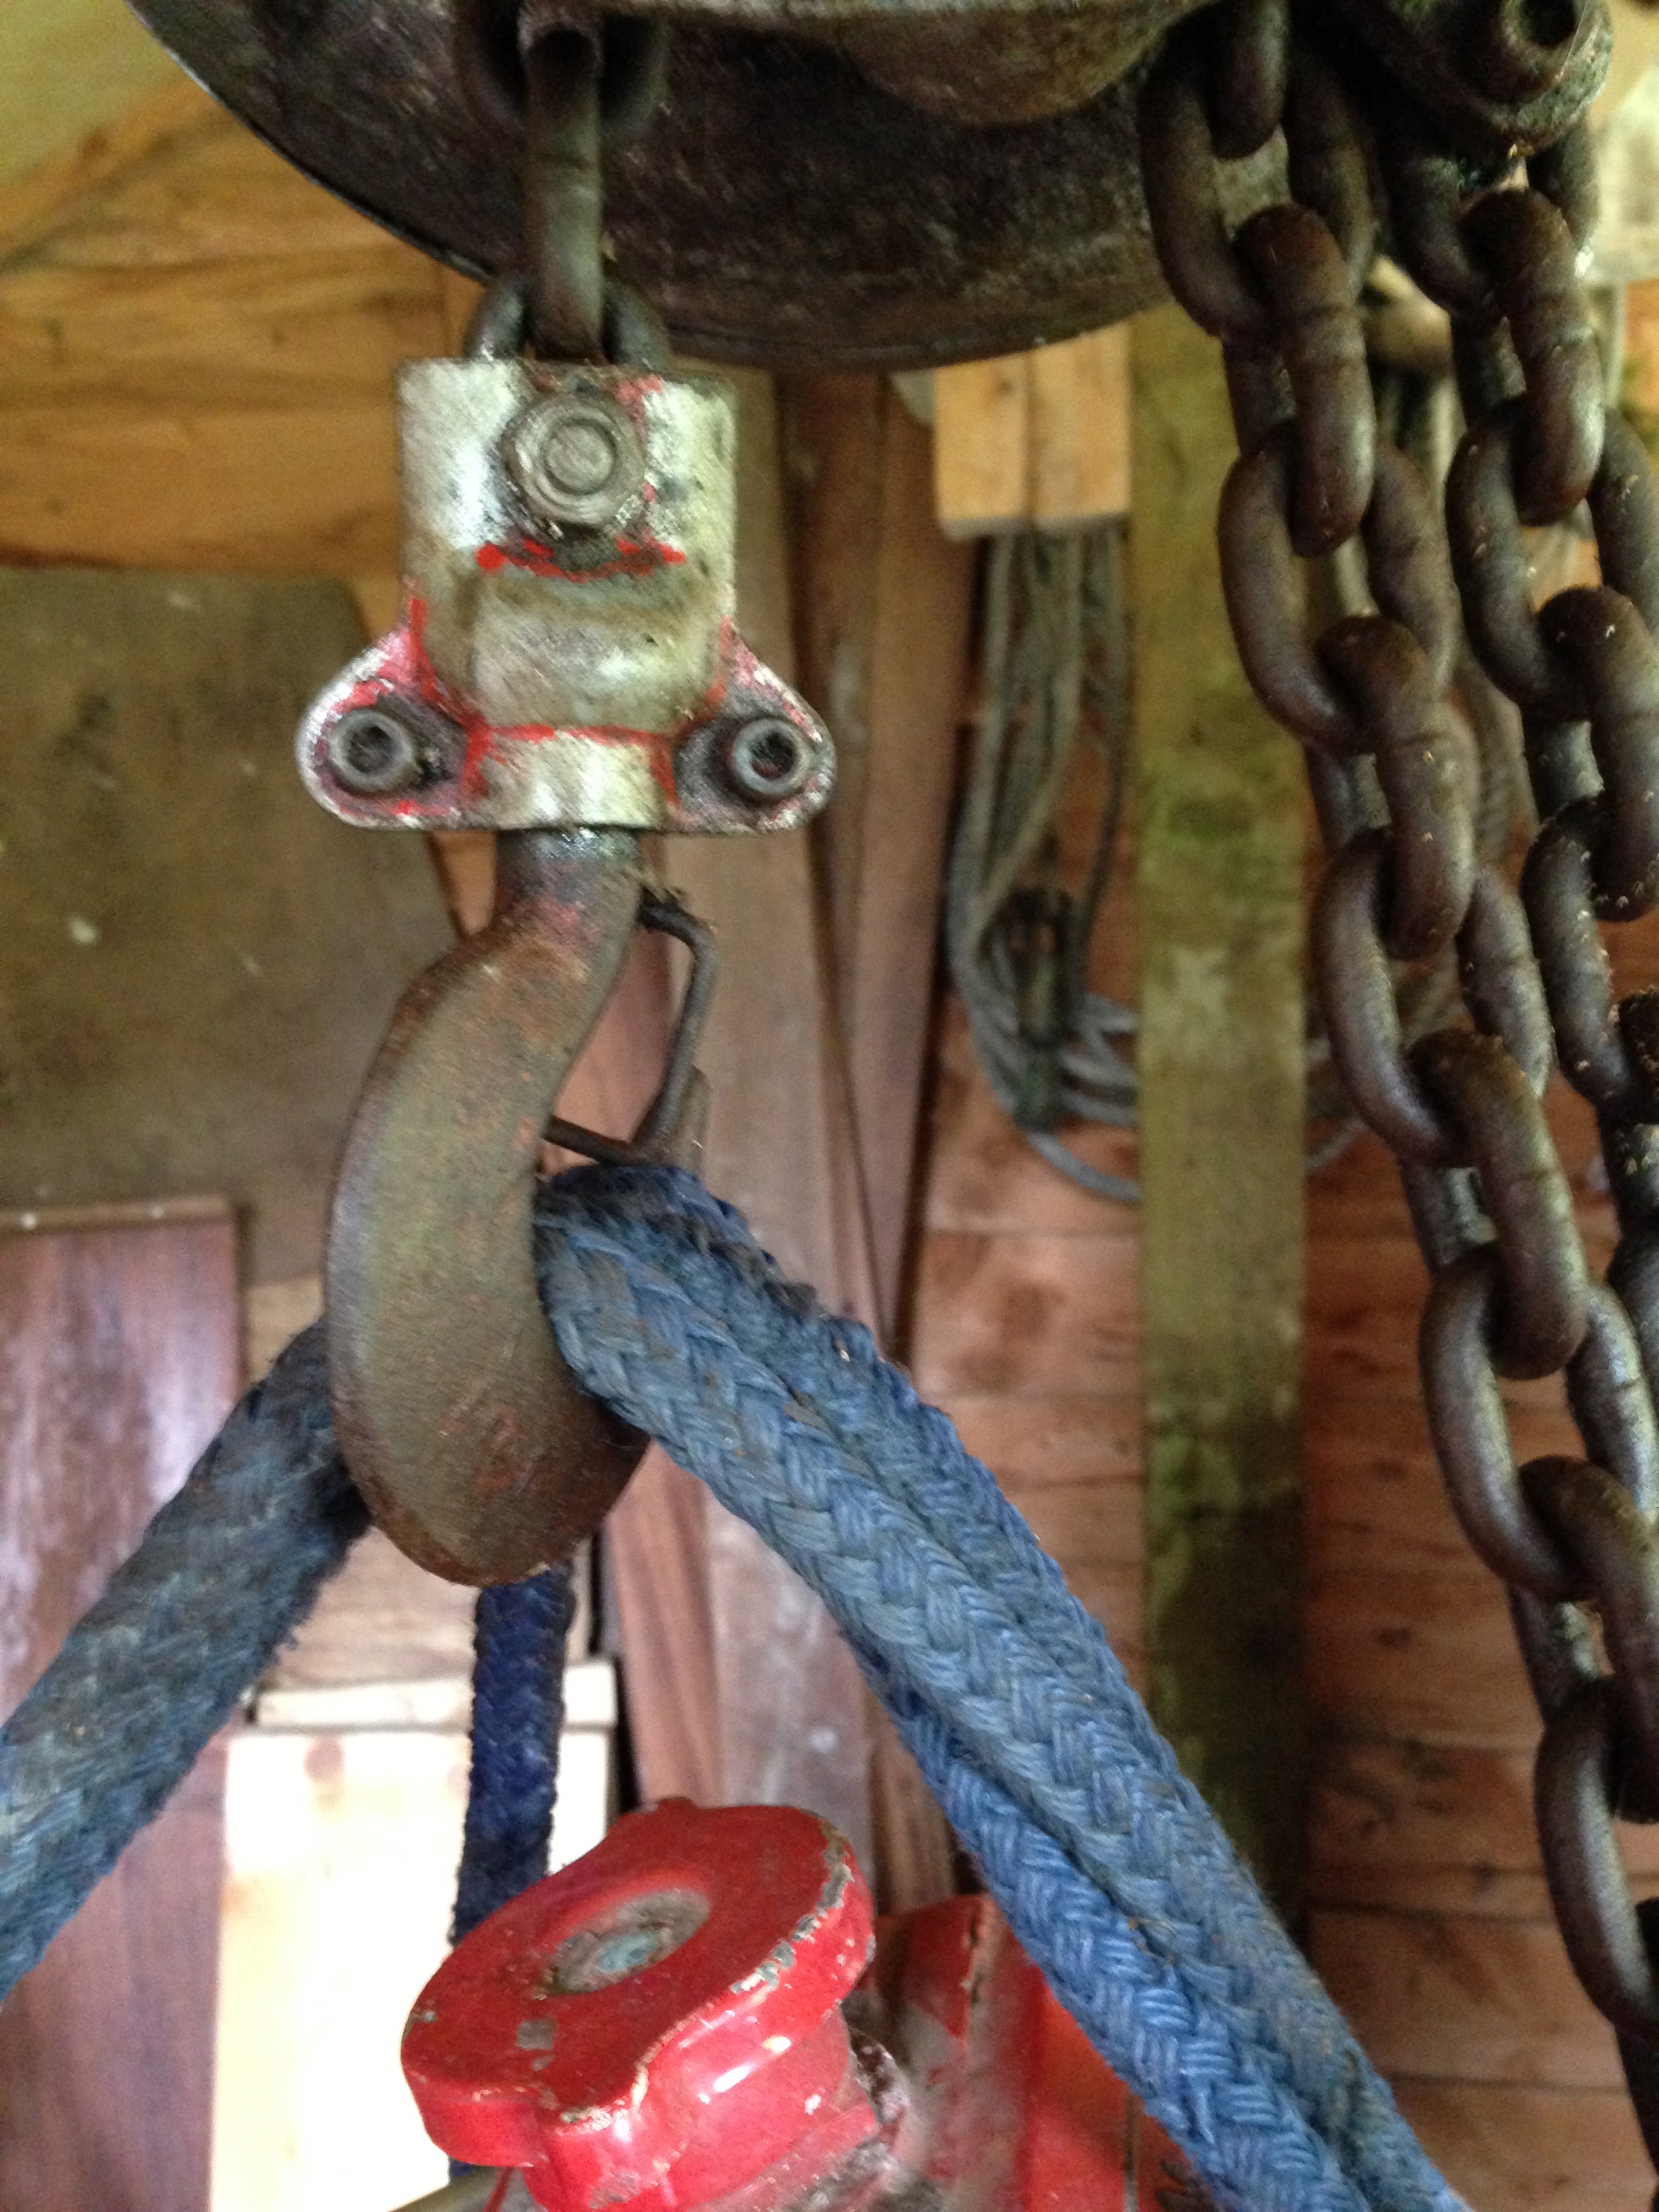
Then, realising that no matter how much gym time I put in, lifting 90kg of engine on my own was not going to happen I made a sturdy goal post out of the timber salvaged from the doomed boat shelter and using an ebay purchased chain hoist, hauled the beast into the air.
I really need a bigger shed
Obviously I carefully measured the distance, calculated the stretch in the rope, the height of the cross beam, the access for the frame and got it dead right. OK I guessed it all and luckily it worked… just.
With only a couple of links left, the engine was just high enough to slide the frame under!
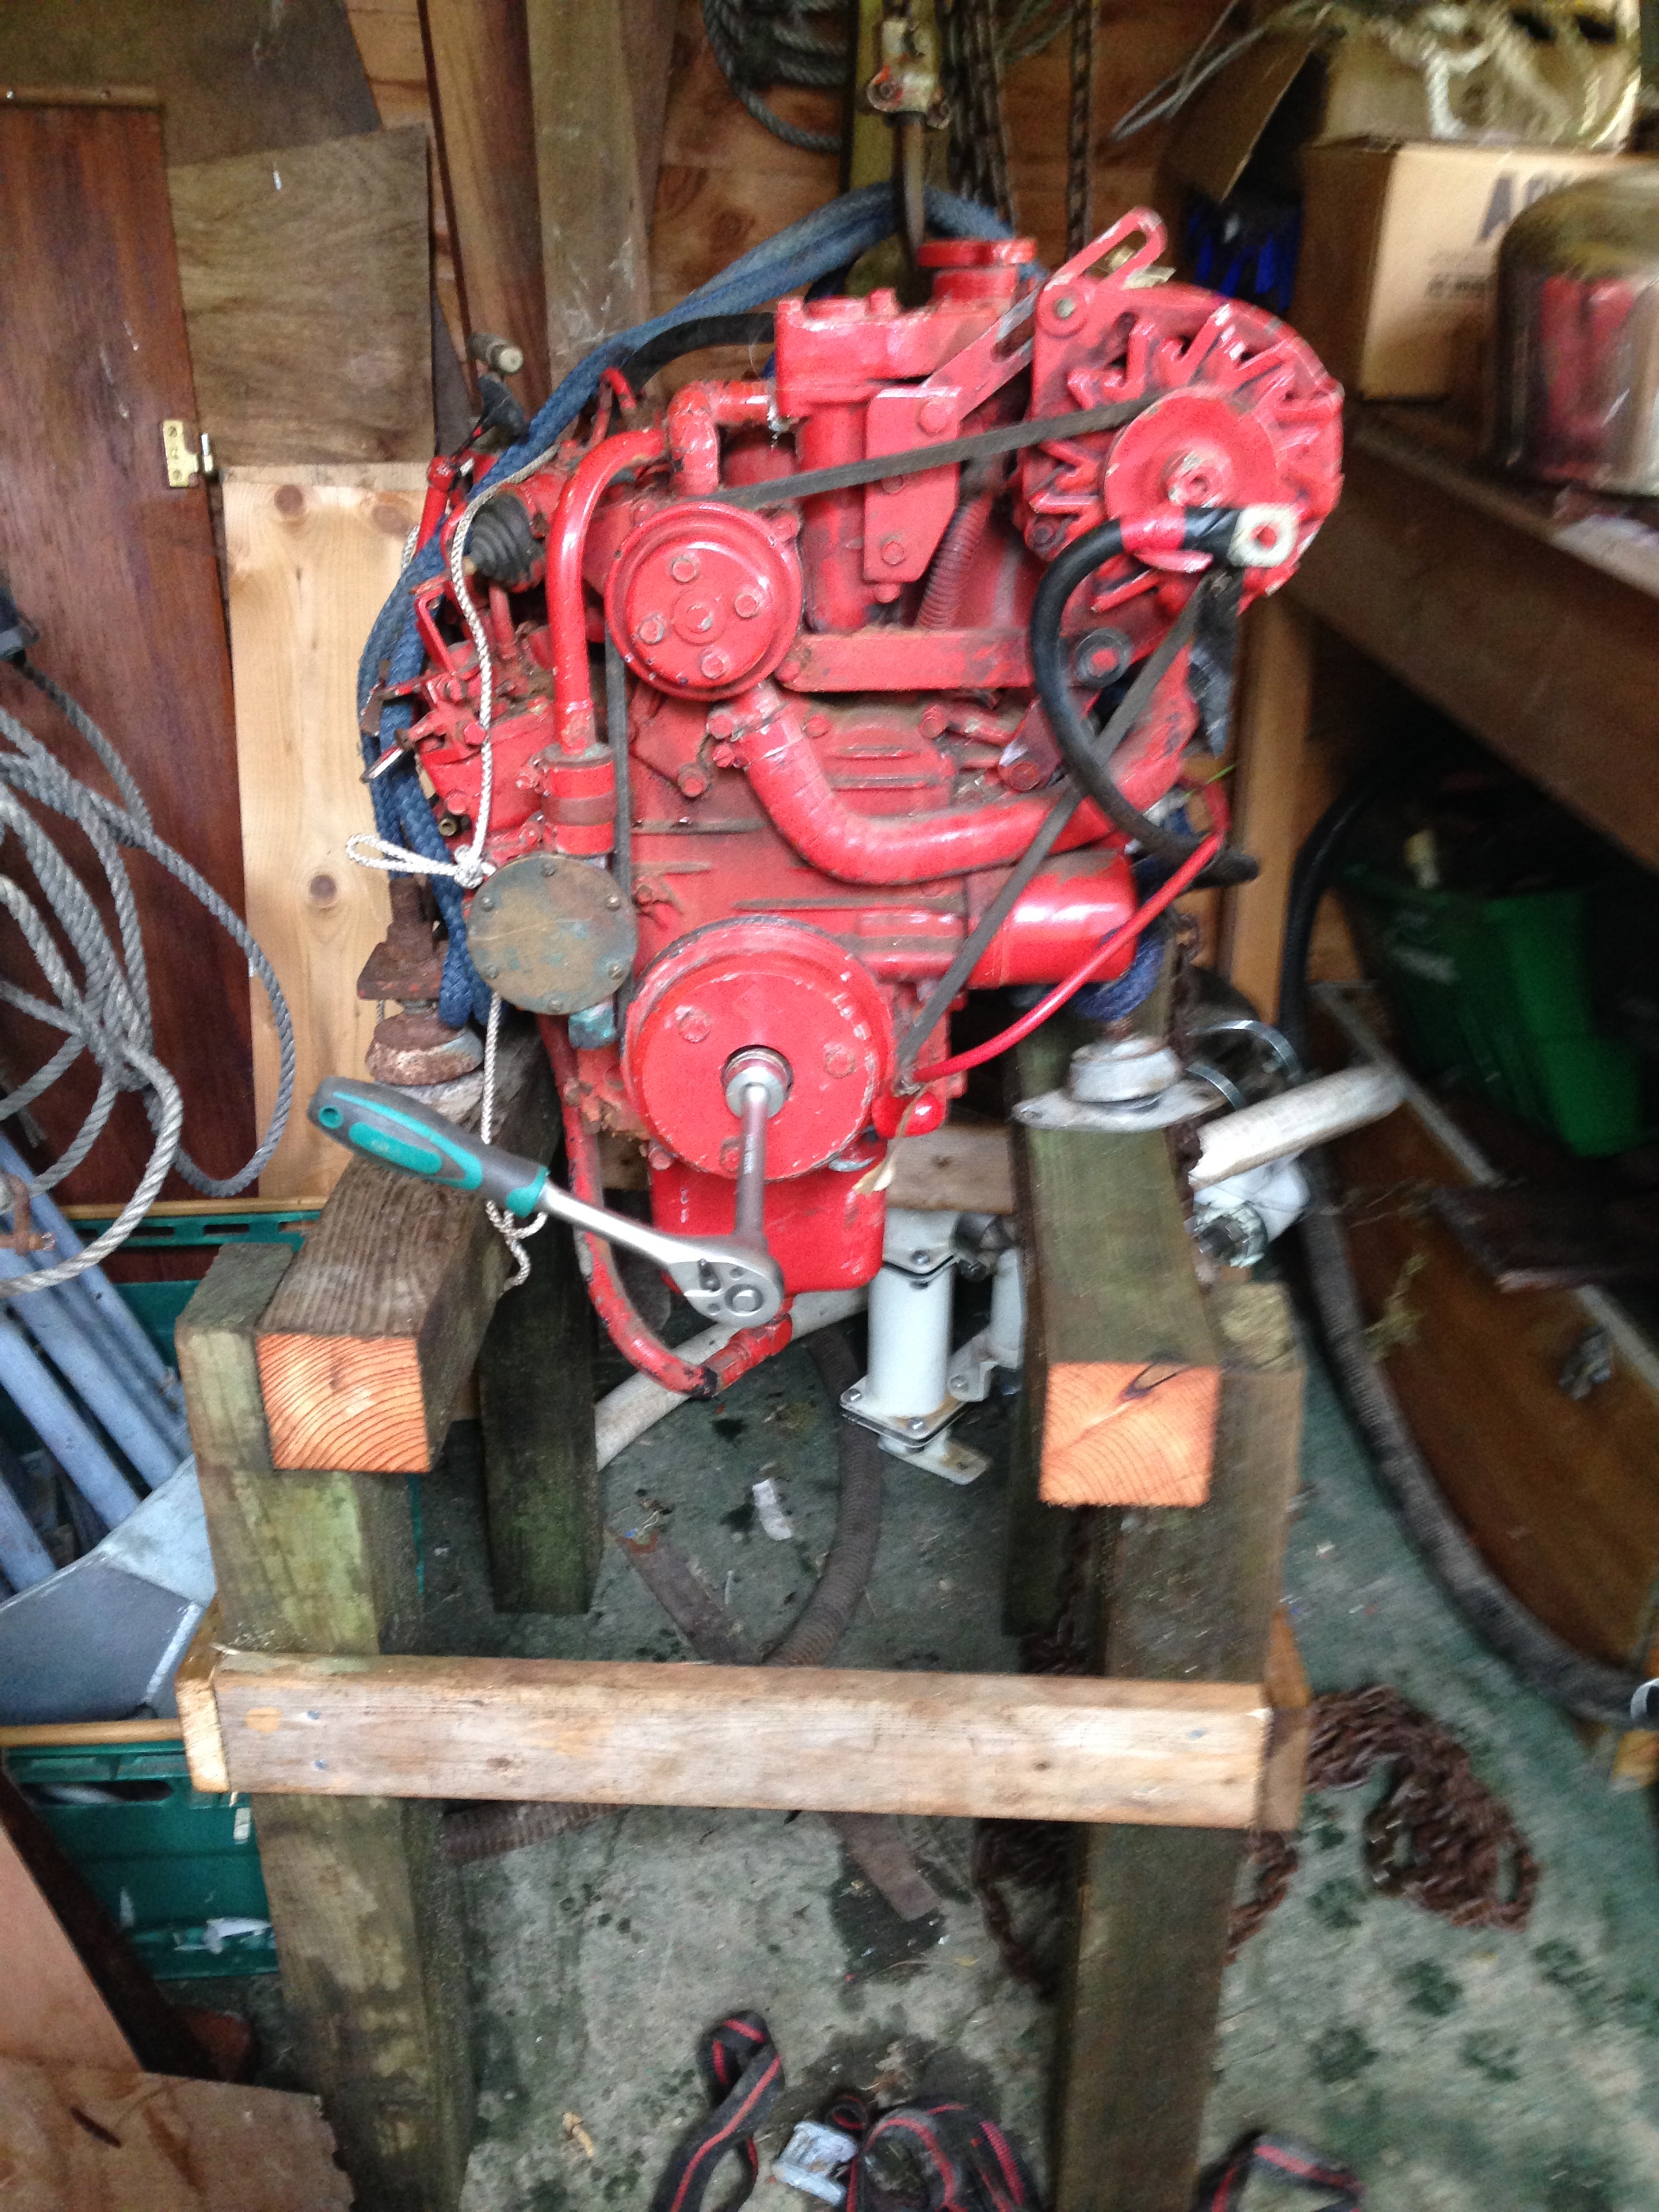
With the engine safely stored the right way up I tried turning it over by pulling the fan belt, no joy, using a spanner, still no joy. Back to email and ybw Forum for more advice (I really am a novice when it comes to engines) and the consensus is good compression is stopping me. “Simply” remove or loosen the injectors…. so next weekend if I get a chance I’ll see if I can discover the whereabouts of the injectors…
Upright, safe, but uncooperative.
After a week resting the right way up the issue has solved itself! I can now, with only a modicum of difficulty, turn the engine over. Back to working with something I understand, wood.
Marking out the remaining frames
cut out with the bandsaw
Having bought some more timber from Wealden Oak a great timber yard where there are mountains of off cuts that languish, valueless until someone like me turns up, whereupon, after a quick look up and down to assess the cut of my jib/size of my wallet and the barest hint of measuring, the proprietor declared; “£40”. I ‘d like to say I haggled him down mercilessly like a Berber in a Moroccan Carpet shop, but I probably just looked confused and a little resigned. He looked me up and down again and, perhaps noticing my frayed collar and dire need of a hair cut, randomly tapped his calculator again and said, “my mistake, £30”.
Back at the workshop I cut out the remaining sections of frames, then it was back to the boat to remove more screws from the old frames. They look in reasonable condition and though I might feel happier replacing them with new ones, the cost of bronze screws might be prohibitive!
there are 100+ screws in various states that probably should be replaced…£££! not forgetting the 60+ Bronze coach bolts! 😦
Meanwhile the Oxalic Acid I bought to remove some stains from the cabin trunk has been put to a different use; lighting this kitchen table. It will always be a knotty pine table but after scraping off the accumulated stains of colouring pens, curry, red wine and oil, and a couple of treatments of acid it lost its ‘orange’ hue.
the kitchen table mid treatment
So not a very boat busy summer really, time seems to have compressed it into the blink of an eye, the mornings are dark now on my way to work and the evenings dark on my way back. Looking on the bright side the sky was alight with a sliver of moon and millions of stars this morning, lack of light pollution yet another advantage of living out here in the sticks. Hopefully now the garden is making less demands on my time I’ll get more done. Of course, though there is always something higher up the list of priorities, not all of it is unwelcome…like some actual sailing!
Distractions come thick and fast, half term has been and gone but not without some progress being made.
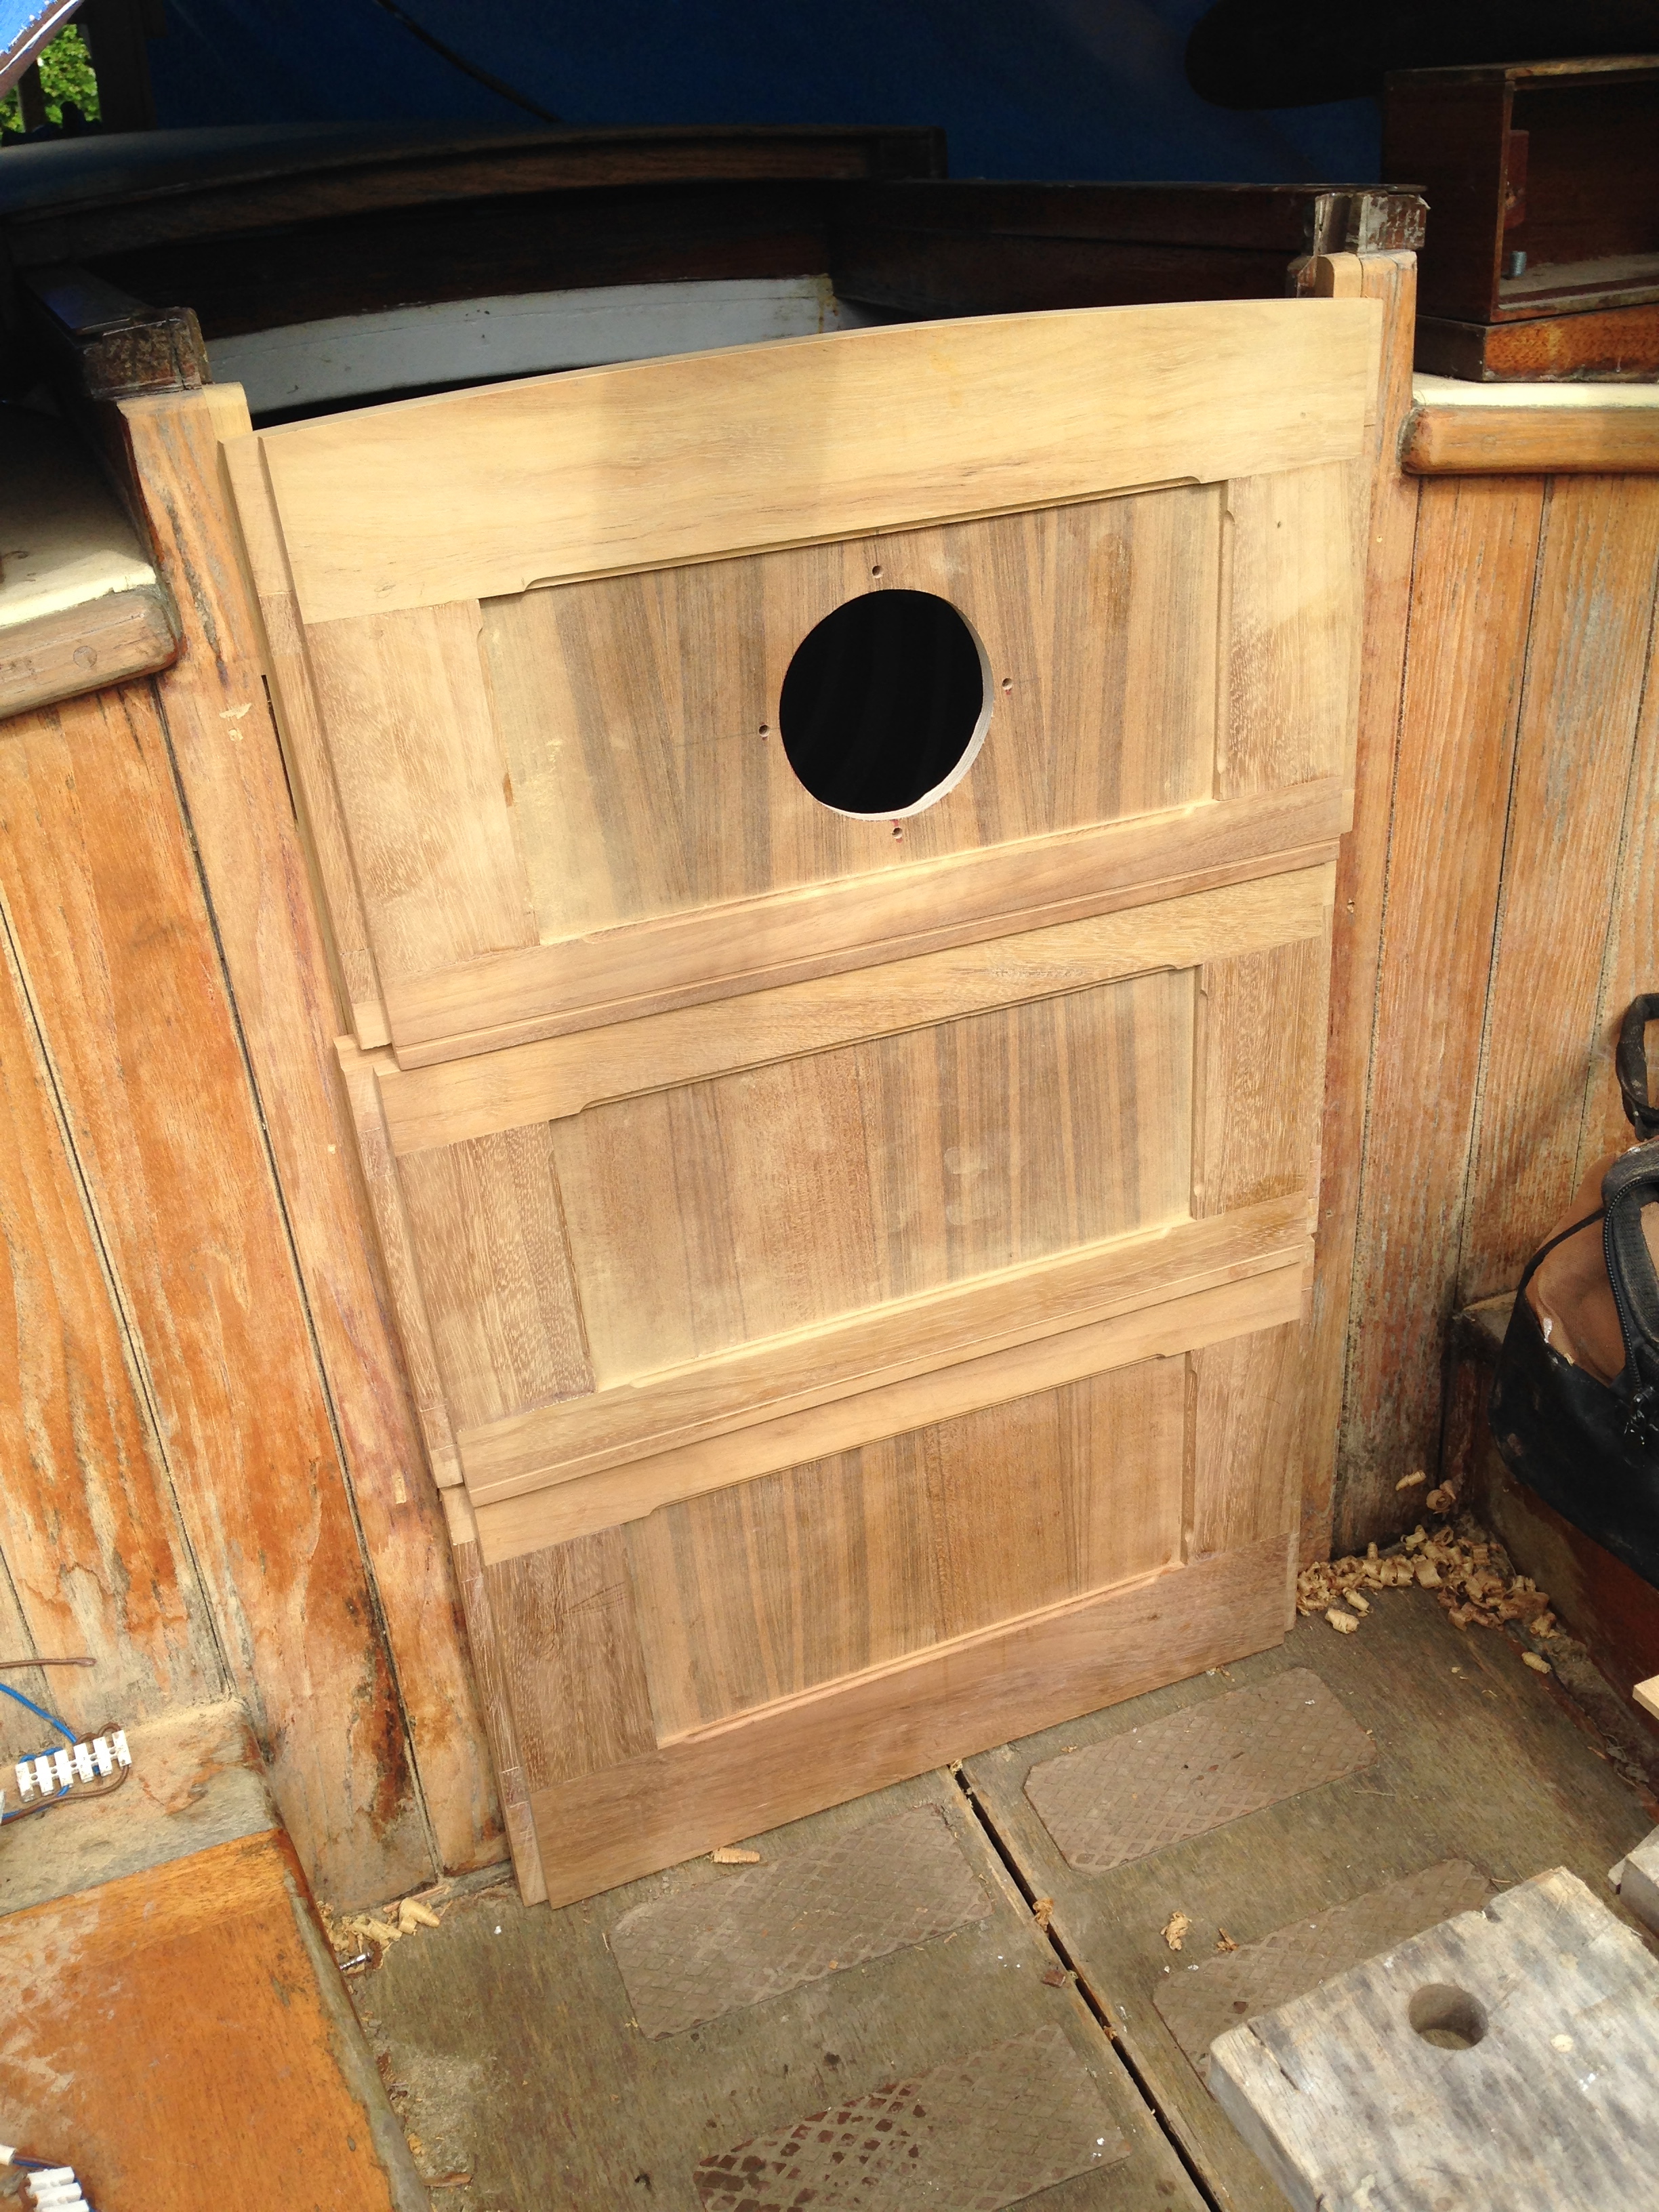
Washboards fitted
Unsightly holes left by the door hinges
Fillets of teak glued in.
Planed and sanded flush.
Screw holes filled with teak grain plugs
Distractions
Regular readers (oh alright who am I kidding, reader), may remember this picture from a previous post.
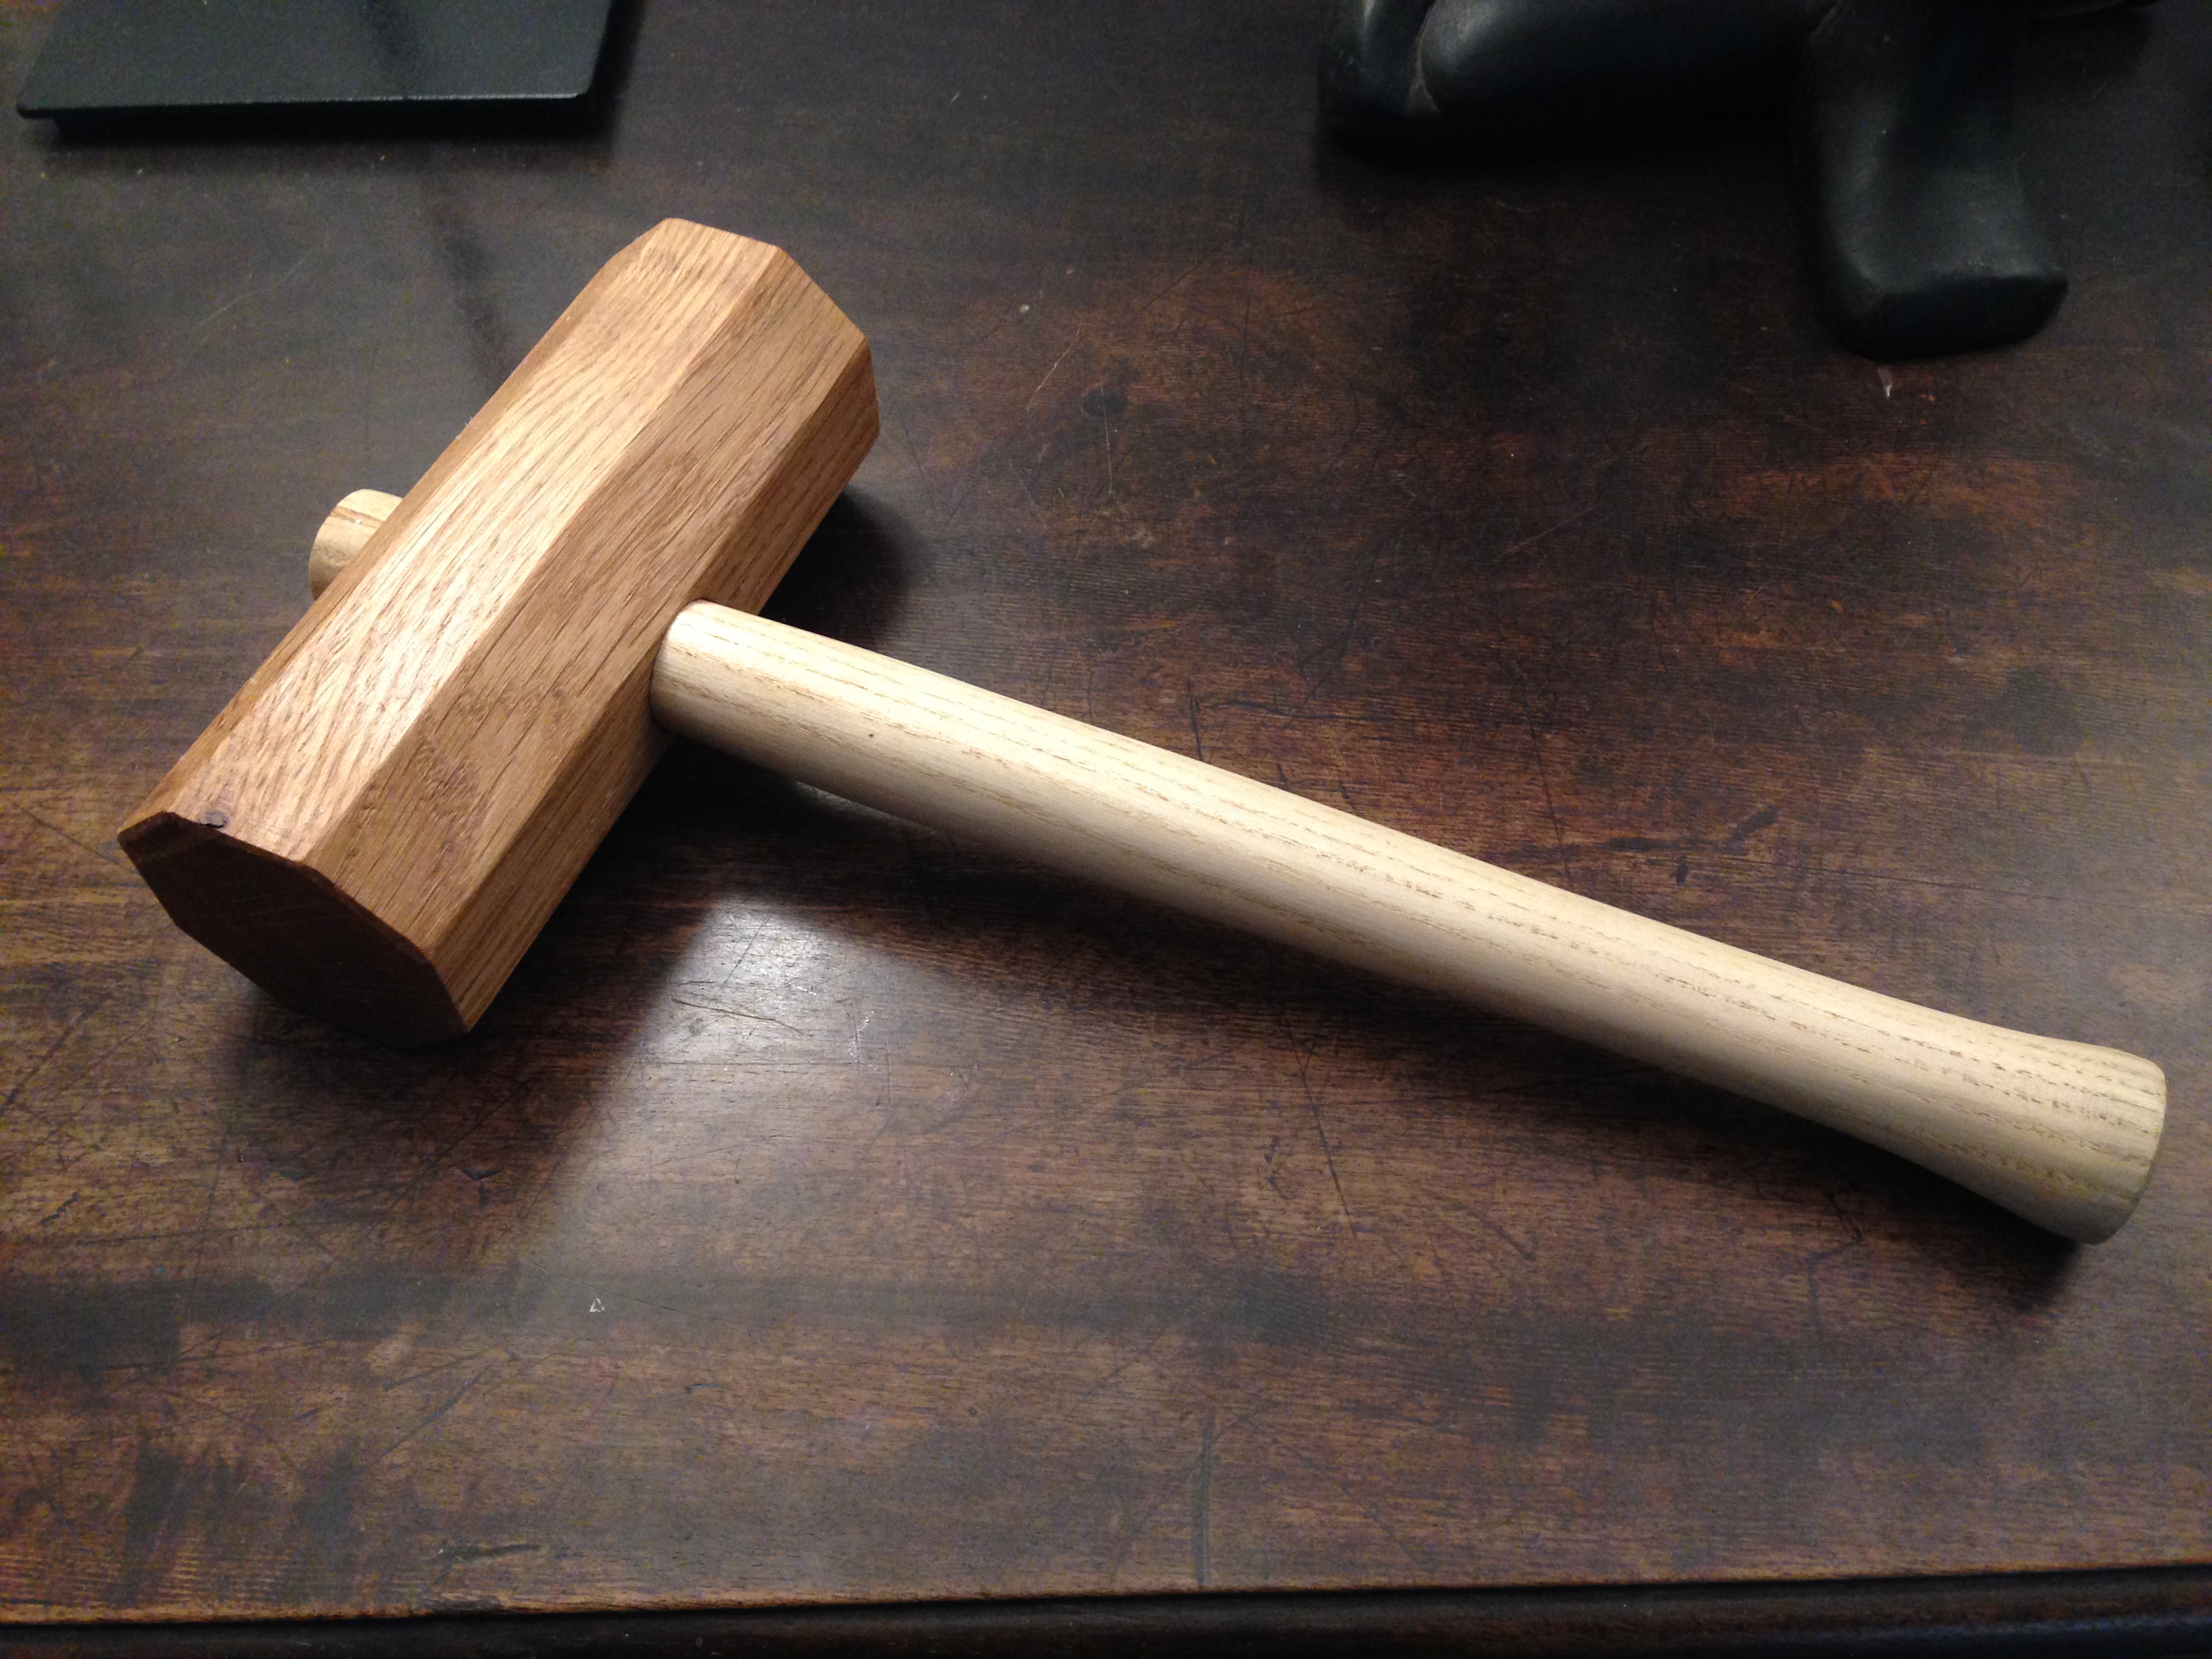
the sad demise of the first tool I ever made…. back in 1981
I broke my old mallet a while ago and to split a piece of Oak to make a the head of a replacement it I needed a…. well a mallet…..with what shall I hit it dear Liza dear Liza? Luckily as a man who firmly believes you can’t have too many tools, I have another rather cumbersome mallet that is great for hitting things really hard but a bit weighty and awkward for lighter tasks.
An off cut from the Oak Barn, split with mallet and hatchet
Next step make the lump square, then octagonal. At this stage it reminded me of a croquet mallet and I decided to leave it that shape.
Roughing the lump of oak into an octagon
There is a limit to how much time I want to spend planing a knotty bit of oak so a quick trip to father’s workshop saw it sawn to a more even shape and sanded on the disc sander. Next a handle; an old broken spade handle provided the raw material and after a lot of work with the spokeshave I had a lovely ash handle. It’s actually very therapeutic with a sharp blade and clear idea of the shape you want, repetitive but really satisfying.
Hole drilled and handle roughed out.
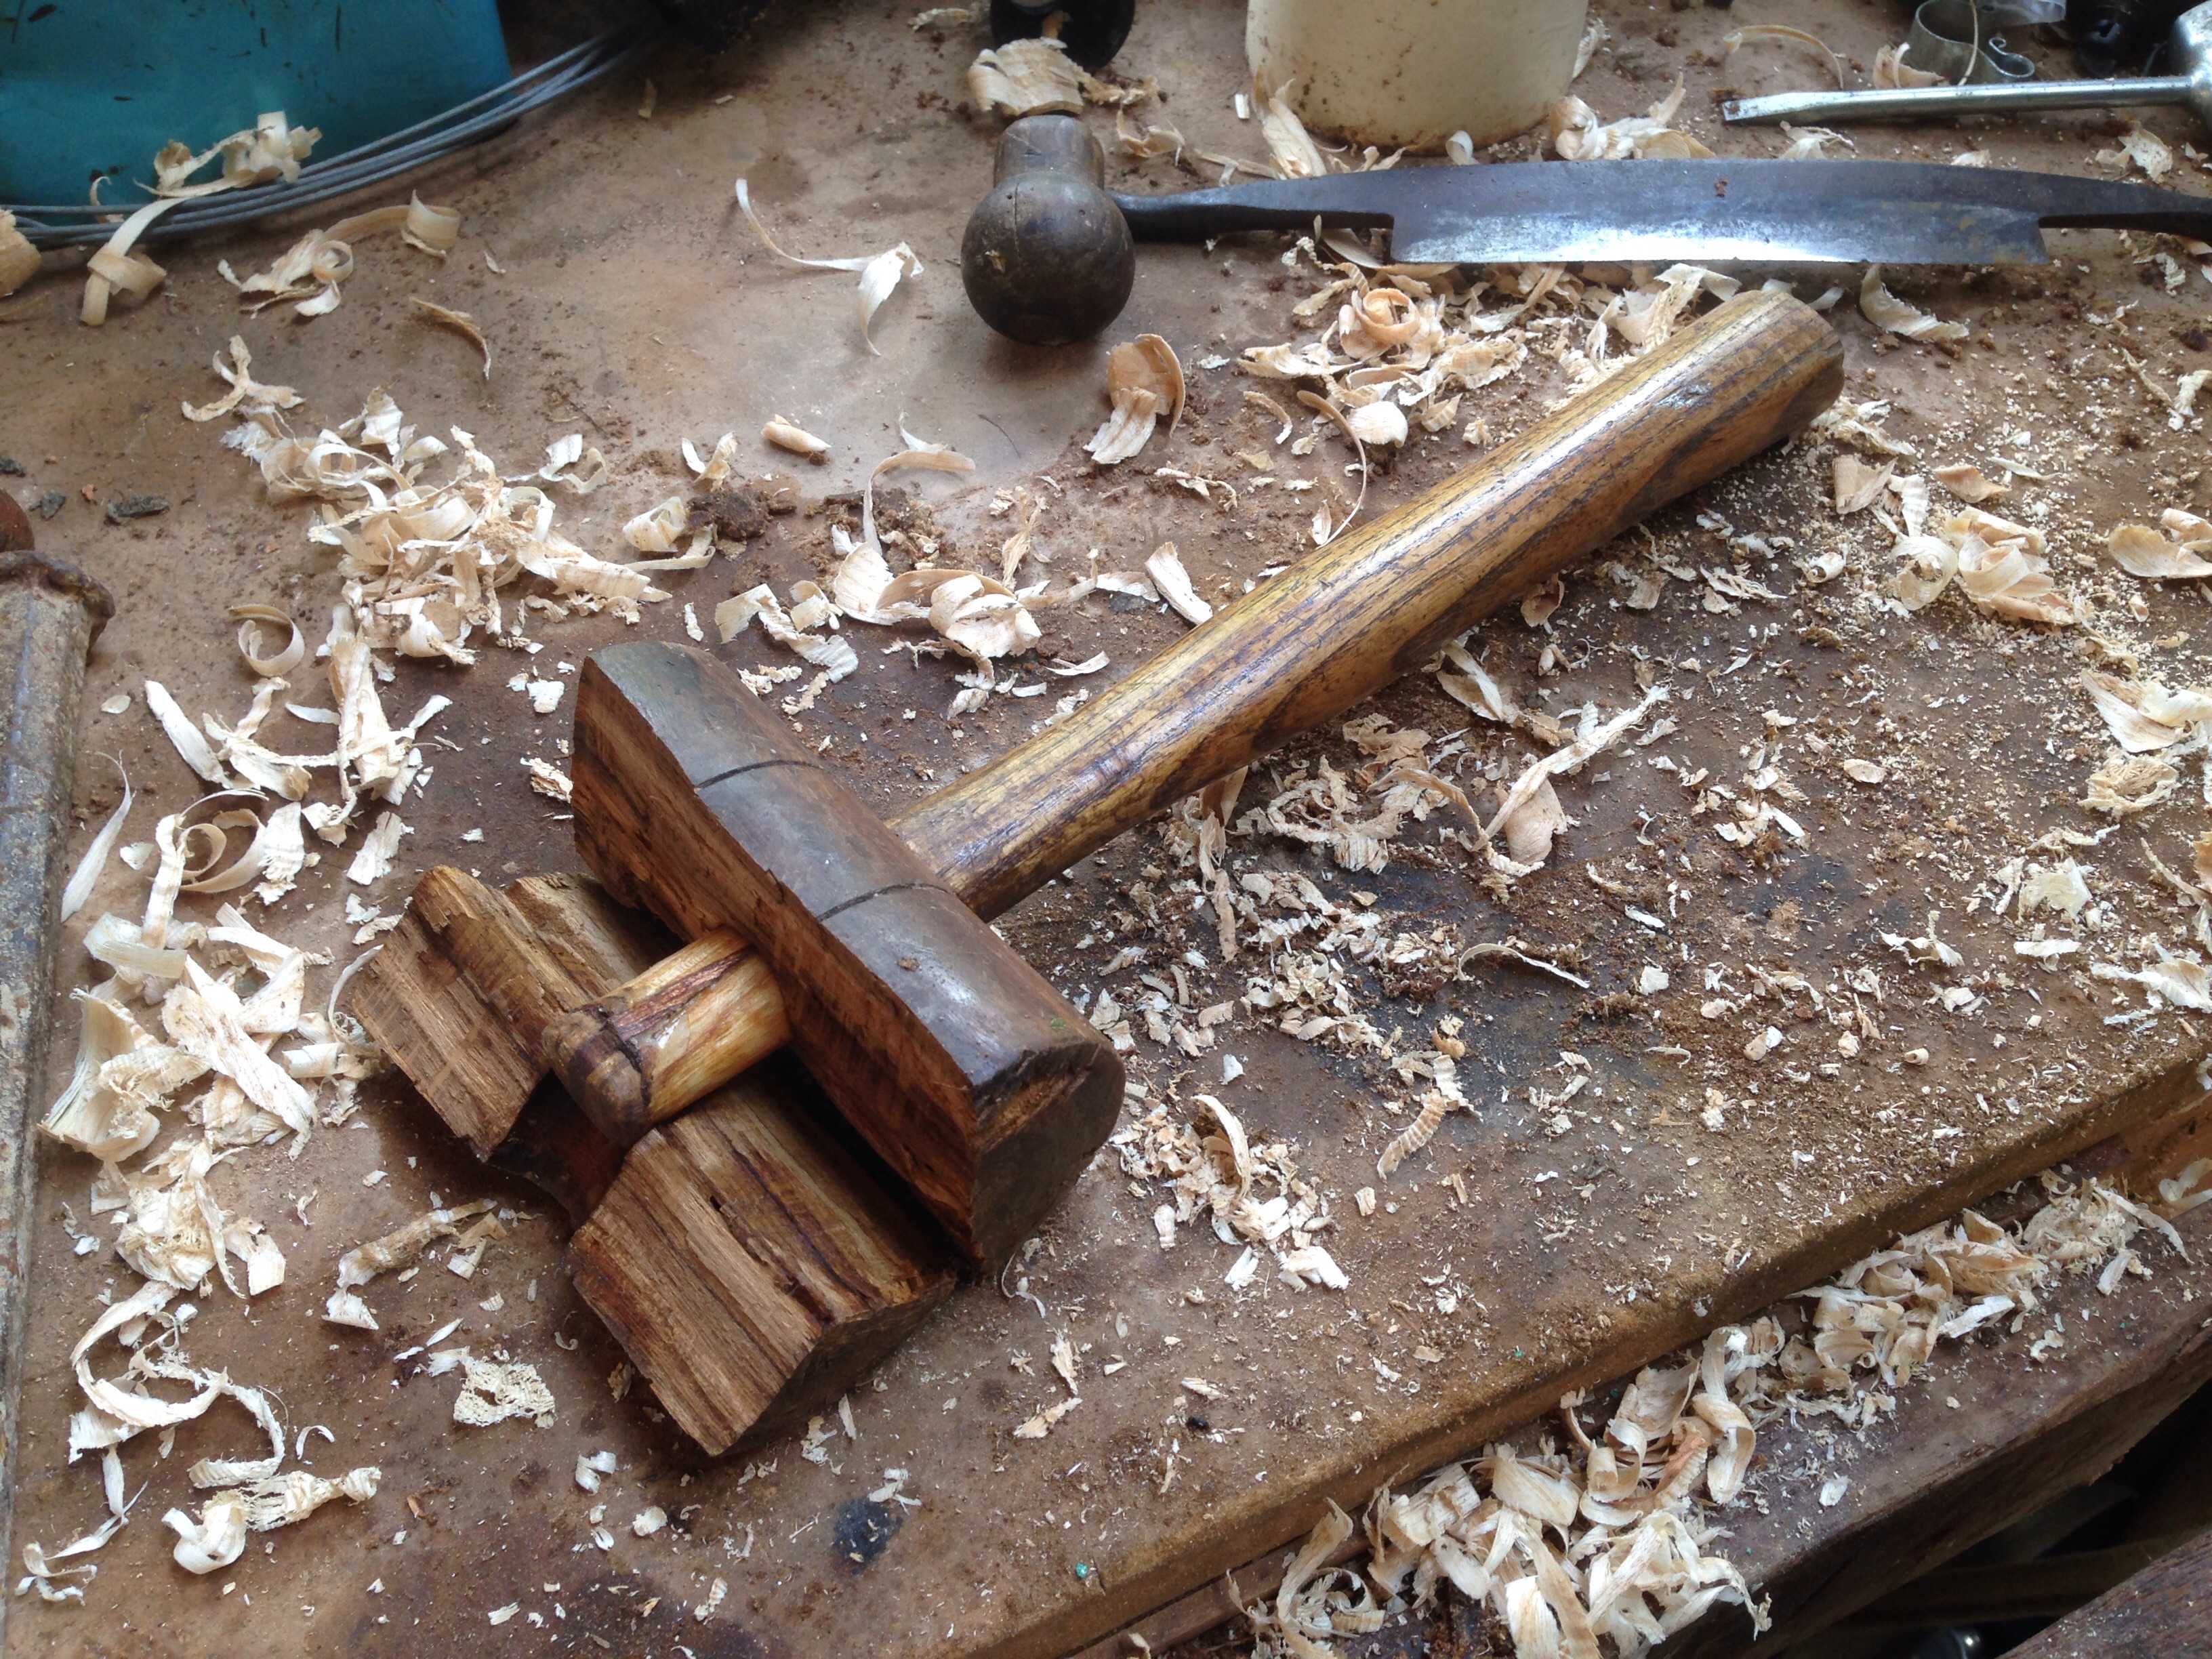
A small saw cut in the end of the handle and an oak wedge to fix it in place, more spoke shaving and hefting it to feel how it handled, (pun!) and job done.
Handle and Head united
The spokeshave on the right has a rounded sole, it’s fiddly to get the blade just right with only very crude adjustment but once it is set up it’s a great little tool.
A lick of tung oil, (another one!) and here’s the finished article.
New Mallet
My children will bear testament as to how strangely excited and proud I am of this simple tool, some people might think 4 or 5 hours making something you can buy at your local DIY merchant for £6 is a foolish way to spend your time, but I’m not so sure. I spend my days designing studio sets for television, these transient structures only function is to look good, it really doesn’t matter how it is made, or what it’s made of, as long as it looks ok on camera and lasts a season. Getting from drawing board (Mac) to workshop, to studio, is a long, drawn out, torturous process of budget constraints, high level sign off, massaging senior egos and compromising the concept. By contrast the only design that went into this was subliminal, the materials are reused, there is no budget and its form is almost entirely dictated by its function. So I think this probably is a worthwhile use of my time and hopefully this one will last as long as its predecessor (33 years)
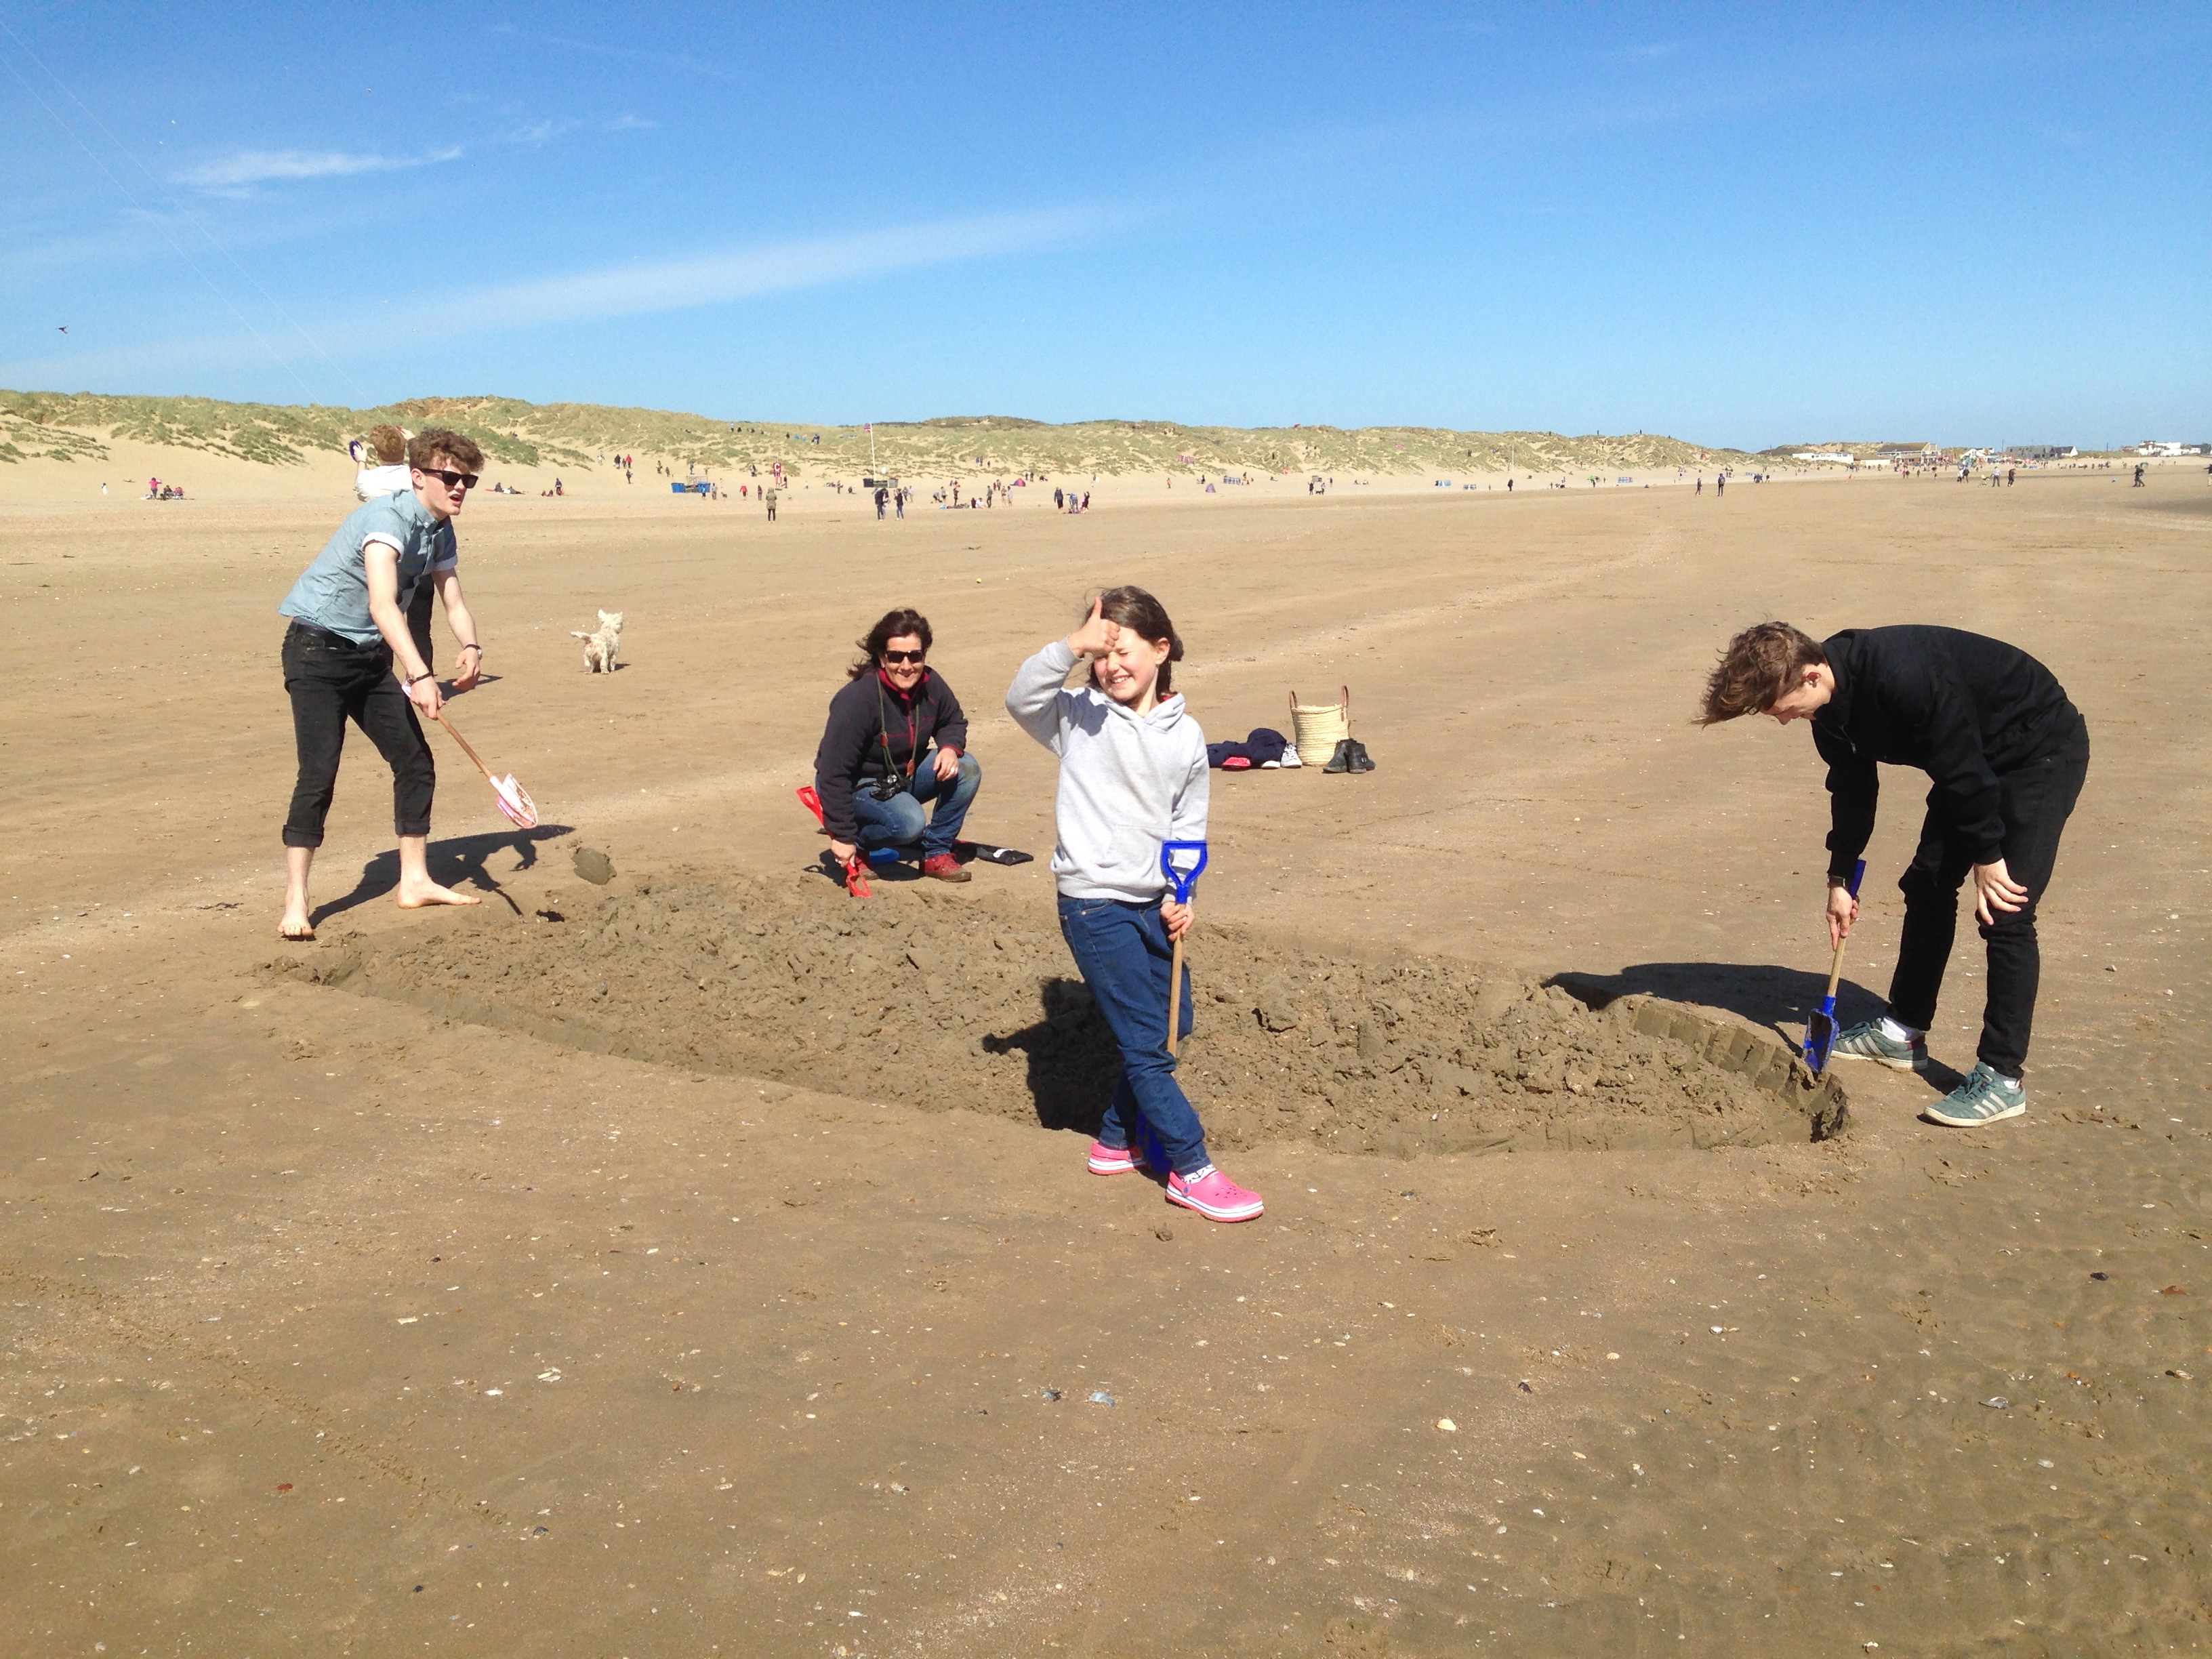
Spring brings longer, lighter, sunnier days, perfect for boat restorers…. also perfect for the garden to burst into life requiring boat restorers to spend rather a lot of their time mowing, strimming, clipping and digging instead of sanding, scraping, sawing and scarfing. Perfect too, for the sweet siren call of a day at the seaside to take precedence over Daddy’s shipwreck.
A different kind of Boatbuilding
A school sandcastle competition (none of that book learning rubbish at The Wells School) saw us building the traditional RR sand boat. Not that we’re competitive but, as the boys like to remind me. “if we’re in it we win it” We didn’t hang around, Canute like, to see the tide come in but with seashell styling like that, surely it would be unsinkable?
Boat Building on the beach
Traditional RR sand boat. Cowabunga!
Nature’s Bounty
The garden, woods and meadow really are bursting with new growth, some things I’ve never noticed before, like these flowers on a Spruce. It’s absolutely laden with them!
Spruce trees laden with flowers
With a cornucopia of fresh food bursting from the ground you have to wonder why the mice in the shed felt it worthwhile eating the lid of this Tung Oil Tin….
There are some very hungry mice with very strange appetites
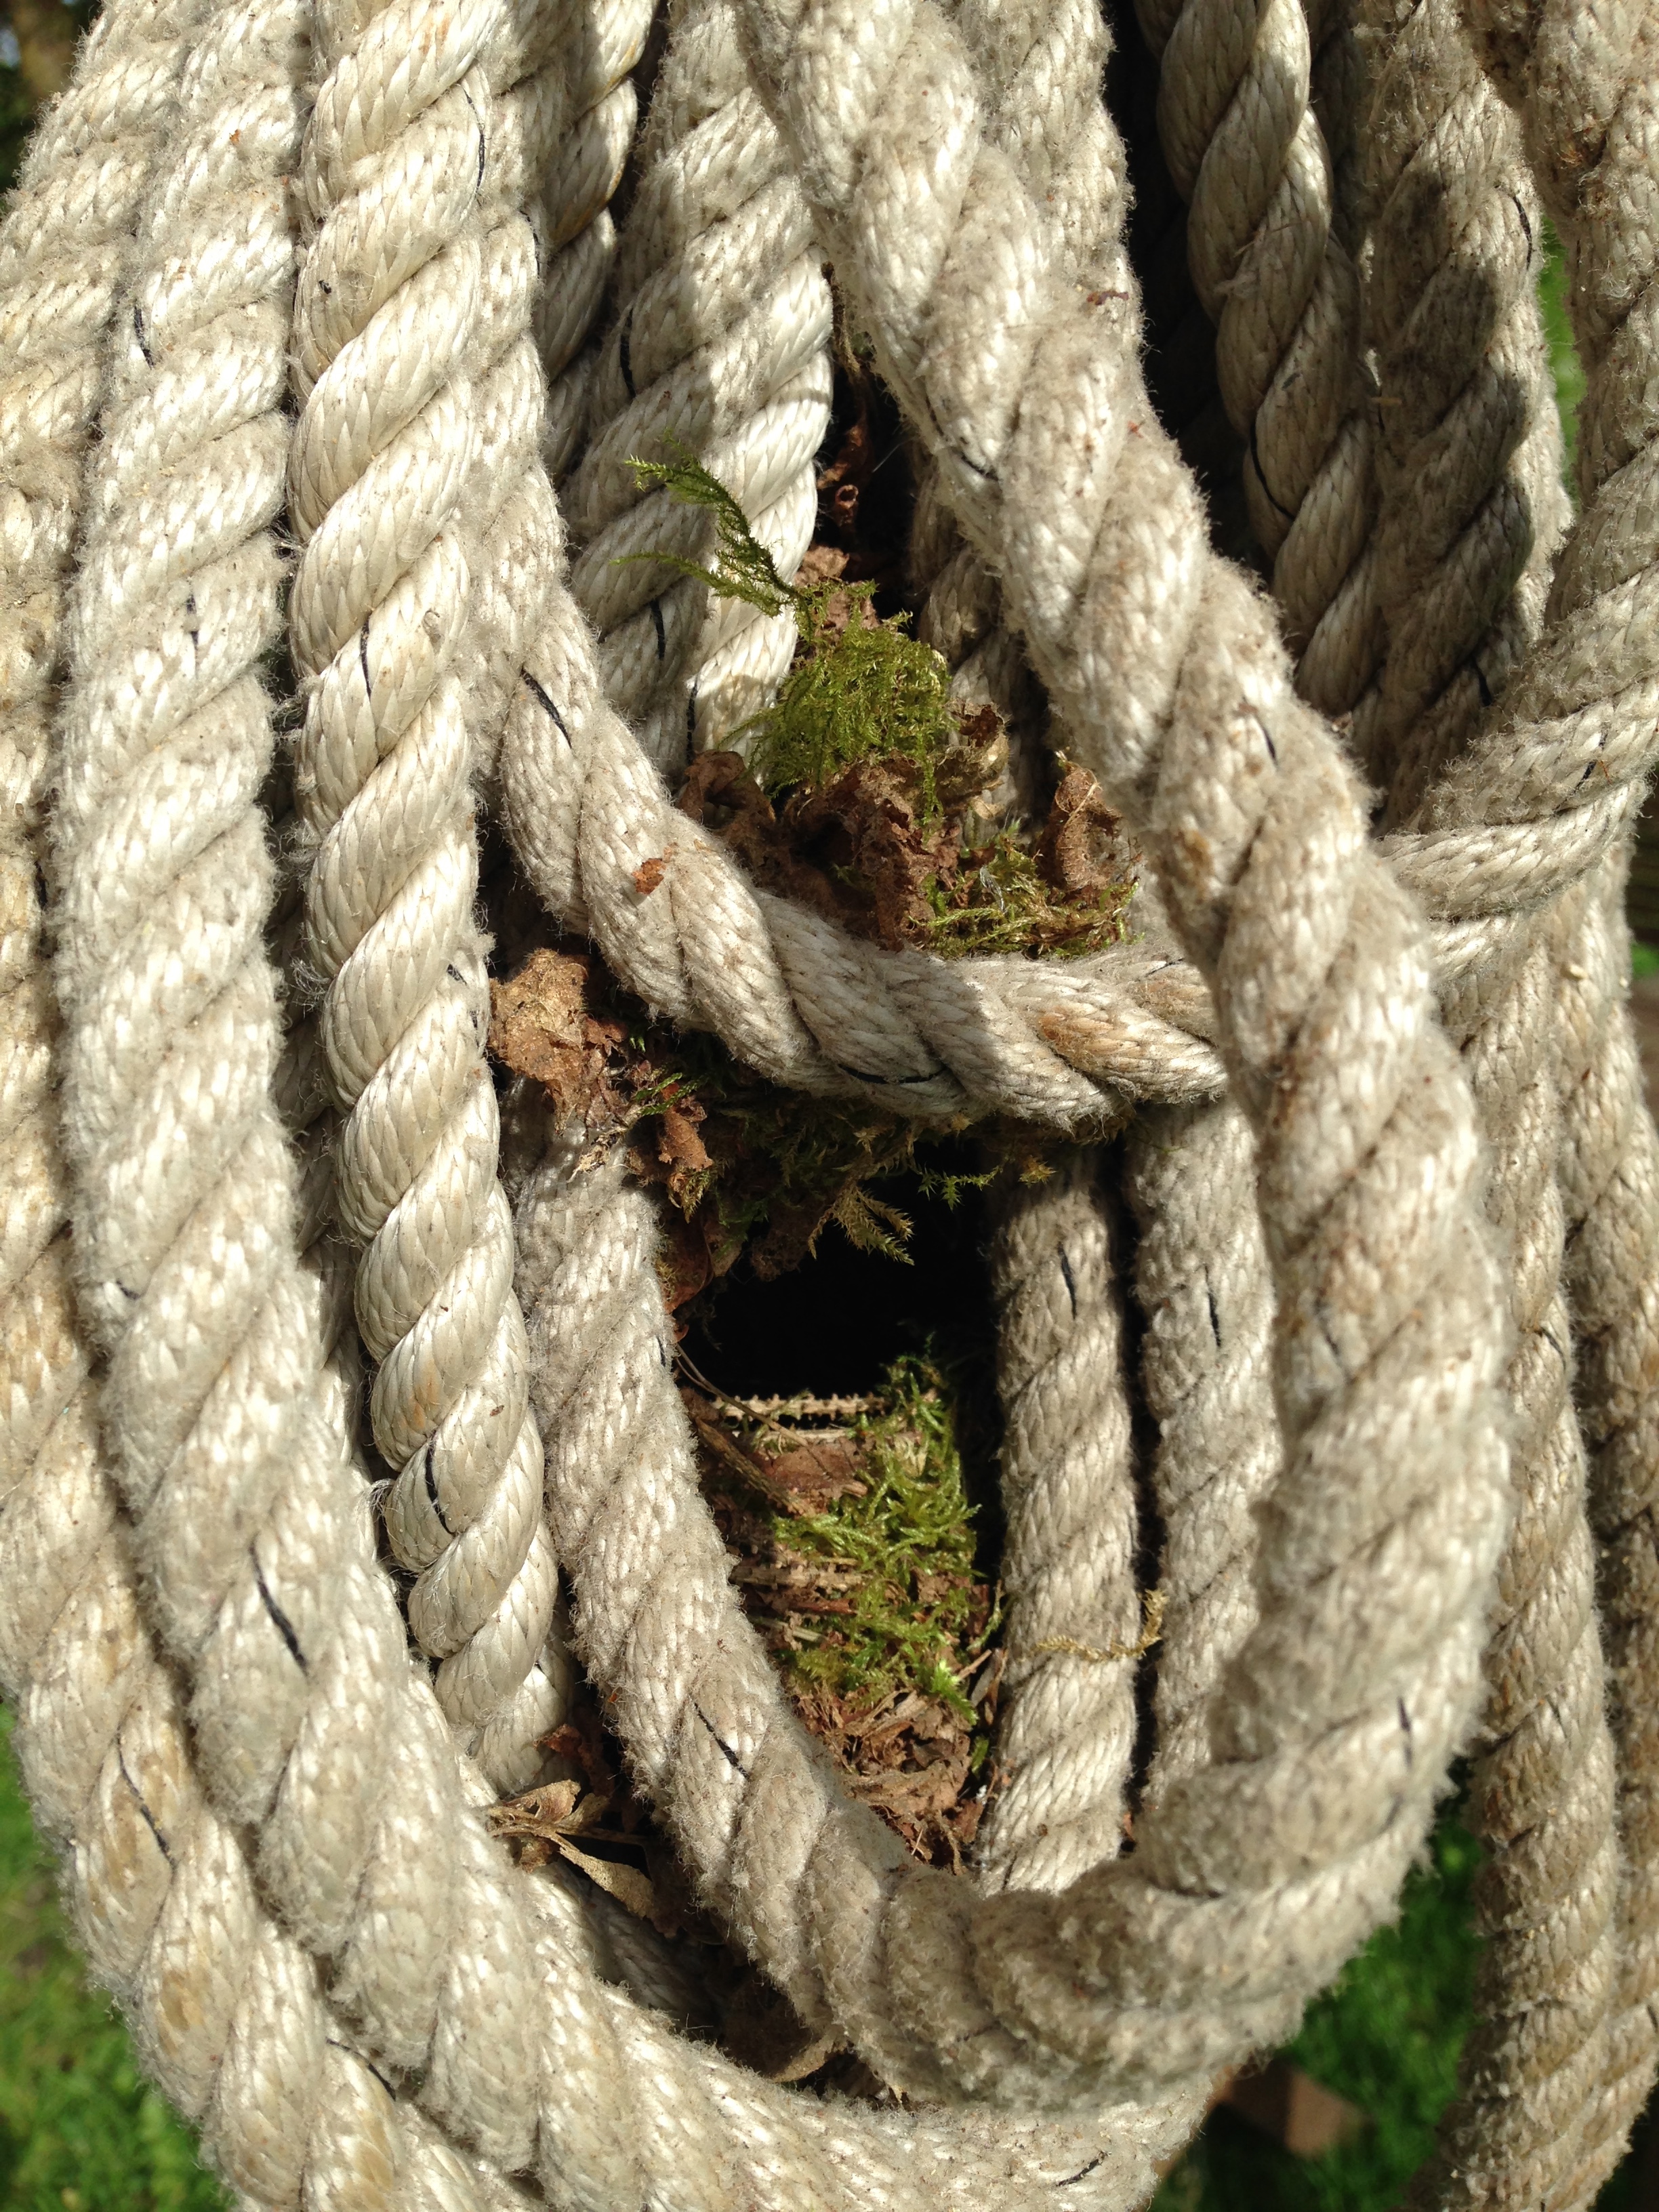
and it’s not like there is a shortage of hedges and trees down here, but if you leave anything in one place for a few minutes someone has either eaten it, or moved in! There are birds nests in camping chairs in the barn, a very large mouse (we say ‘large mouse’ because we don’t like to use the R word) has taken up residence in the anchor chain box, there are moths in the awning, a queen wasp starting her paper home by the bilge pump and a very unwelcome guest in the shape of a large hornet who burst out angrily as I whipped the cover off! Not to mention an enterprising wren (?) who has turned this heaving line into a mossy des res.
a heaving line being put to a rather different use
Some visitors are more welcome than others. This pretty Brimstone moth looked beautiful against the woodwork.
A pretty visitor
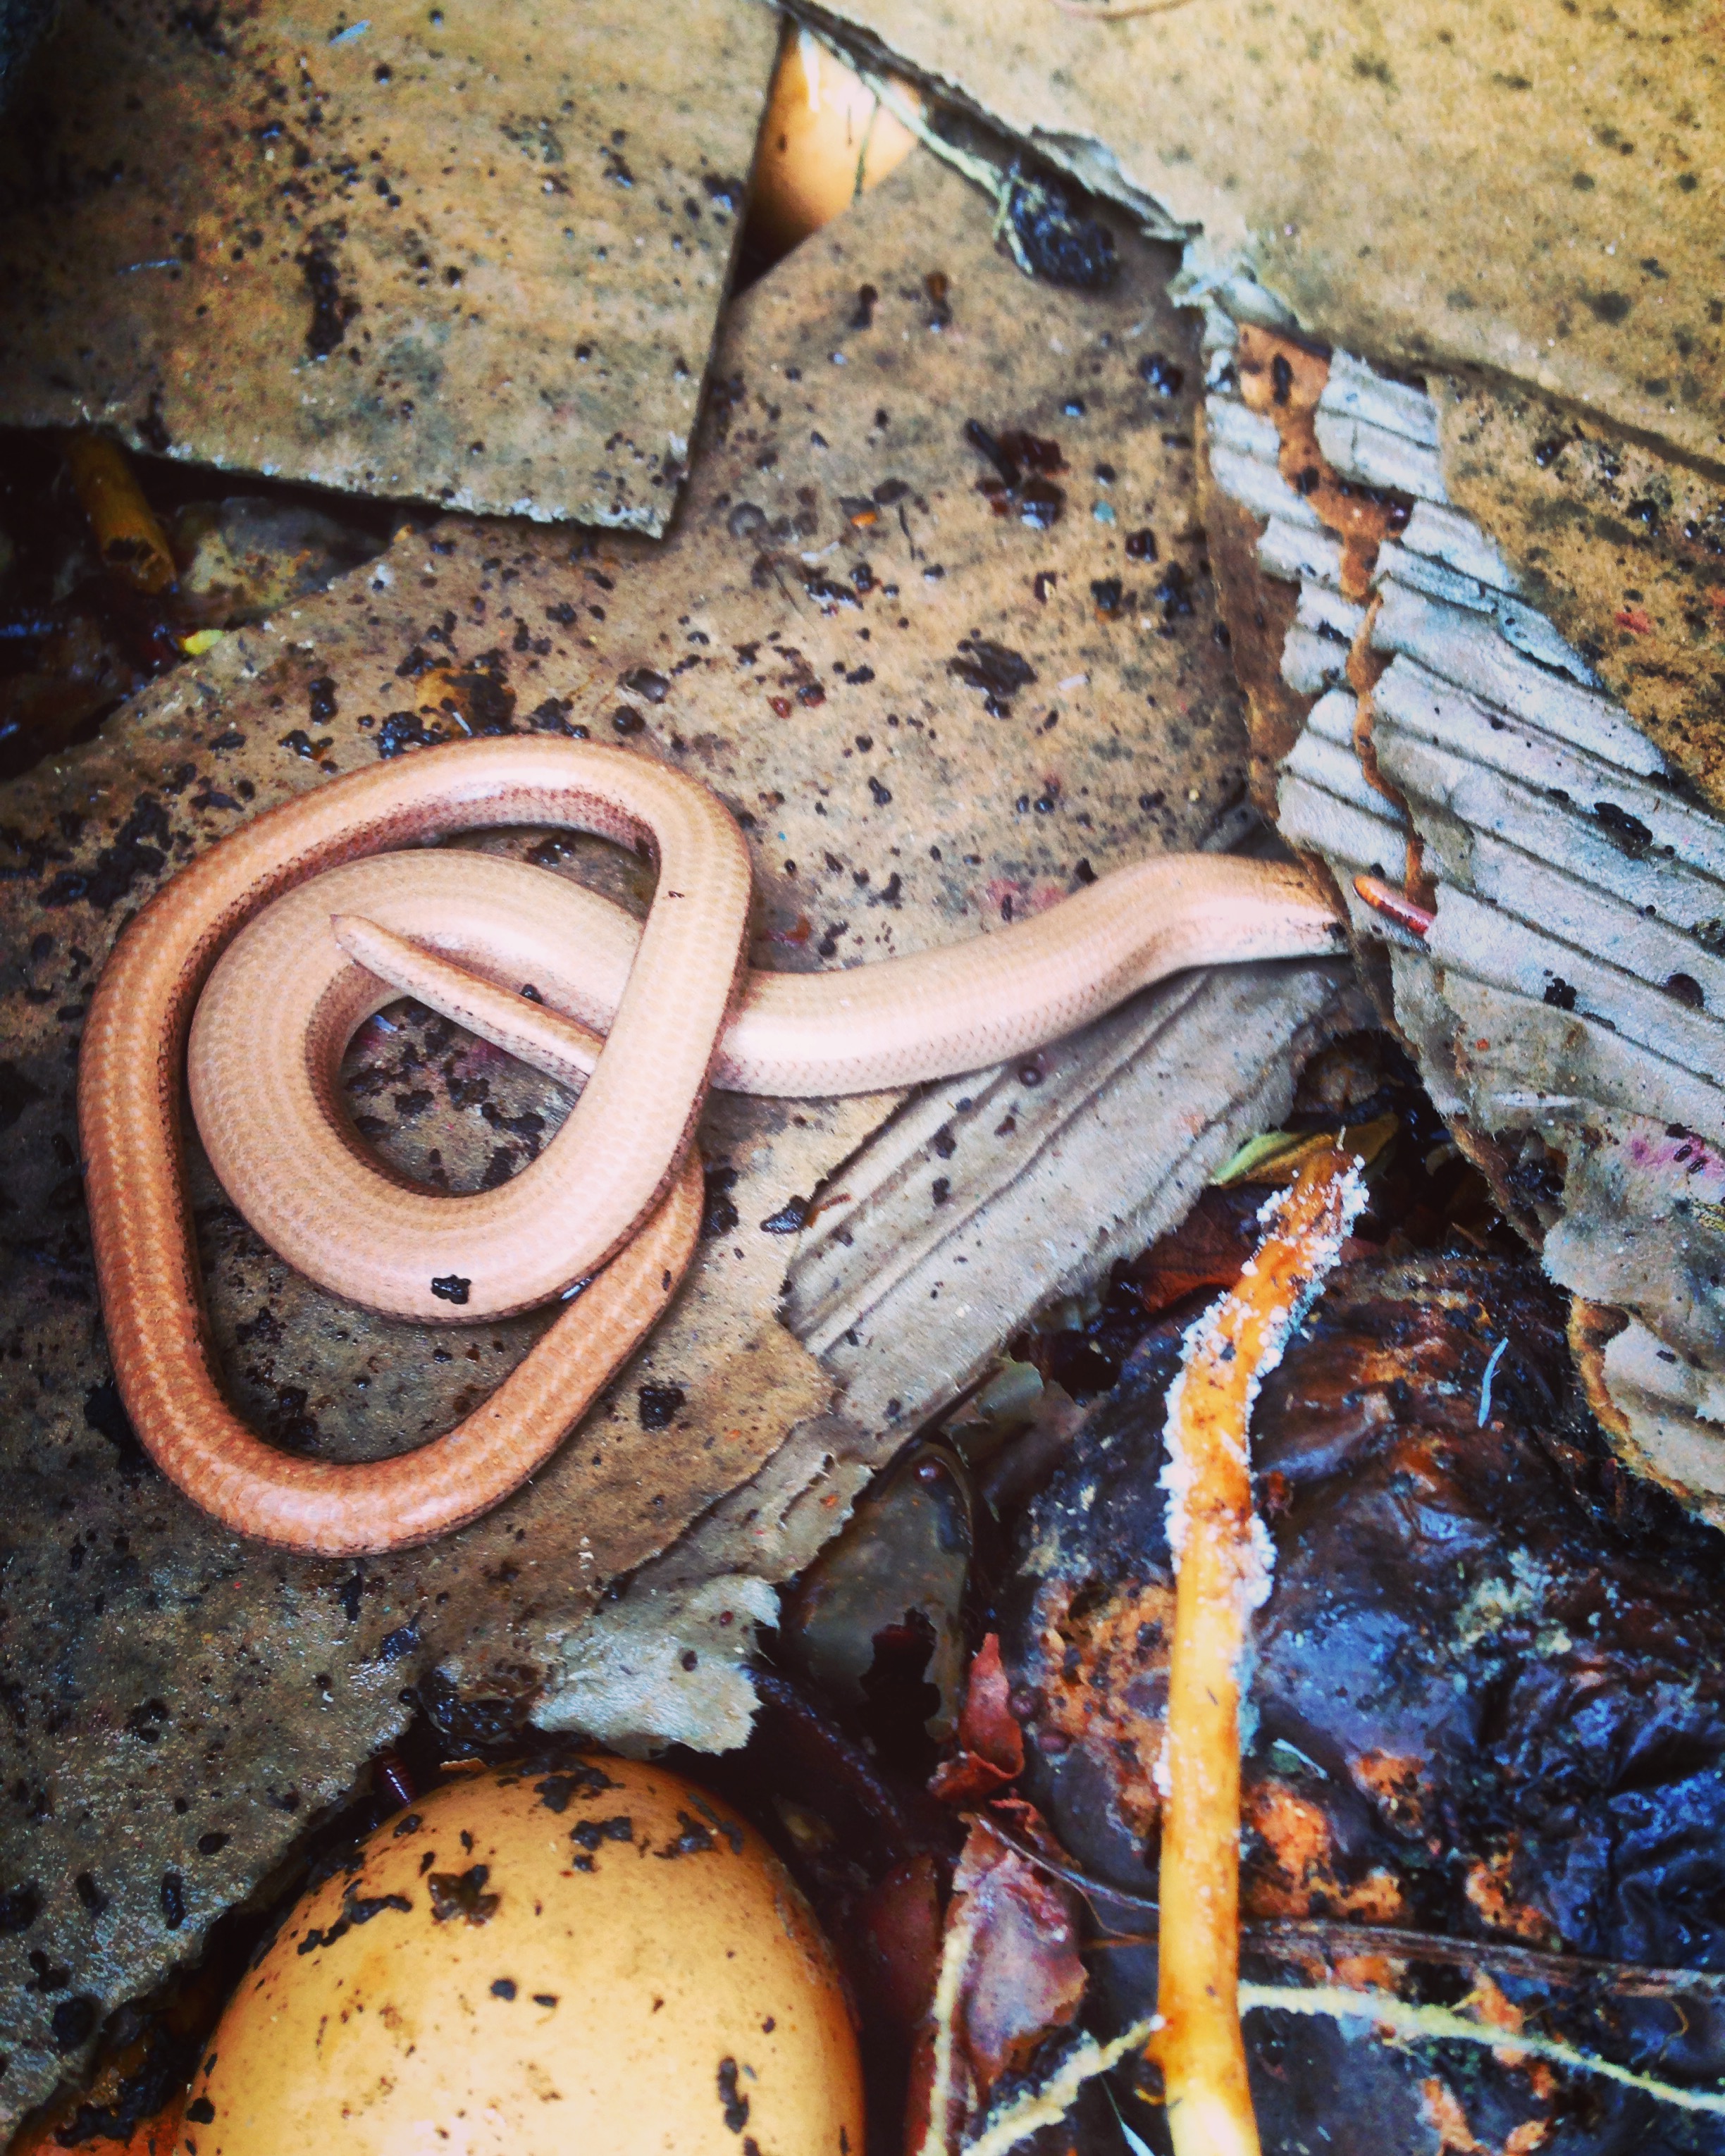
A slow-worm in the nearby compost is pretty too but in a slightly creepy way…
the compost heap provides a nice warm refuge for these slightly creepy legless lizards
Back to the Boat
While I’m marvelling at nature’s bounty, someone has been busy in the workshop. Father’s washboards are on board and ready to fit. Very smart!
Father’s washboards ready for fitting.
Before the washboards can be fitted I have to fit these battens or runners. The previous owner had cut the originals off and hung some rather shoddy doors instead of washboards. tsk! tsk! So unseamanlike…. 🙂 My workmate fits neatly on the cockpit floor so I can avoid too much up and downage on the ladder. For those of you imagining a colleague or friend supine on the deck, by work mate I mean one of those portable work benches so beloved of the DIY enthusiast. It’s tempting to just sit in the sun soaking up the atmosphere and imagining I’m riding at anchor in some idyllic bay, the lap of the waves, the clink of a beer glass… of course there’s no time for that, in the life of a busy boat restorer…. obviously!
Washboard runners ready to fit
Teak seems to blunt the plane fairly swiftly, requiring frequent trips to the sharpening station. I know some purists might say using a guide is cheating….. but it does make achieving a nice consistent bevel much easier. I make sure my whetstone is a wet stone (the water lubricates and prevents clogging) by keeping it in a tupperware filled with water.
Keeping the blade honed
Meanwhile, outside the cosy cockpit….
pottering about by the keel I decided to investigate (for investigate, read stab) this dodgy looking timber…. the knife slid deep into the wood worryingly easily. Not quite like a hot axe through butter but definitely not right.
should it be this easy to stick a knife in?
Soon chunks of rotten wood (it looks like Elm) were being scraped/falling out. I fetched a chisel and mallet and set about chopping it out properly. It only seems to extend about a foot (that’s 304.8mm Toby) laterally and about 3 inches (76.2mm) deep, but I’ll probably cut out more just to be sure.
mmmm this doesn’t look good
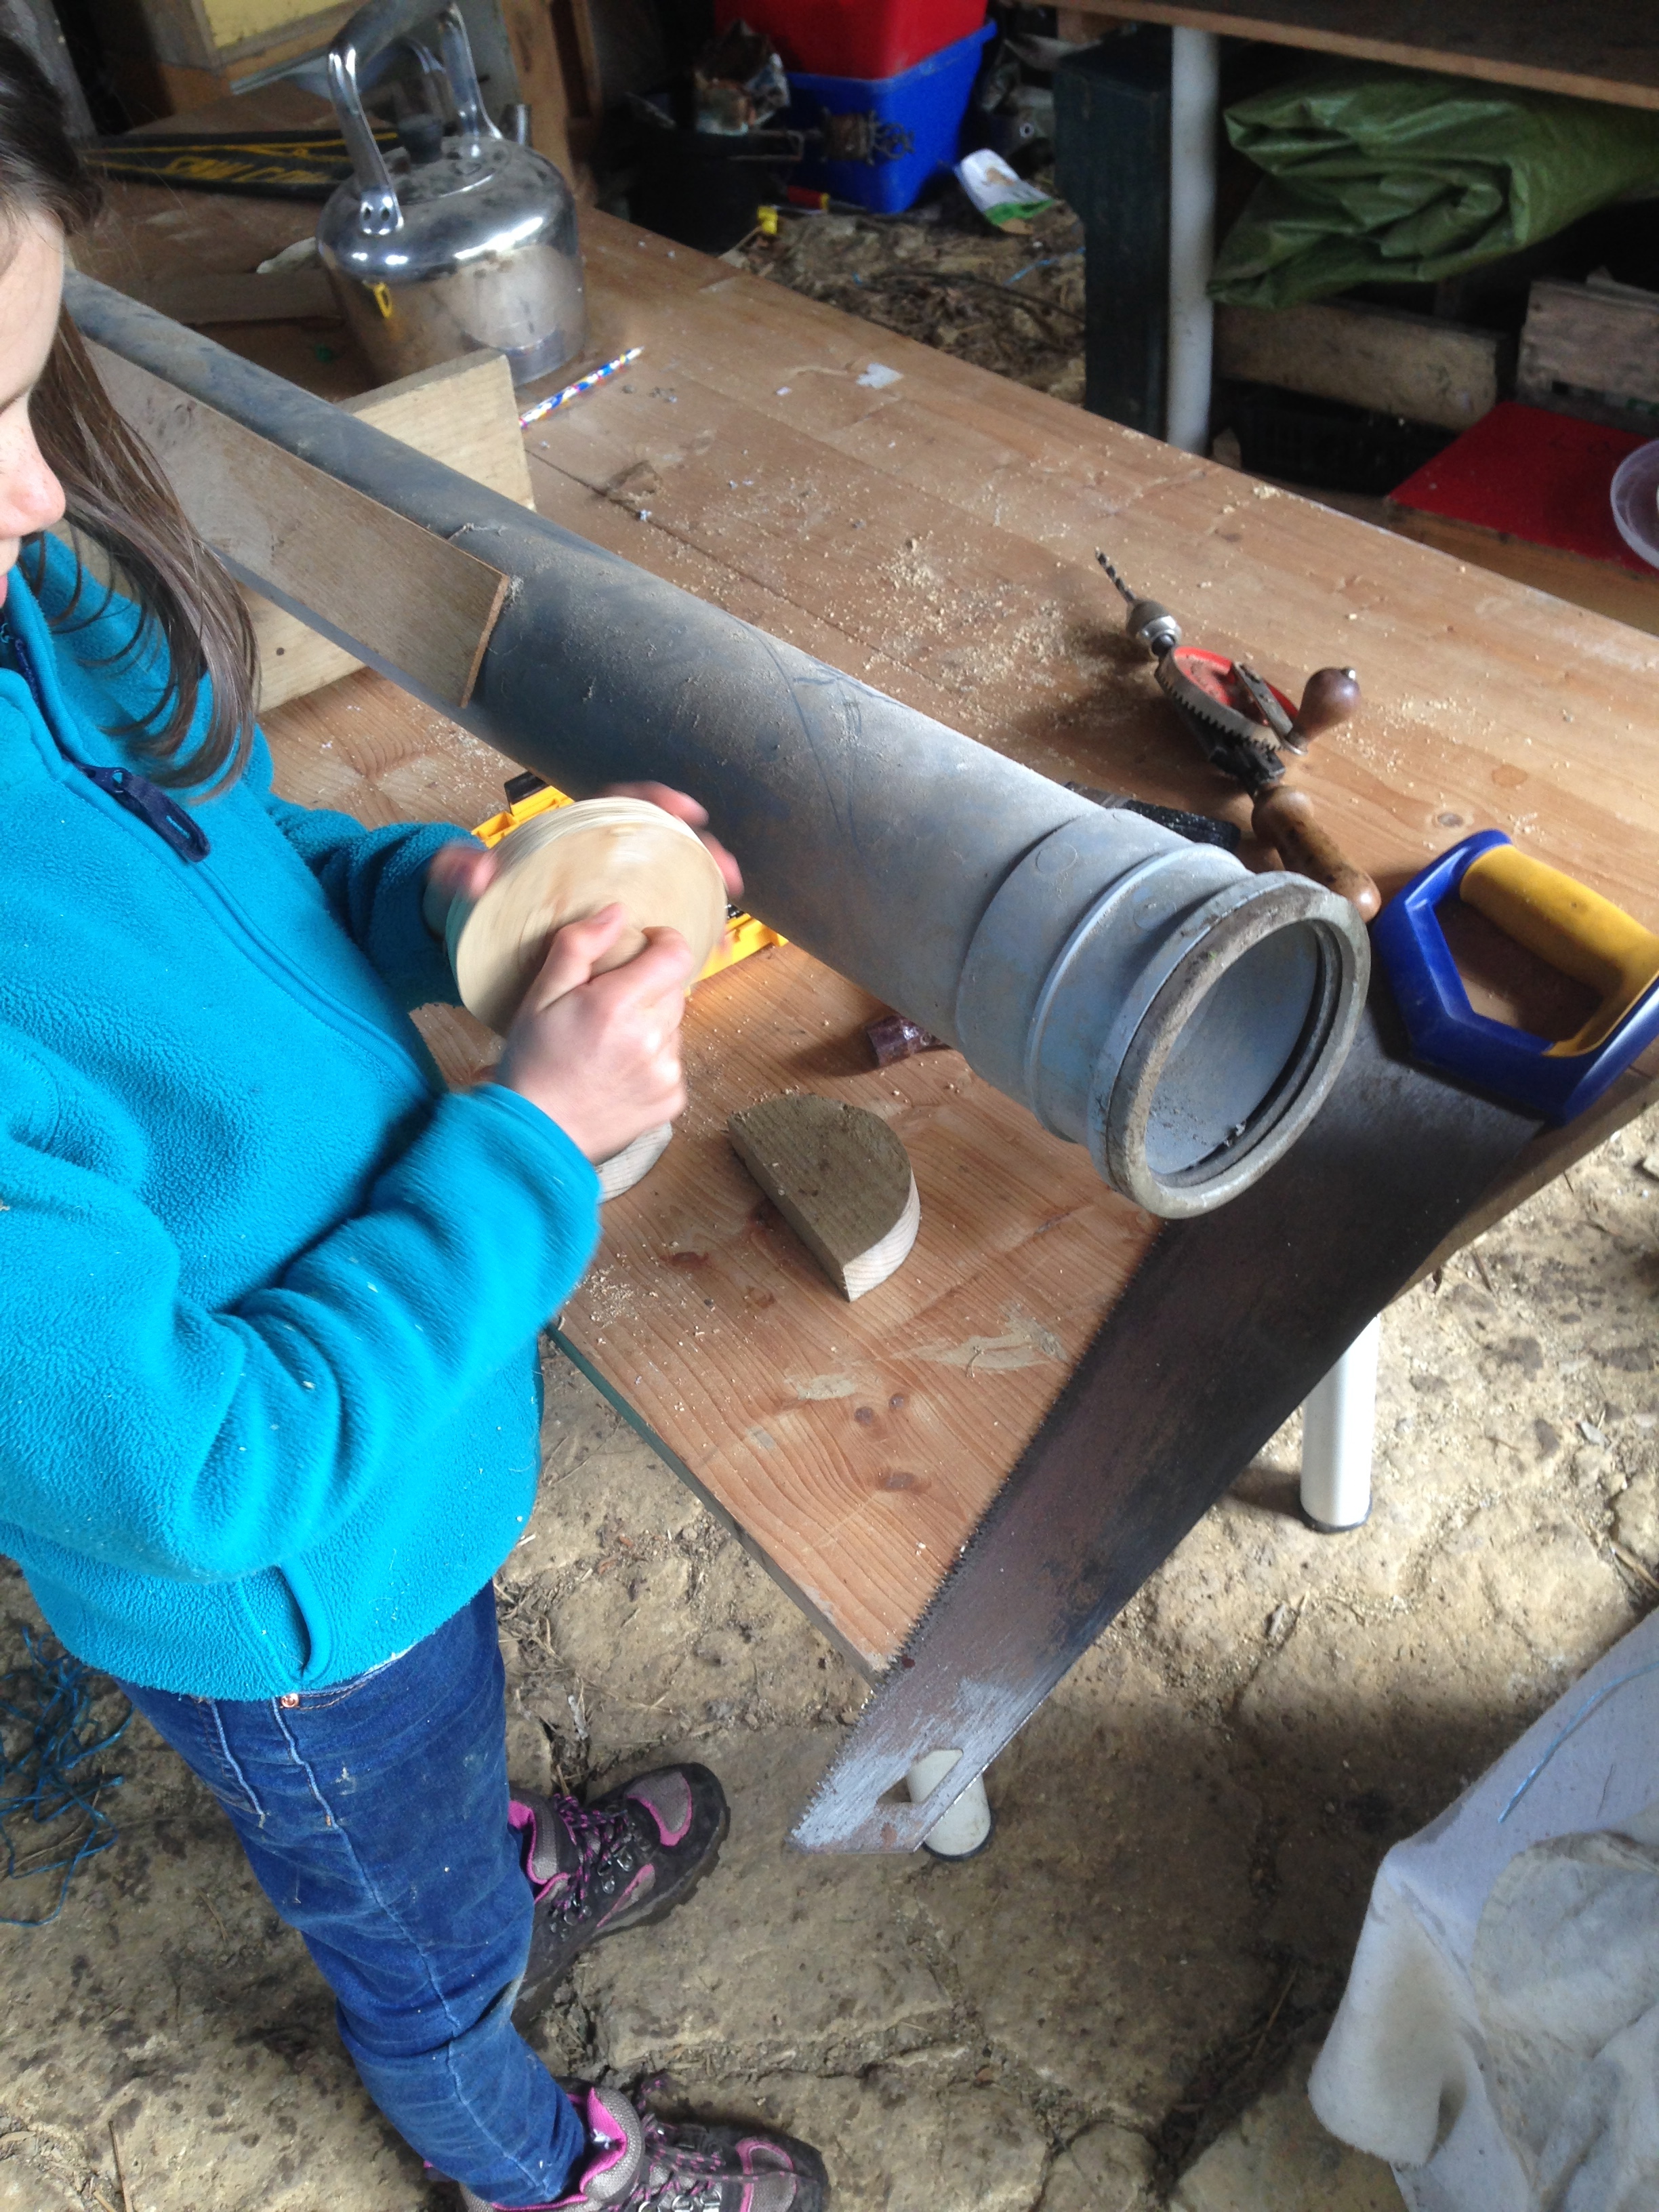
The last frame I laminated took a little persuading to get the laminates to bend around the jig so a home made steamer had to be made…. at home….. thus neatly explaining the term…. anyway moving on.
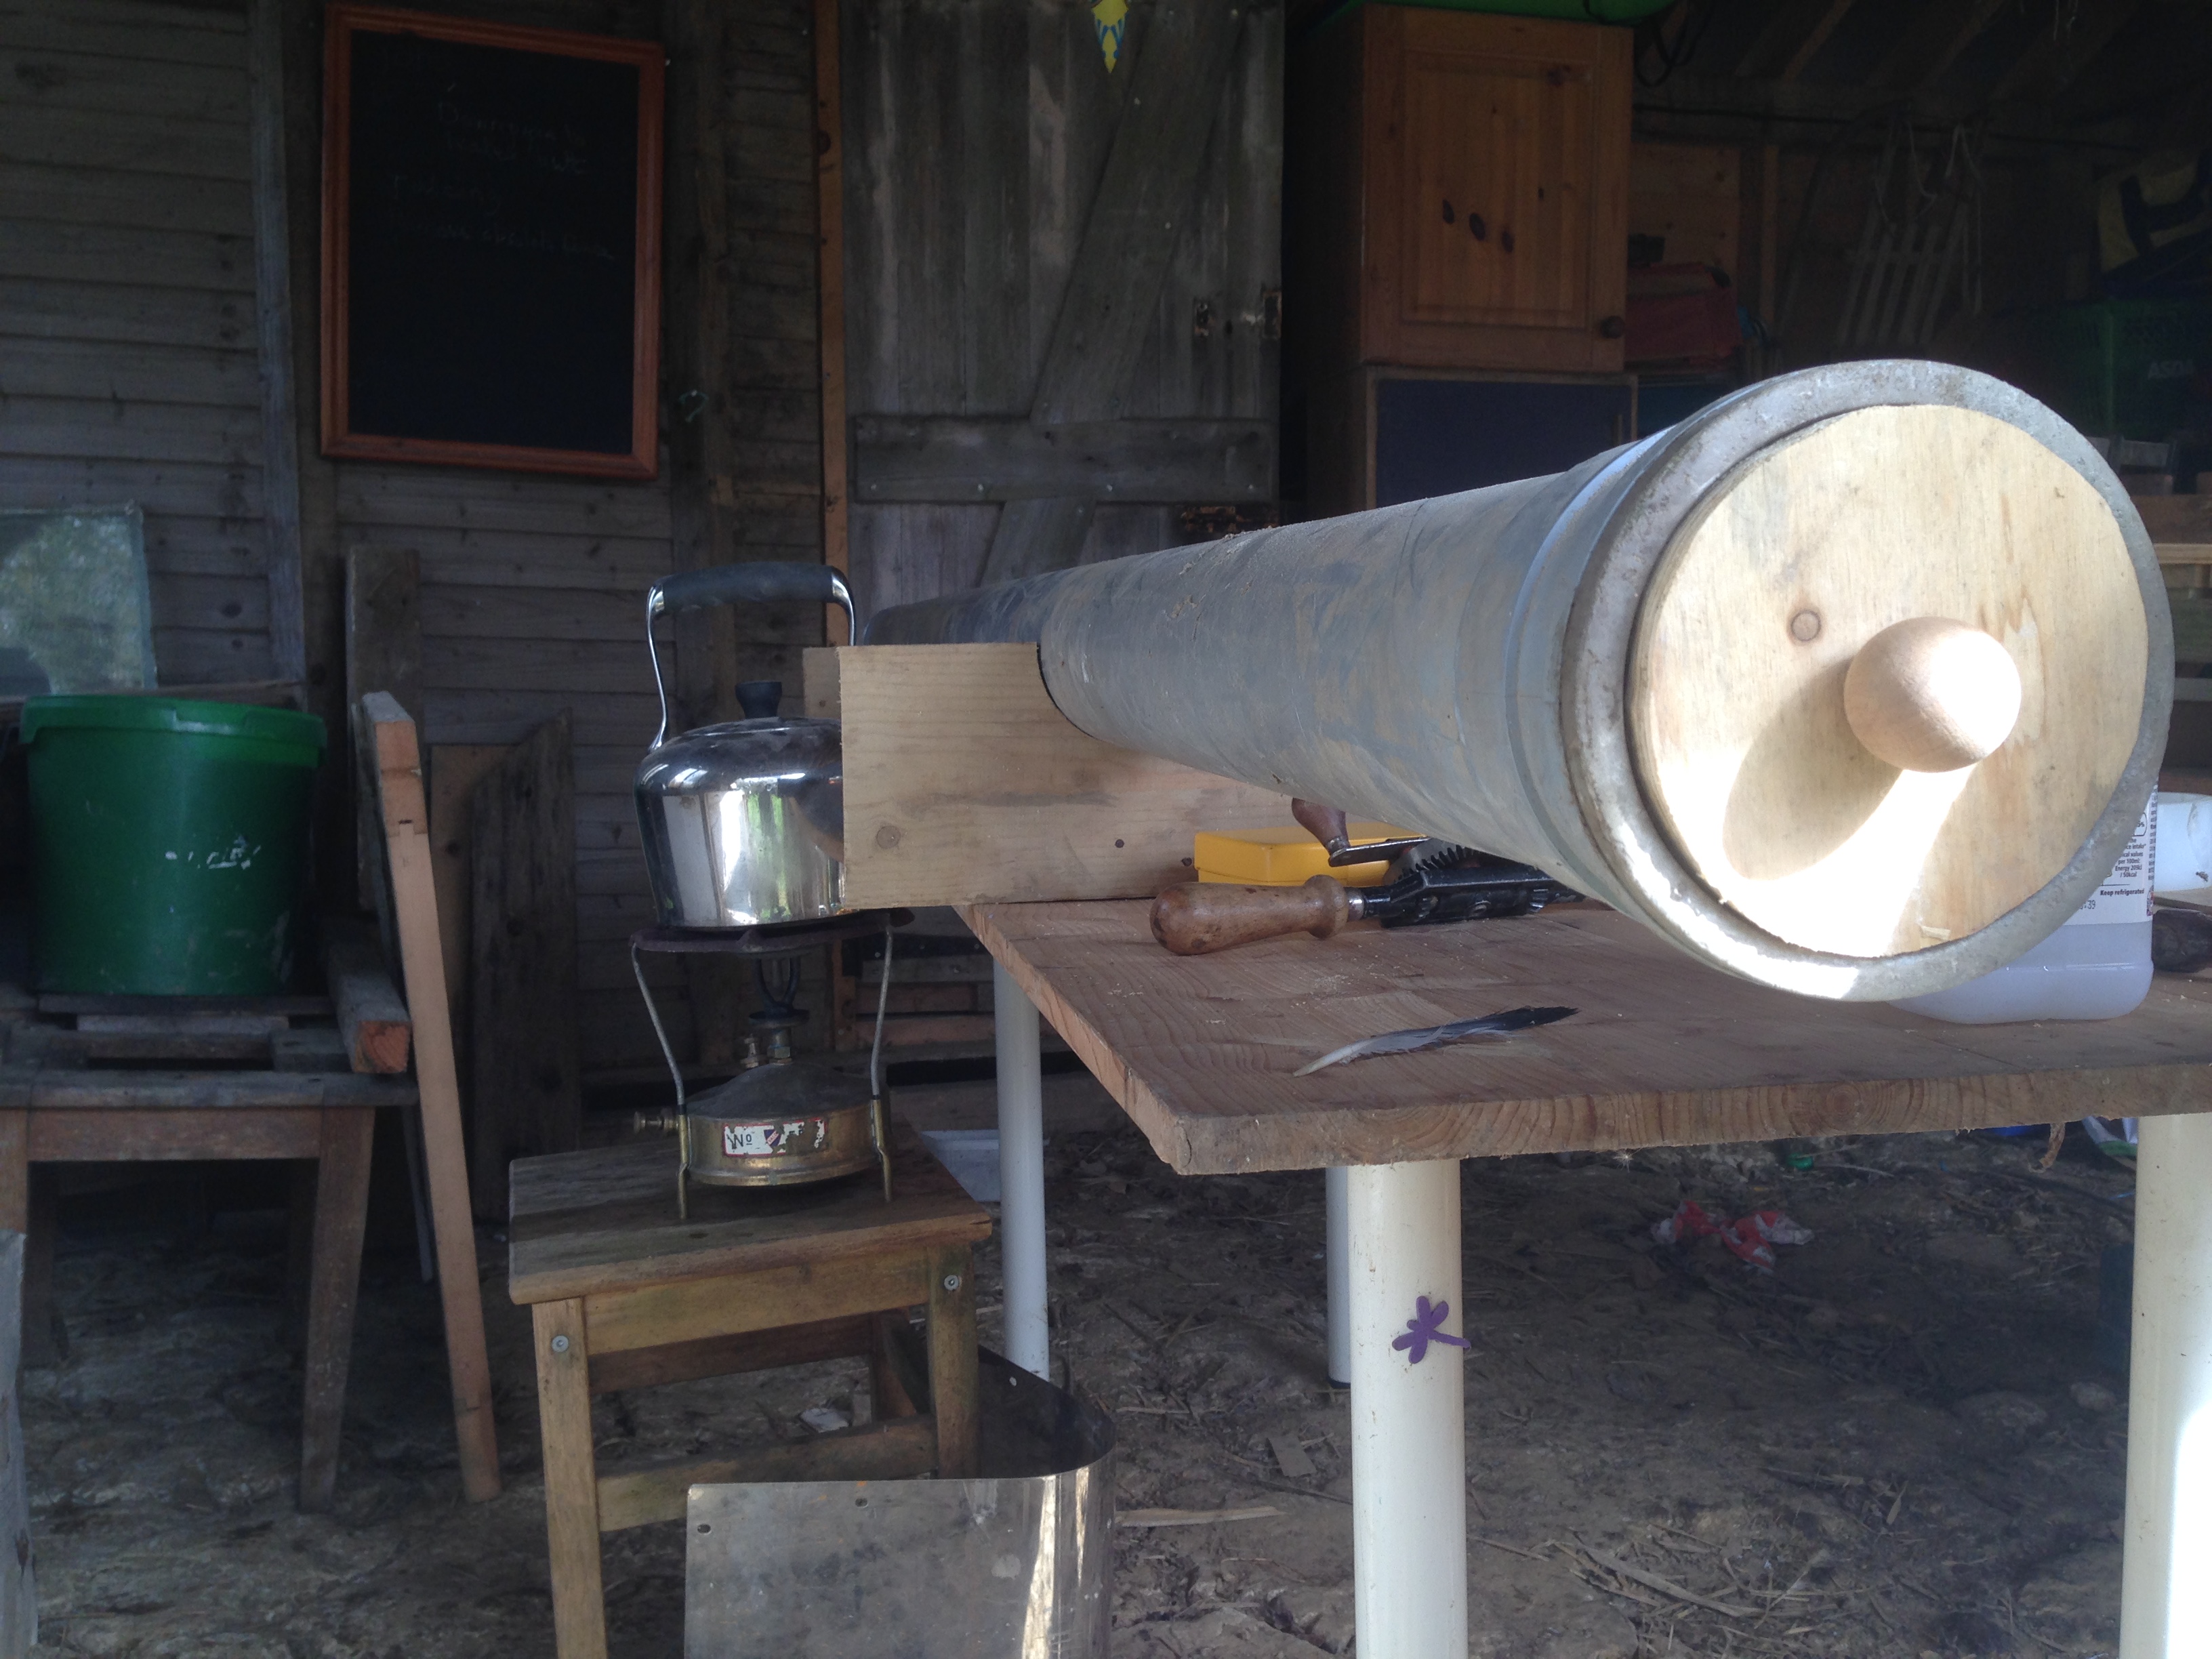
Simply take, a bit of old drain pipe, an old kettle with no spout, a paraffin stove, a bit of scrap ply and a small child, preferably your own but if not, do ask the owners permission. People can be very odd about bloodshed and bruising when it comes to their little darlings. It’s a lesson learned I say, and after all they’ve got nine more fingers… unless they’ve visited my workshop before… in which case they should know better, and…
Tilly helping make a steamer
Steel pipe would have been better as the plastic developed quite a droop before the oak was sufficiently ‘cooked’ but it worked.
The Steaming in progress
It’s a bit distracting being surrounded by all this burgeoning plant and animal life, but I’m looking forward to next weekend and shaving a couple of millimetres off the Wash boards to fit them and maybe scavenging for the last bits of oak I need to finish the frames…. maybe some more soaking up the sun and picturing Flamingo finished who knows 🙂
So it has been a while since I put pen to paper, (or finger to keyboard), and updated this blog. No excuse really, just life getting in the way and lack of funds…. who knew glue could be so expensive!? Anyway, there has finally been some progress, prompted in part, by my eldest who apparently looks forward to his father’s, loosely boat restoration based ramblings and has commented on the dry spell.
Glue purchased, laminating jig thoroughly tested, preparation table prepared, sunny day….. there really were no more excuses.
Cling film to stop the glue bonding to the jig
All ready for gluing
It was quite hard to find any information about how much filler powder to use and consequently the first mixture was a bit thick.
Glued up and clamped up
Quite tricky getting enough pressure to create the shape but not so much as to force all the glue out. It was so cold that I didn’t dare un-clamp it the next day, so it languishes in this state ’til next weekend.
Meanwhile, despite working in TV, I didn’t have “one I prepared earlier” with which to show you the next step, so I looked at my ‘to do’ list and thought I’d attempt a keel bolt extraction. Like a tooth extraction, I have not been eagerly anticipating this job. It has hung in the back of my mind like a bad smell in the back of a fridge. You know you should investigate it but really don’t want to find that ‘way past it’s use by’ product. All the advice I have gleaned from forums and websites says inspect your keel bolts regularly. However much of a pain it might be, it’s not going to be as painful as the keel falling off in the middle of a storm, or a smiling joint allowing water ingress and the inevitable rot.
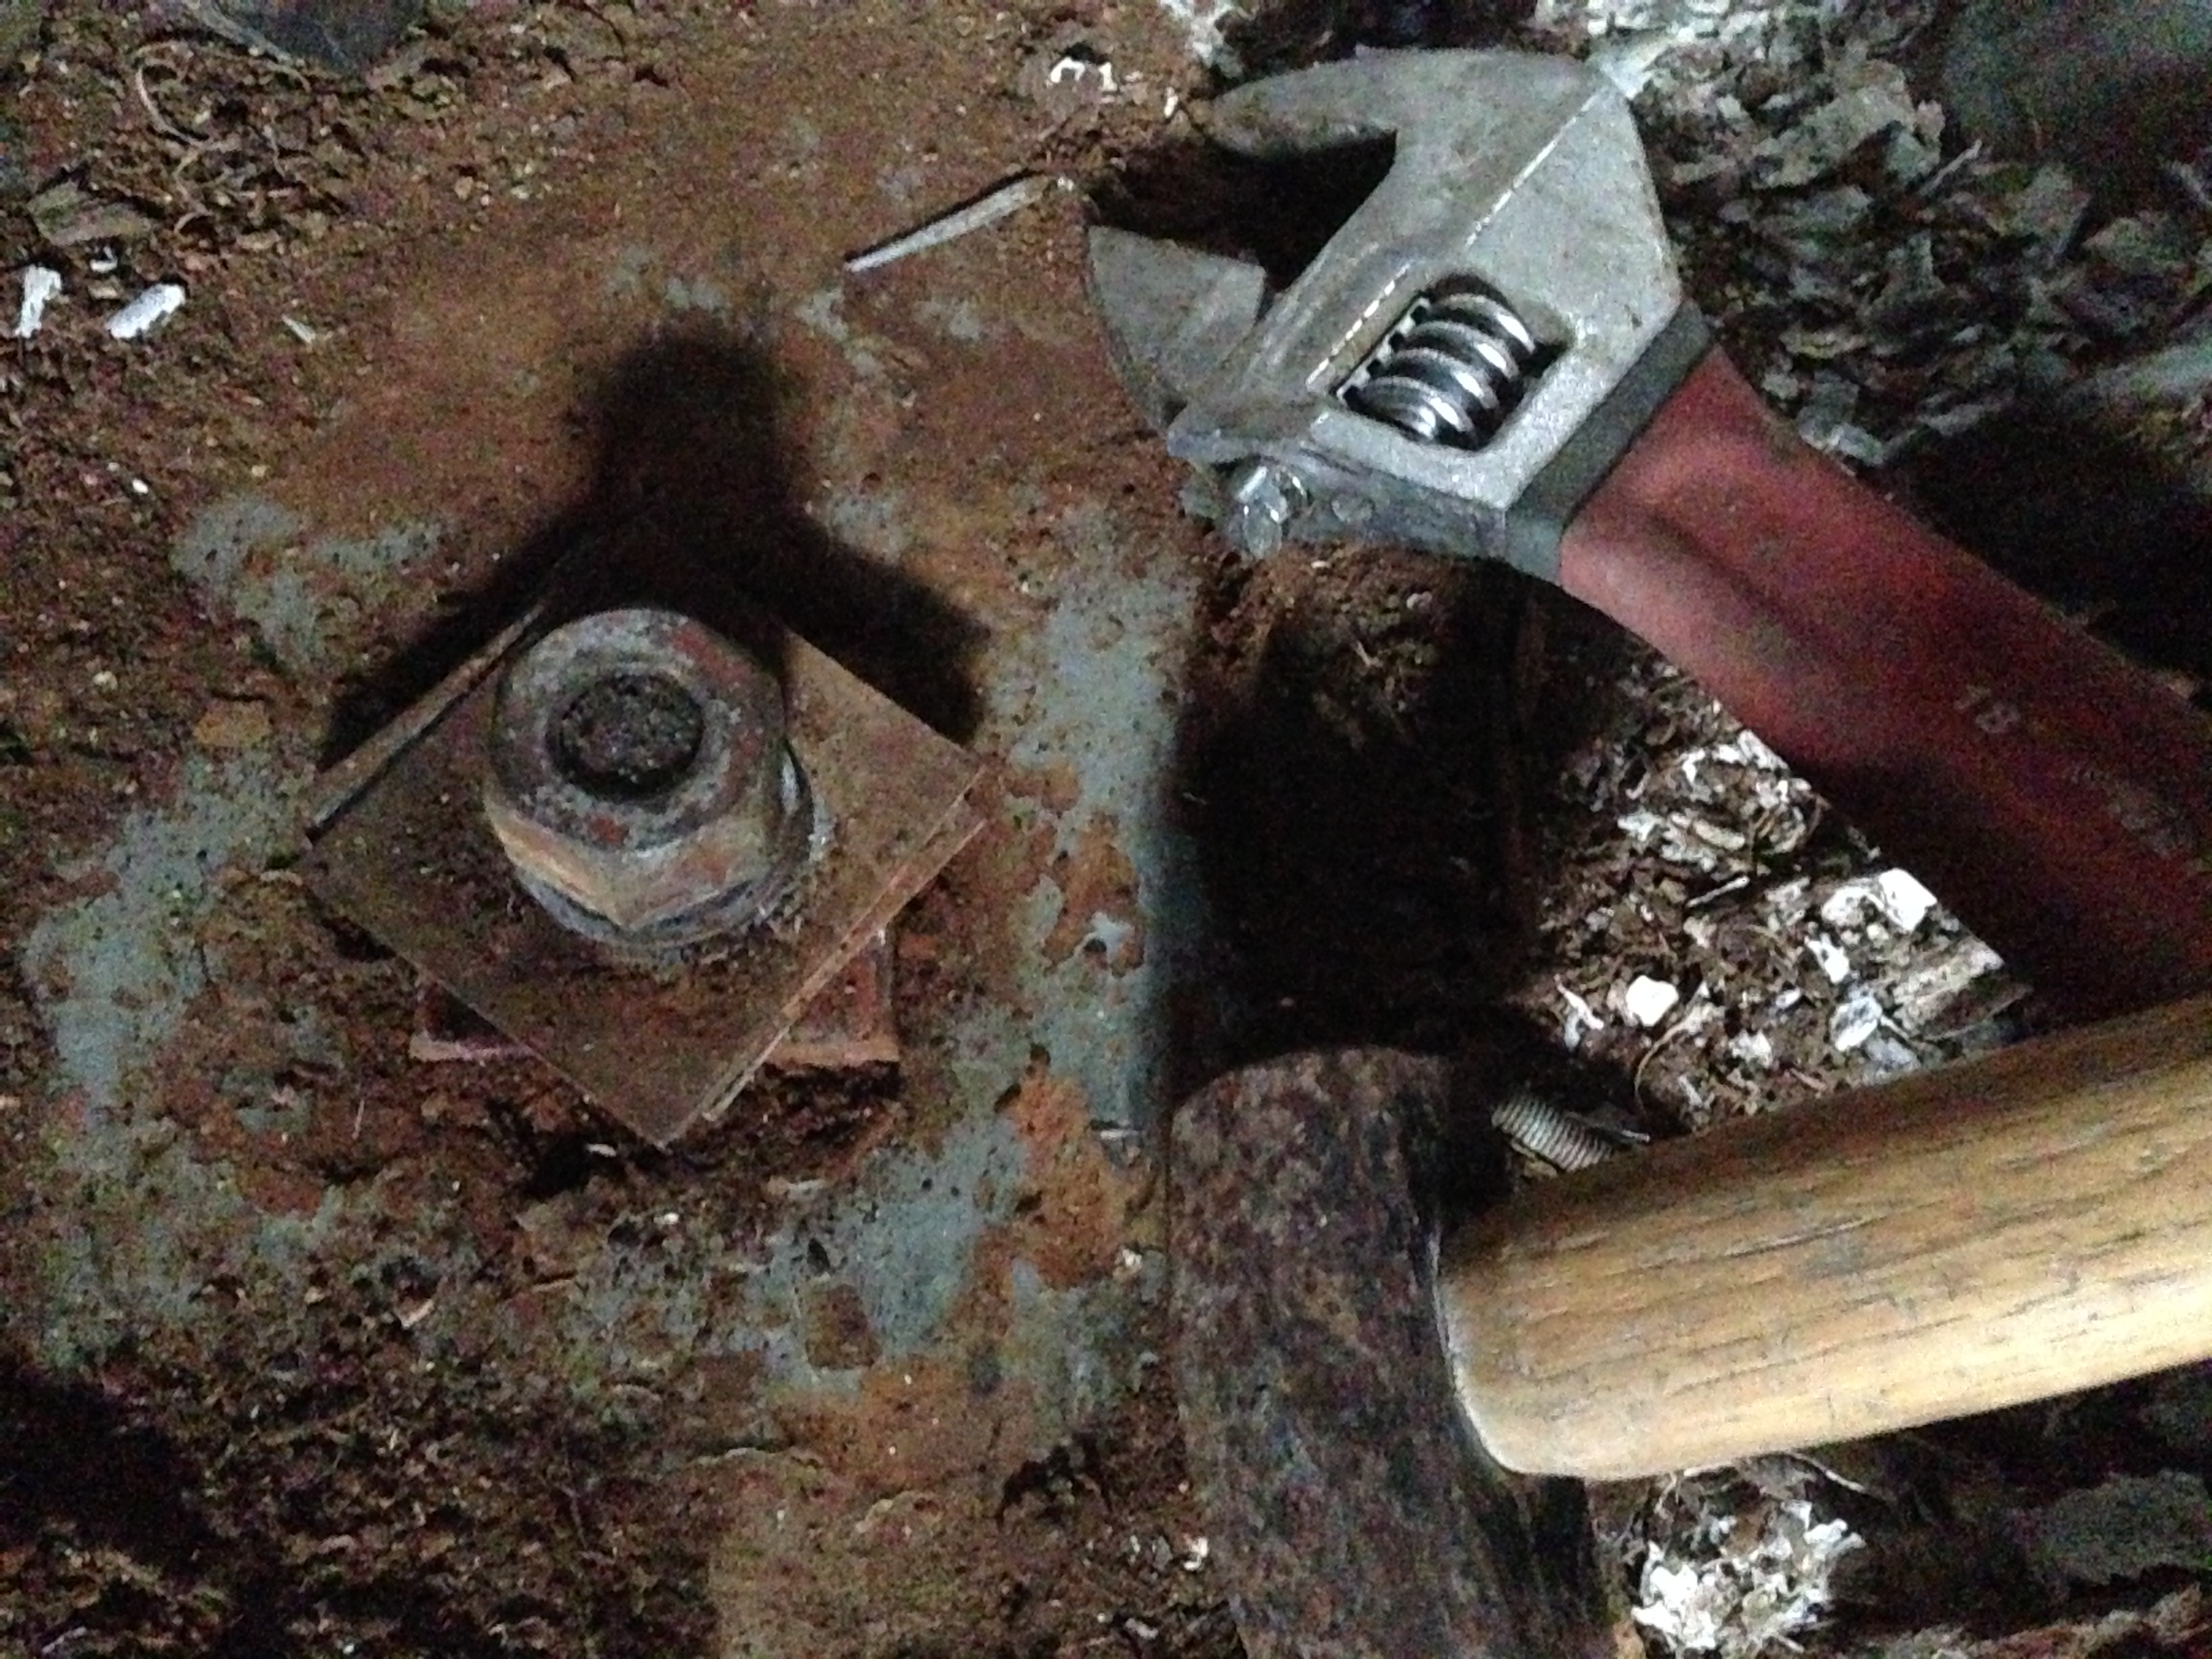
Flamingo is up on blocks, and if I’d thought this far ahead I’d have made them higher. Instead I had to dig a couple of holes in order to drive the bolts out from inside the boat.
Holes dug to receive the keel bolts
Undo the nut, drive the bolt out….. simples!
The ‘wet’ end of the bolt appearing
The nuts came off remarkably easily, and using a lump of wood to prevent damaging the thread, the bolt was driven out reasonably quickly. With bated breath I clambered out of the hull to peer under the keel and see what condition it was in.
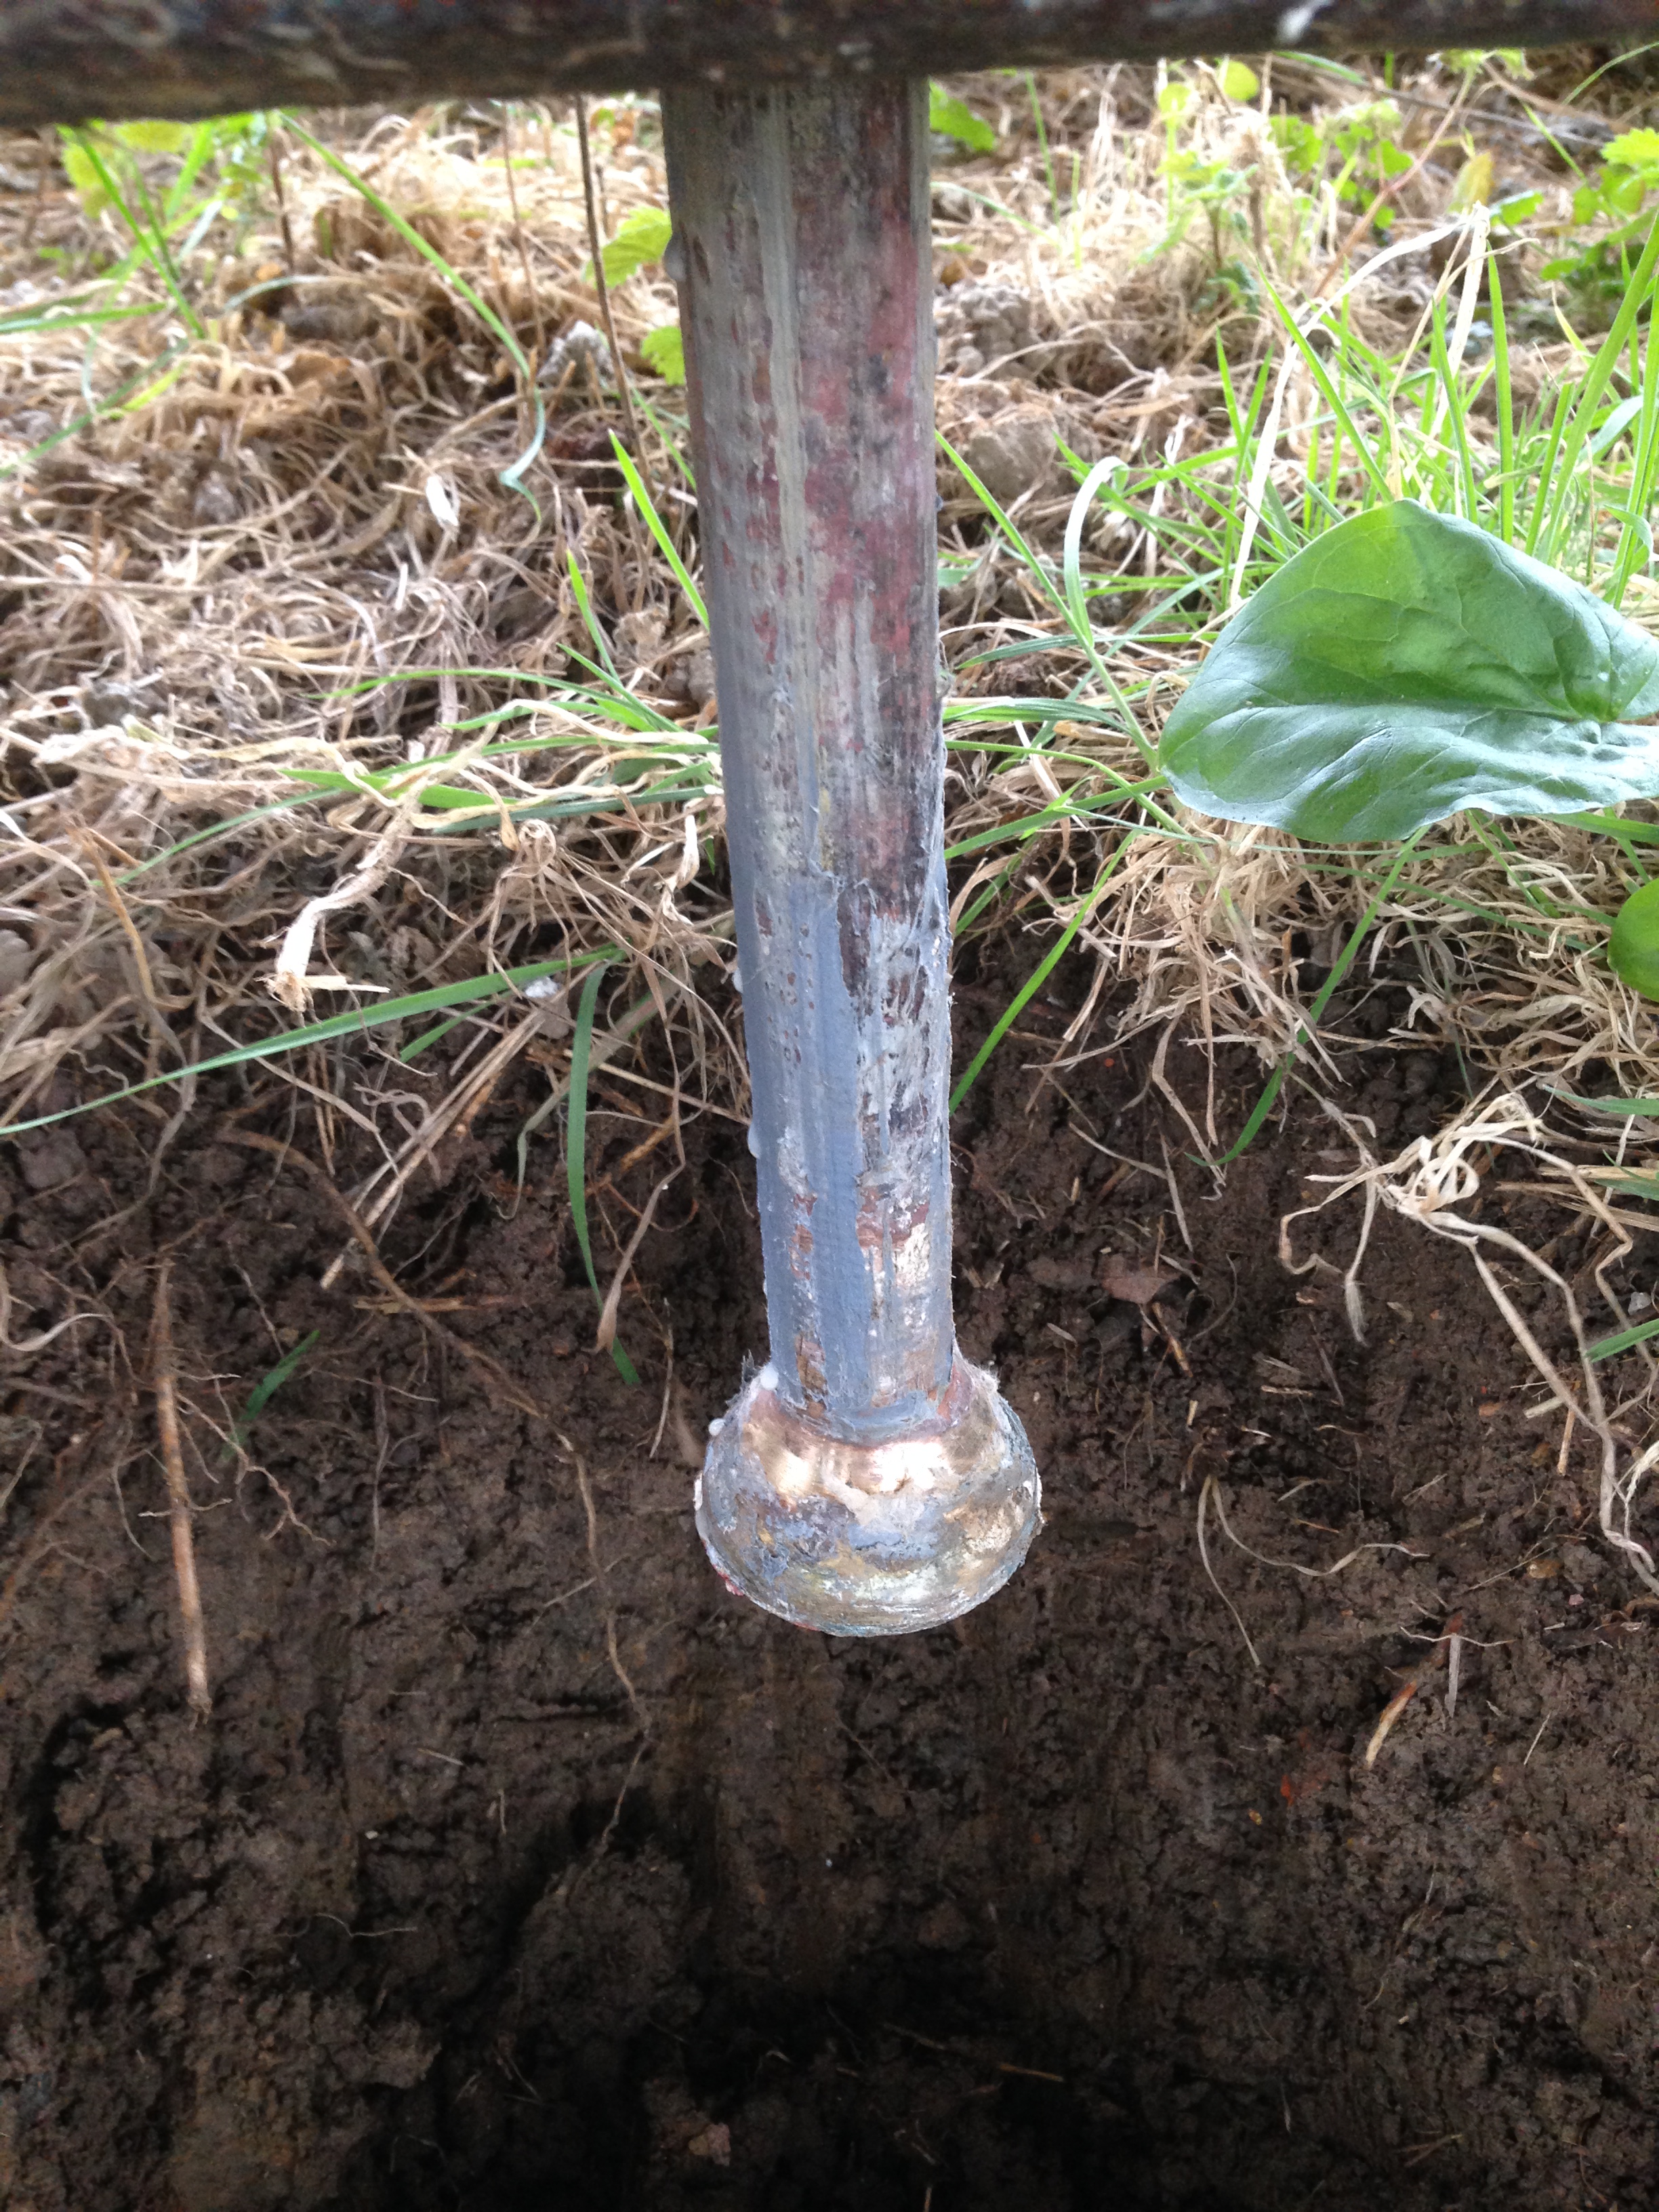
The sight that greeted me was of the shiny bronze shaft of a keel bolt looking as good as the day it was made, as my father might comment, ‘my cup runneth over’ or indeed, ‘let joy be unconfined!’
Shiny bronze bolt
I was sorely tempted to simply drive it back up and leave it at that but remembering one of the worst areas for corrosion is the join between keel and hull I decided, for piece of mind, to take it right out.
500mm Bronze Keel Bolt
A quick clean with parrafin, (thanks be to Brian) and here it is. Apparently the discolouration is nothing to worry about (thank you Vyv (engineer33)) and there is no pitting or thinning at all. I don’t know if these are original bolts or whether they are replacements. If original they have done fantastically well to survive 86 years in such a hostile environment. Driving out two more showed them to be in much the same pristine condition, so a job that could have ended in tears and the expense of bespoke made replacements has gone better than I could have hoped.
But where are the cupcakes and crystals?
I hear you ask…. or was it a random title chosen for it’s alliterative value with little or no basis in reality? Life intervenes in boat restorers dreams and crystals and cupcakes are just some of the distractions.
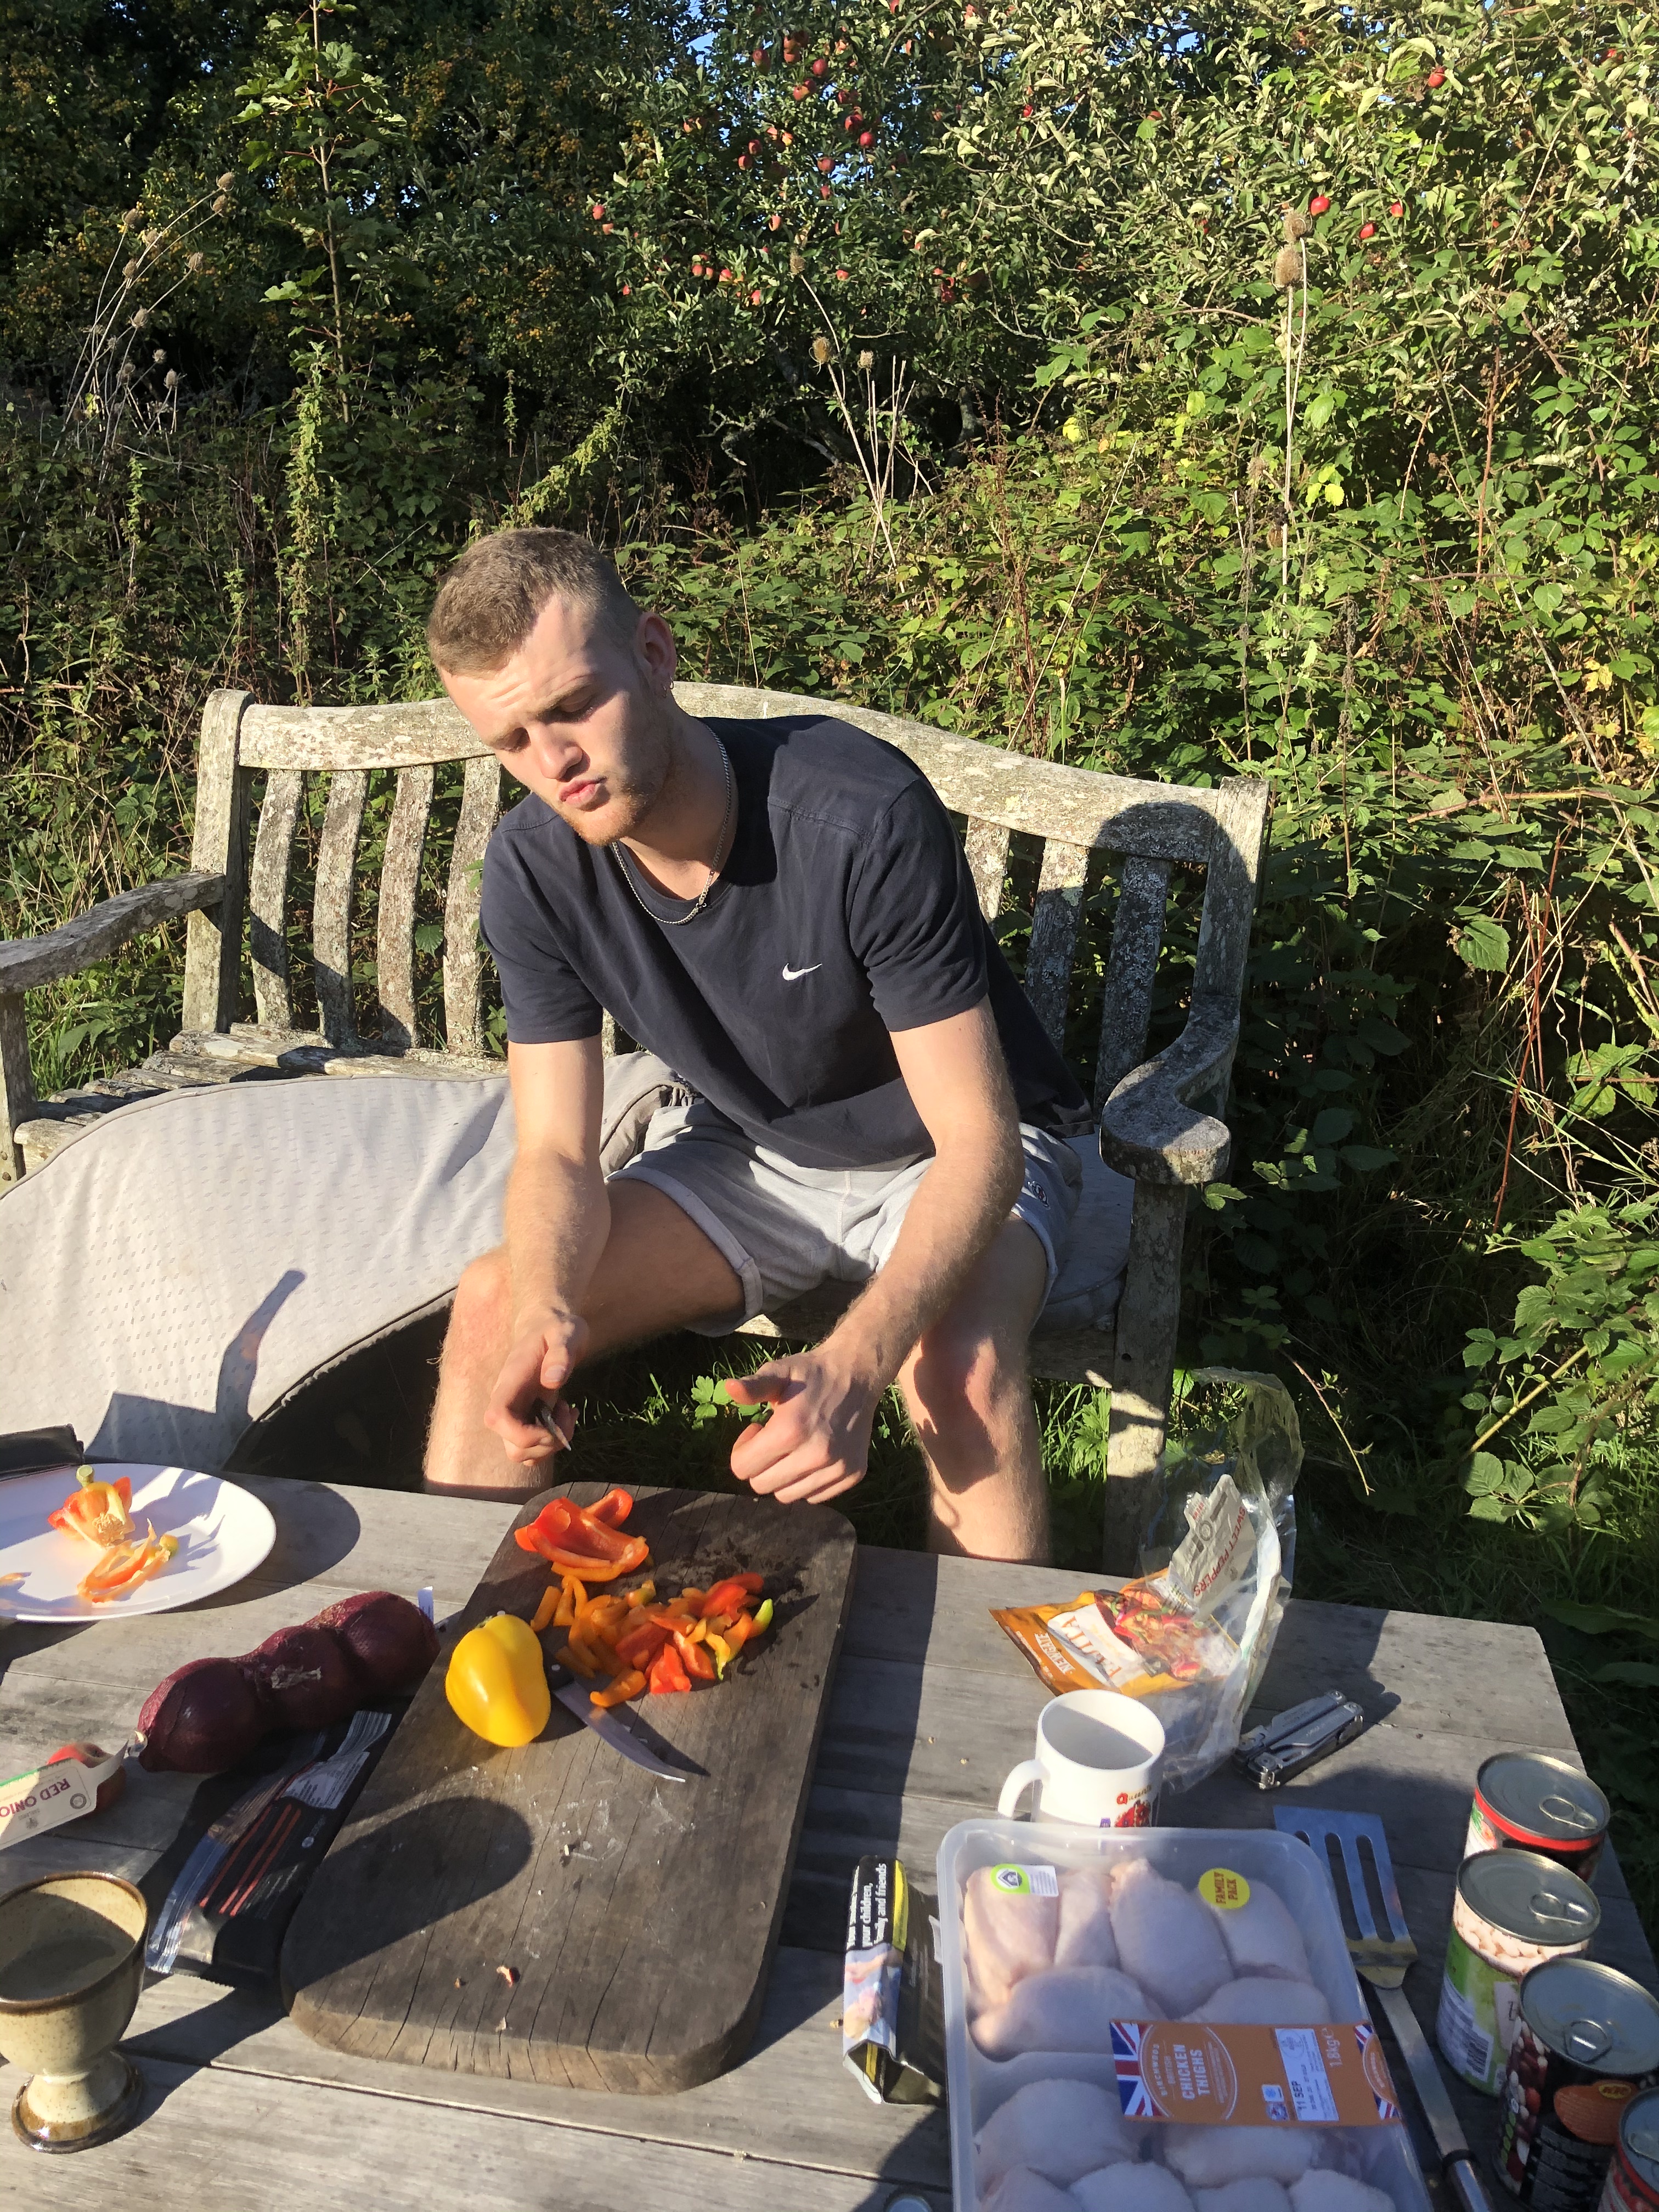
Luke’s Breakfast Cupcakes
Sadly I’d already eaten, but Luke made these delicious looking breakfast cupcakes; roll some bread flat, line a muffin tin with it, line that with bacon, crack in an egg and sprinkle with cheese. cook in the oven ’til it’s done. Top (hindsight) tip from Luke….. GREASE THE TINS!
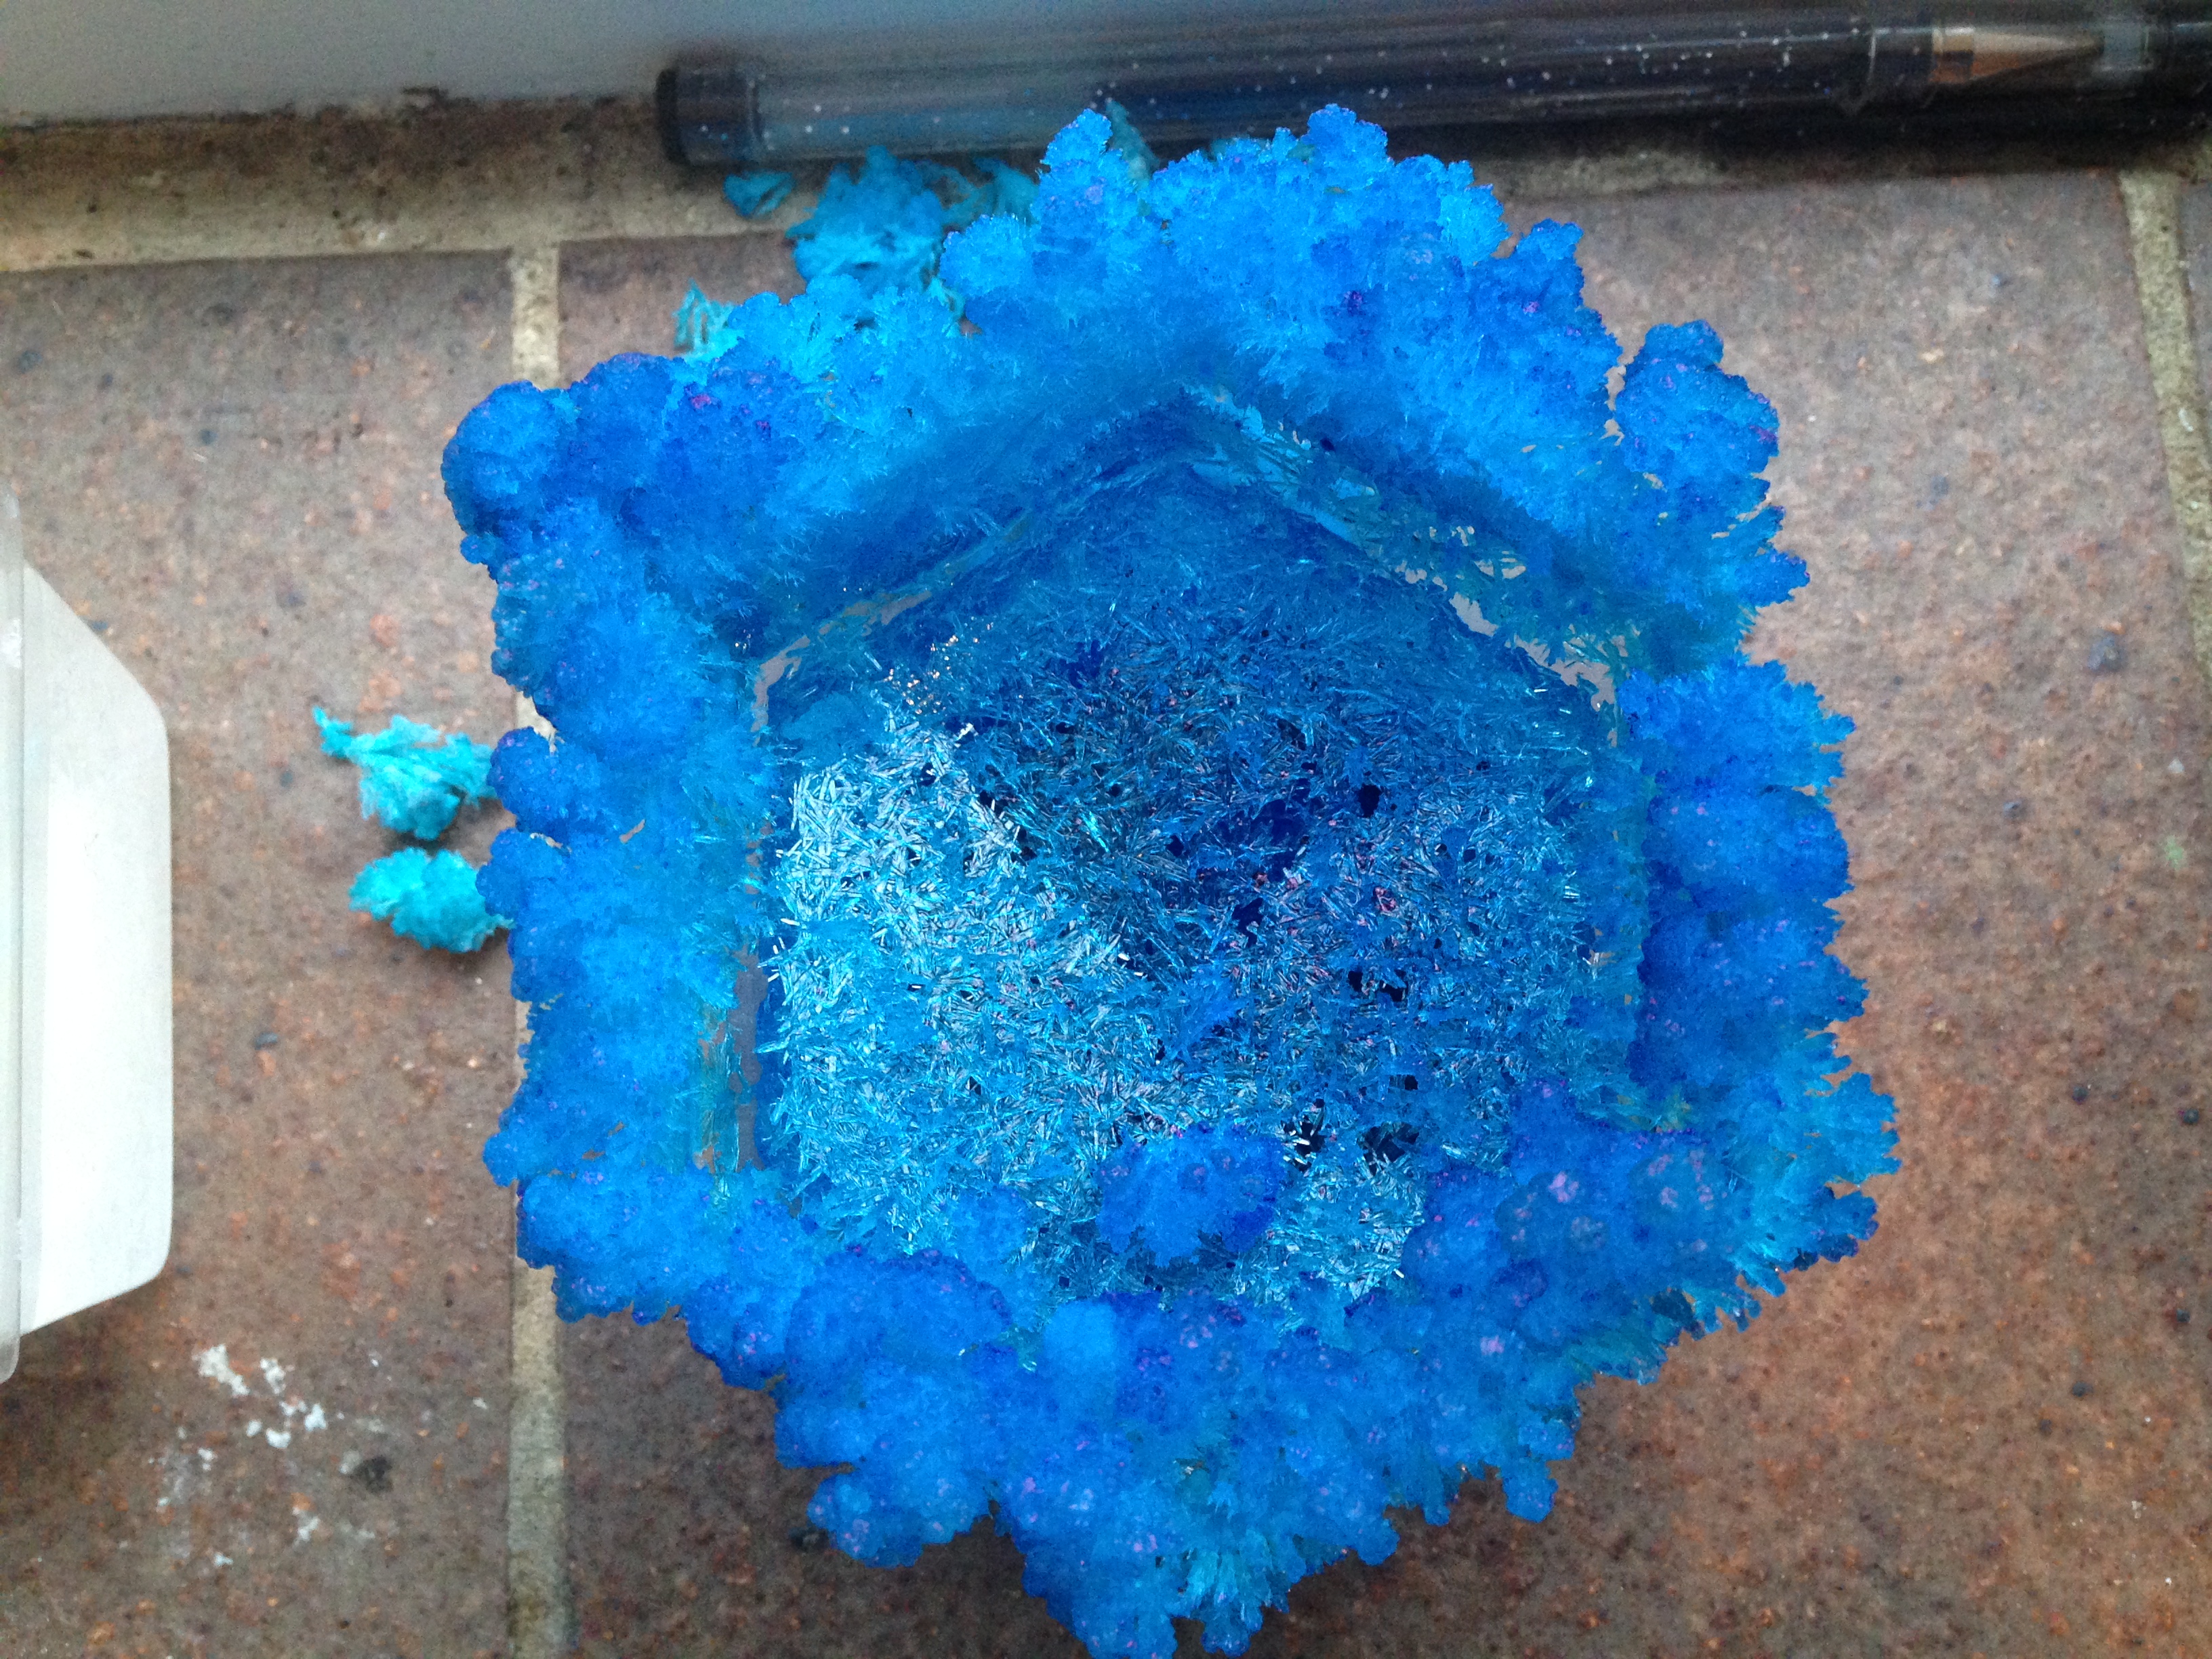
Meanwhile, nearby ….. Tilly is growing crystals in a beautiful shade of blue, and Joe is sitting at the kitchen table writing an essay in which he argues whether God’s perfection is proof of his existence or proof that he only exists in our imagination…. eat yer heart out Kant.
Crystals
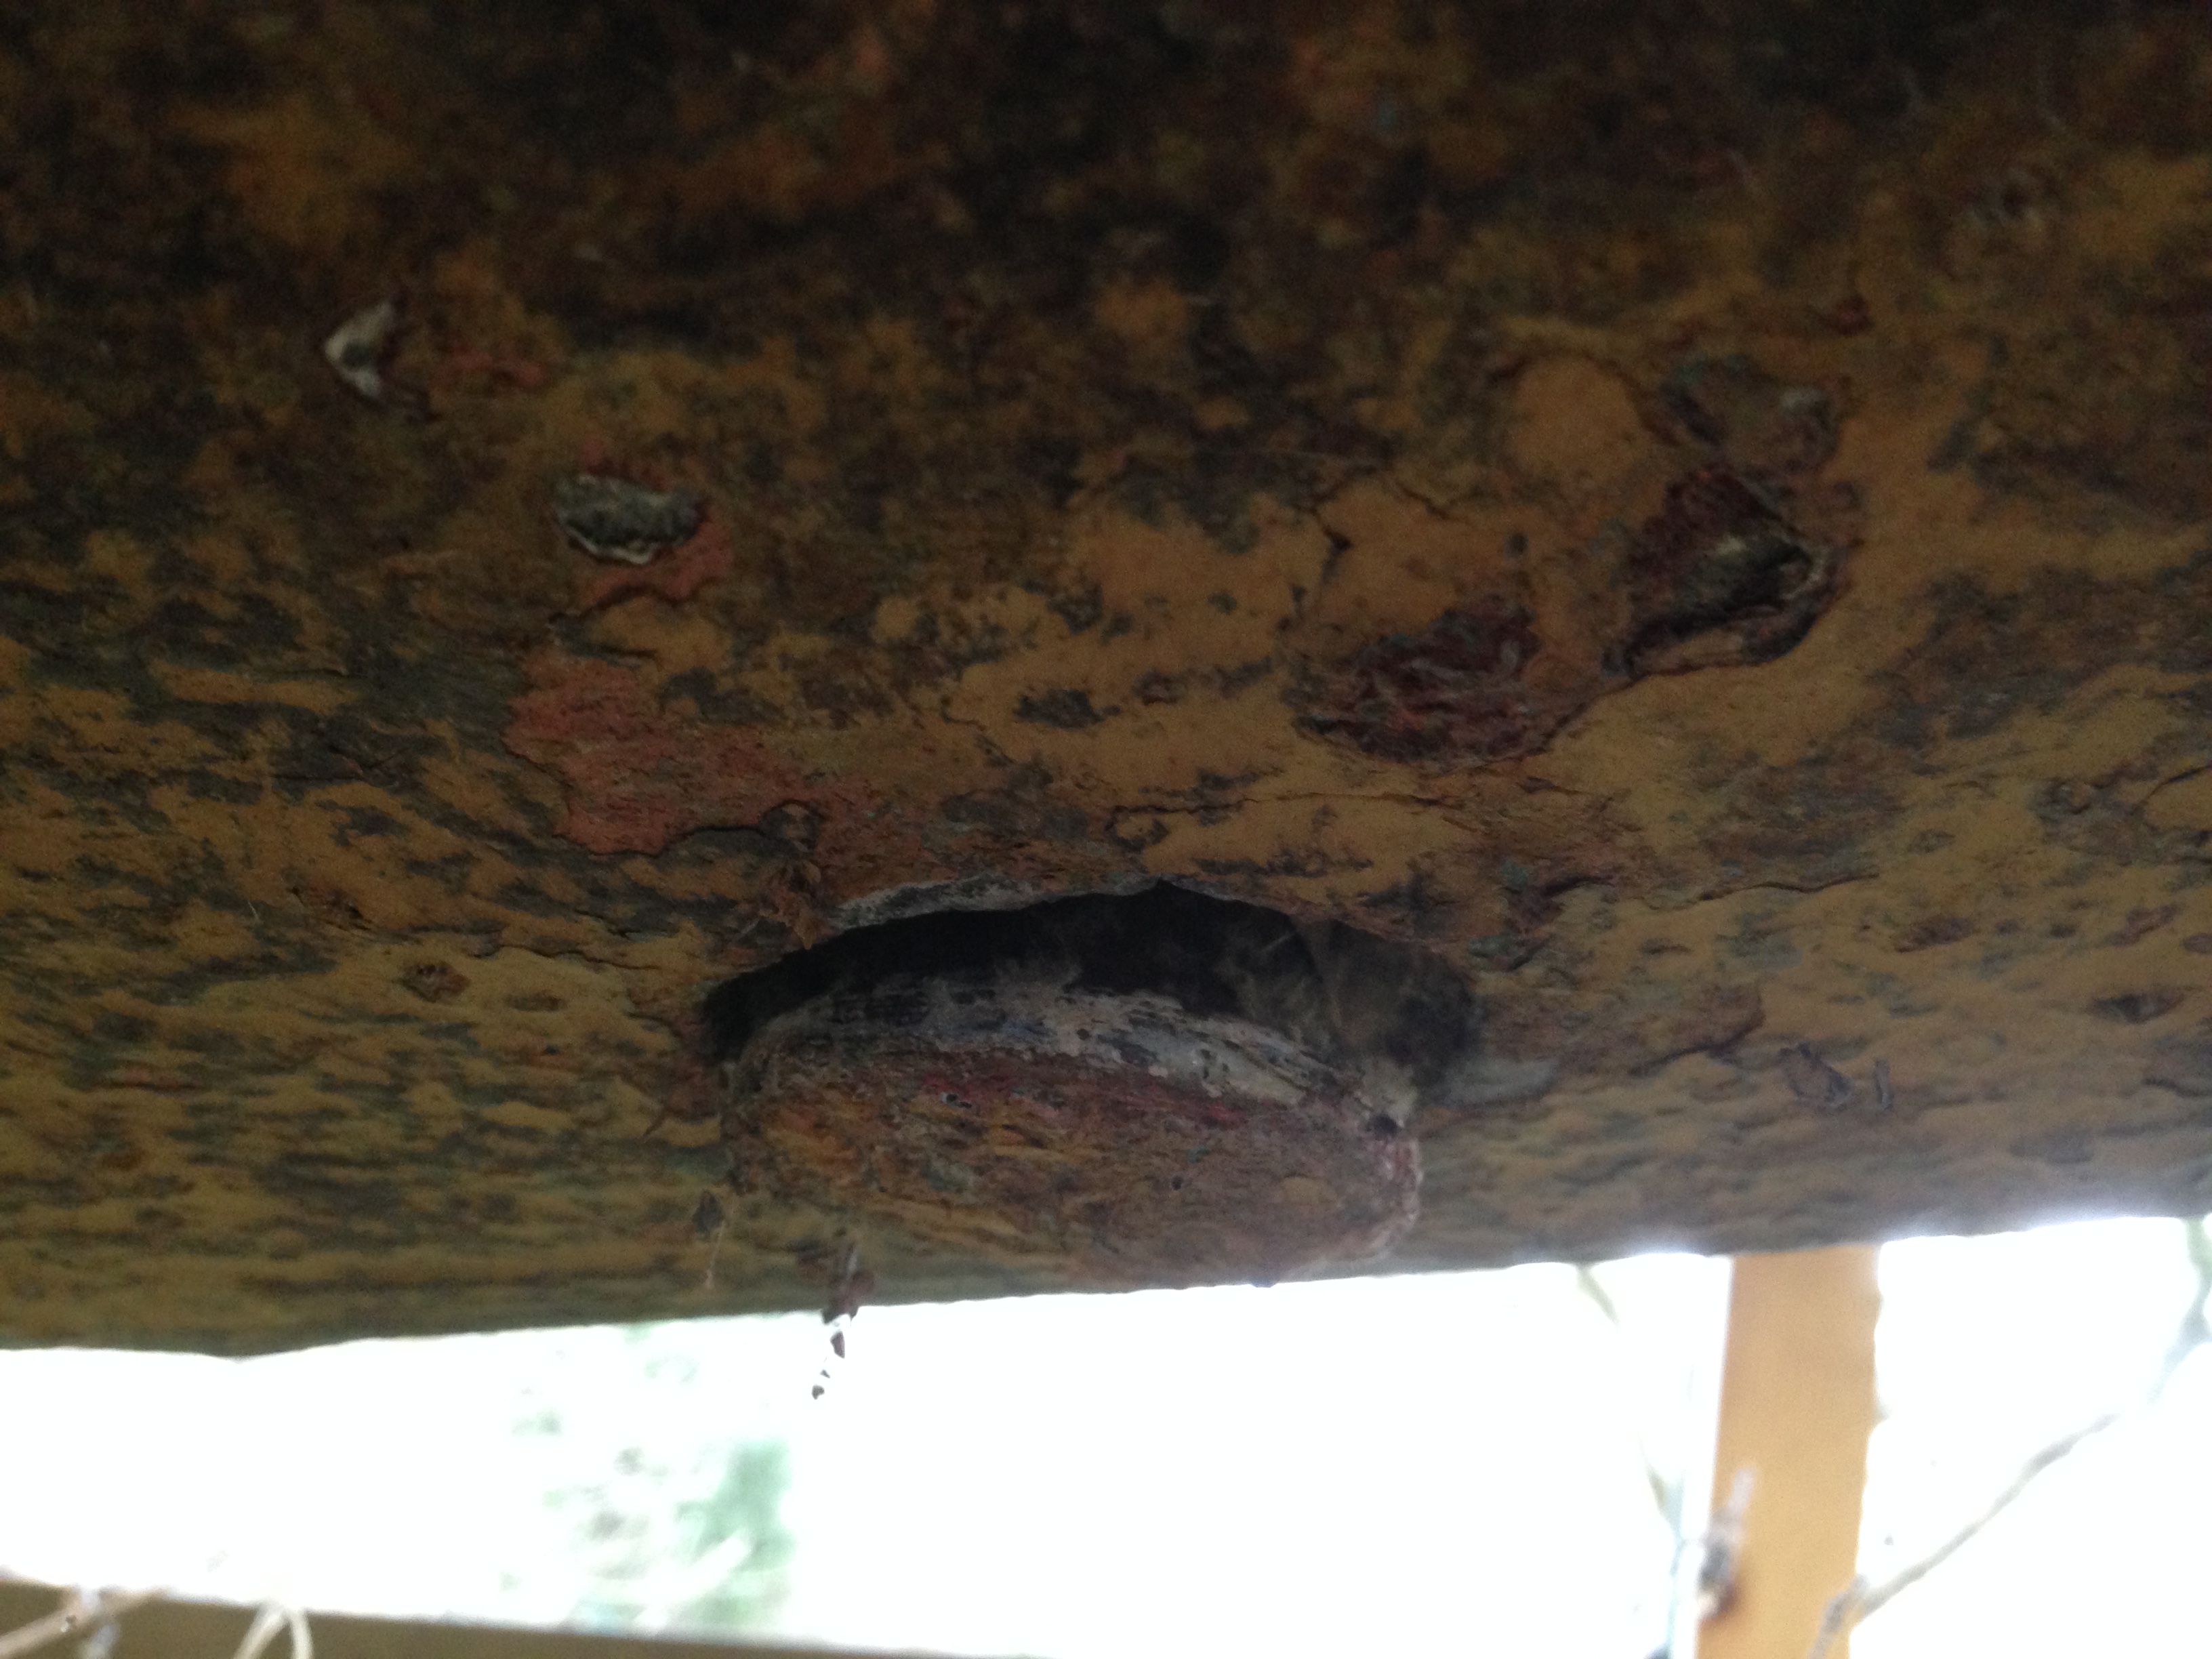
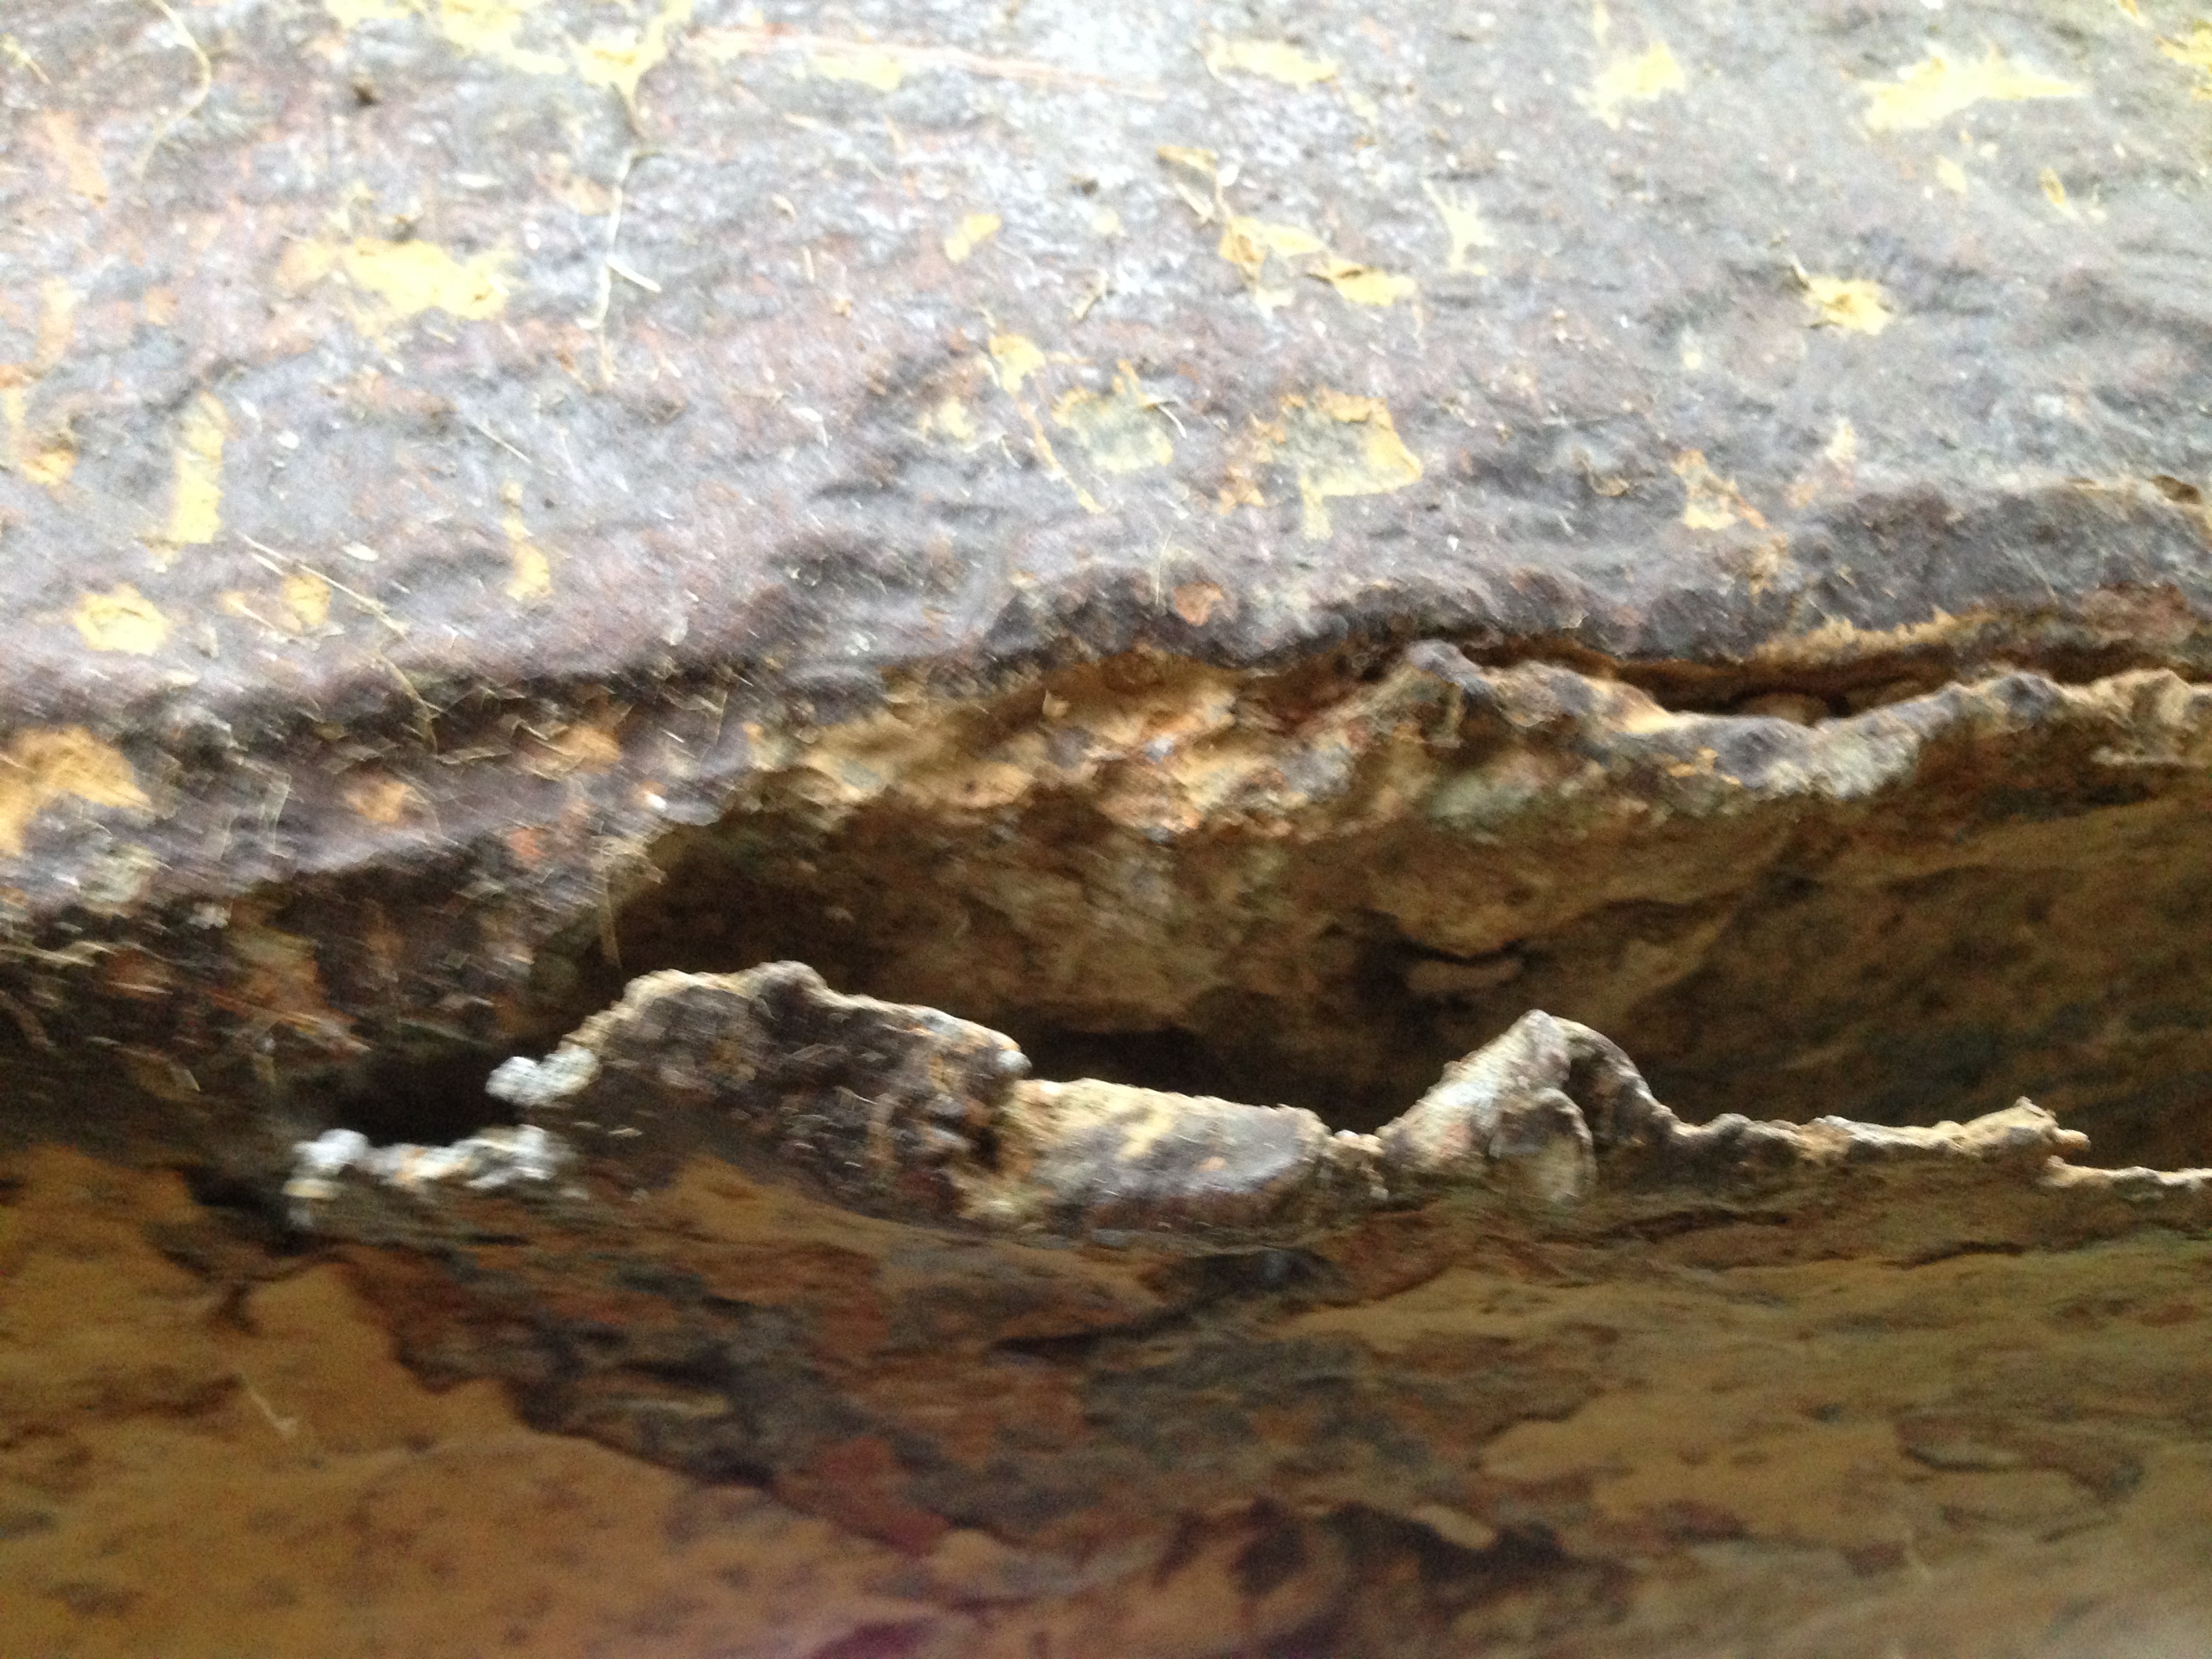
Not wishing you to get the idea that all is sunshine and roses here, this worrying photo shows a large slice of lead peeling away from the keel! I’m hoping to find this is perfectly normal, like a snake sloughing away an old skin, but I fear that is just wishful thinking and this is more like the drooping ear of a dog who has done something so nasty on the carpet it’s going to ruin your day.
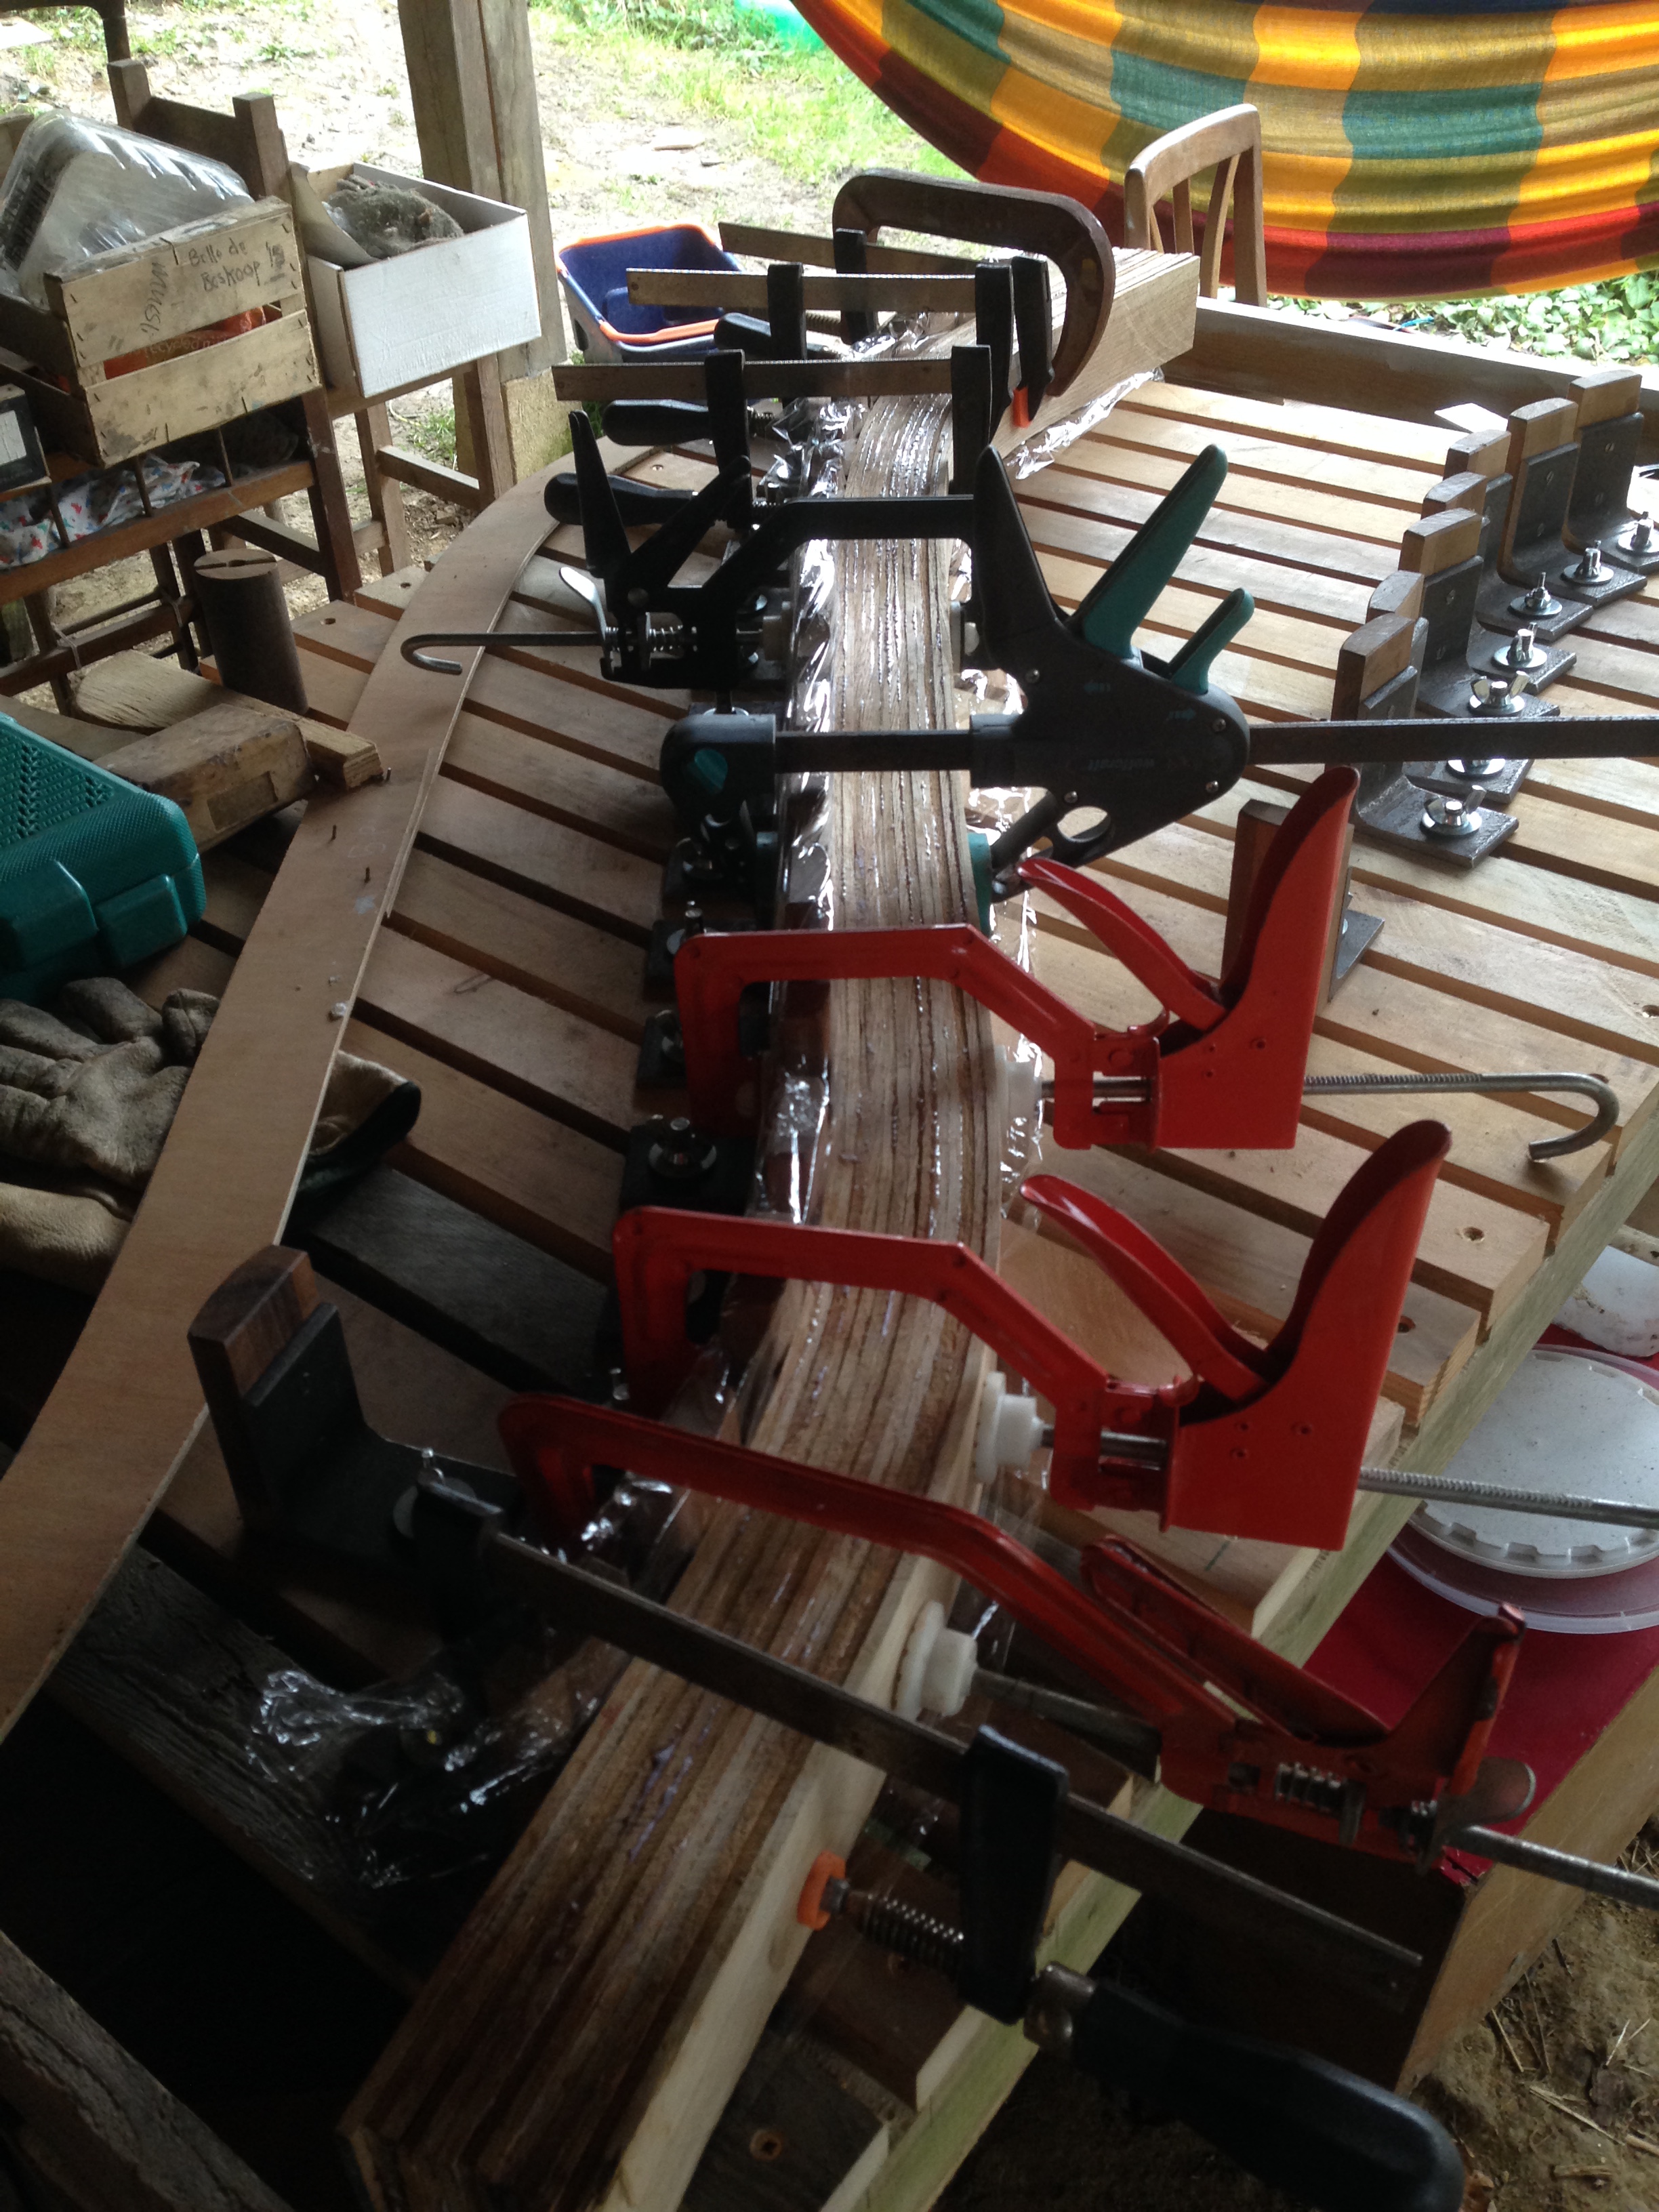
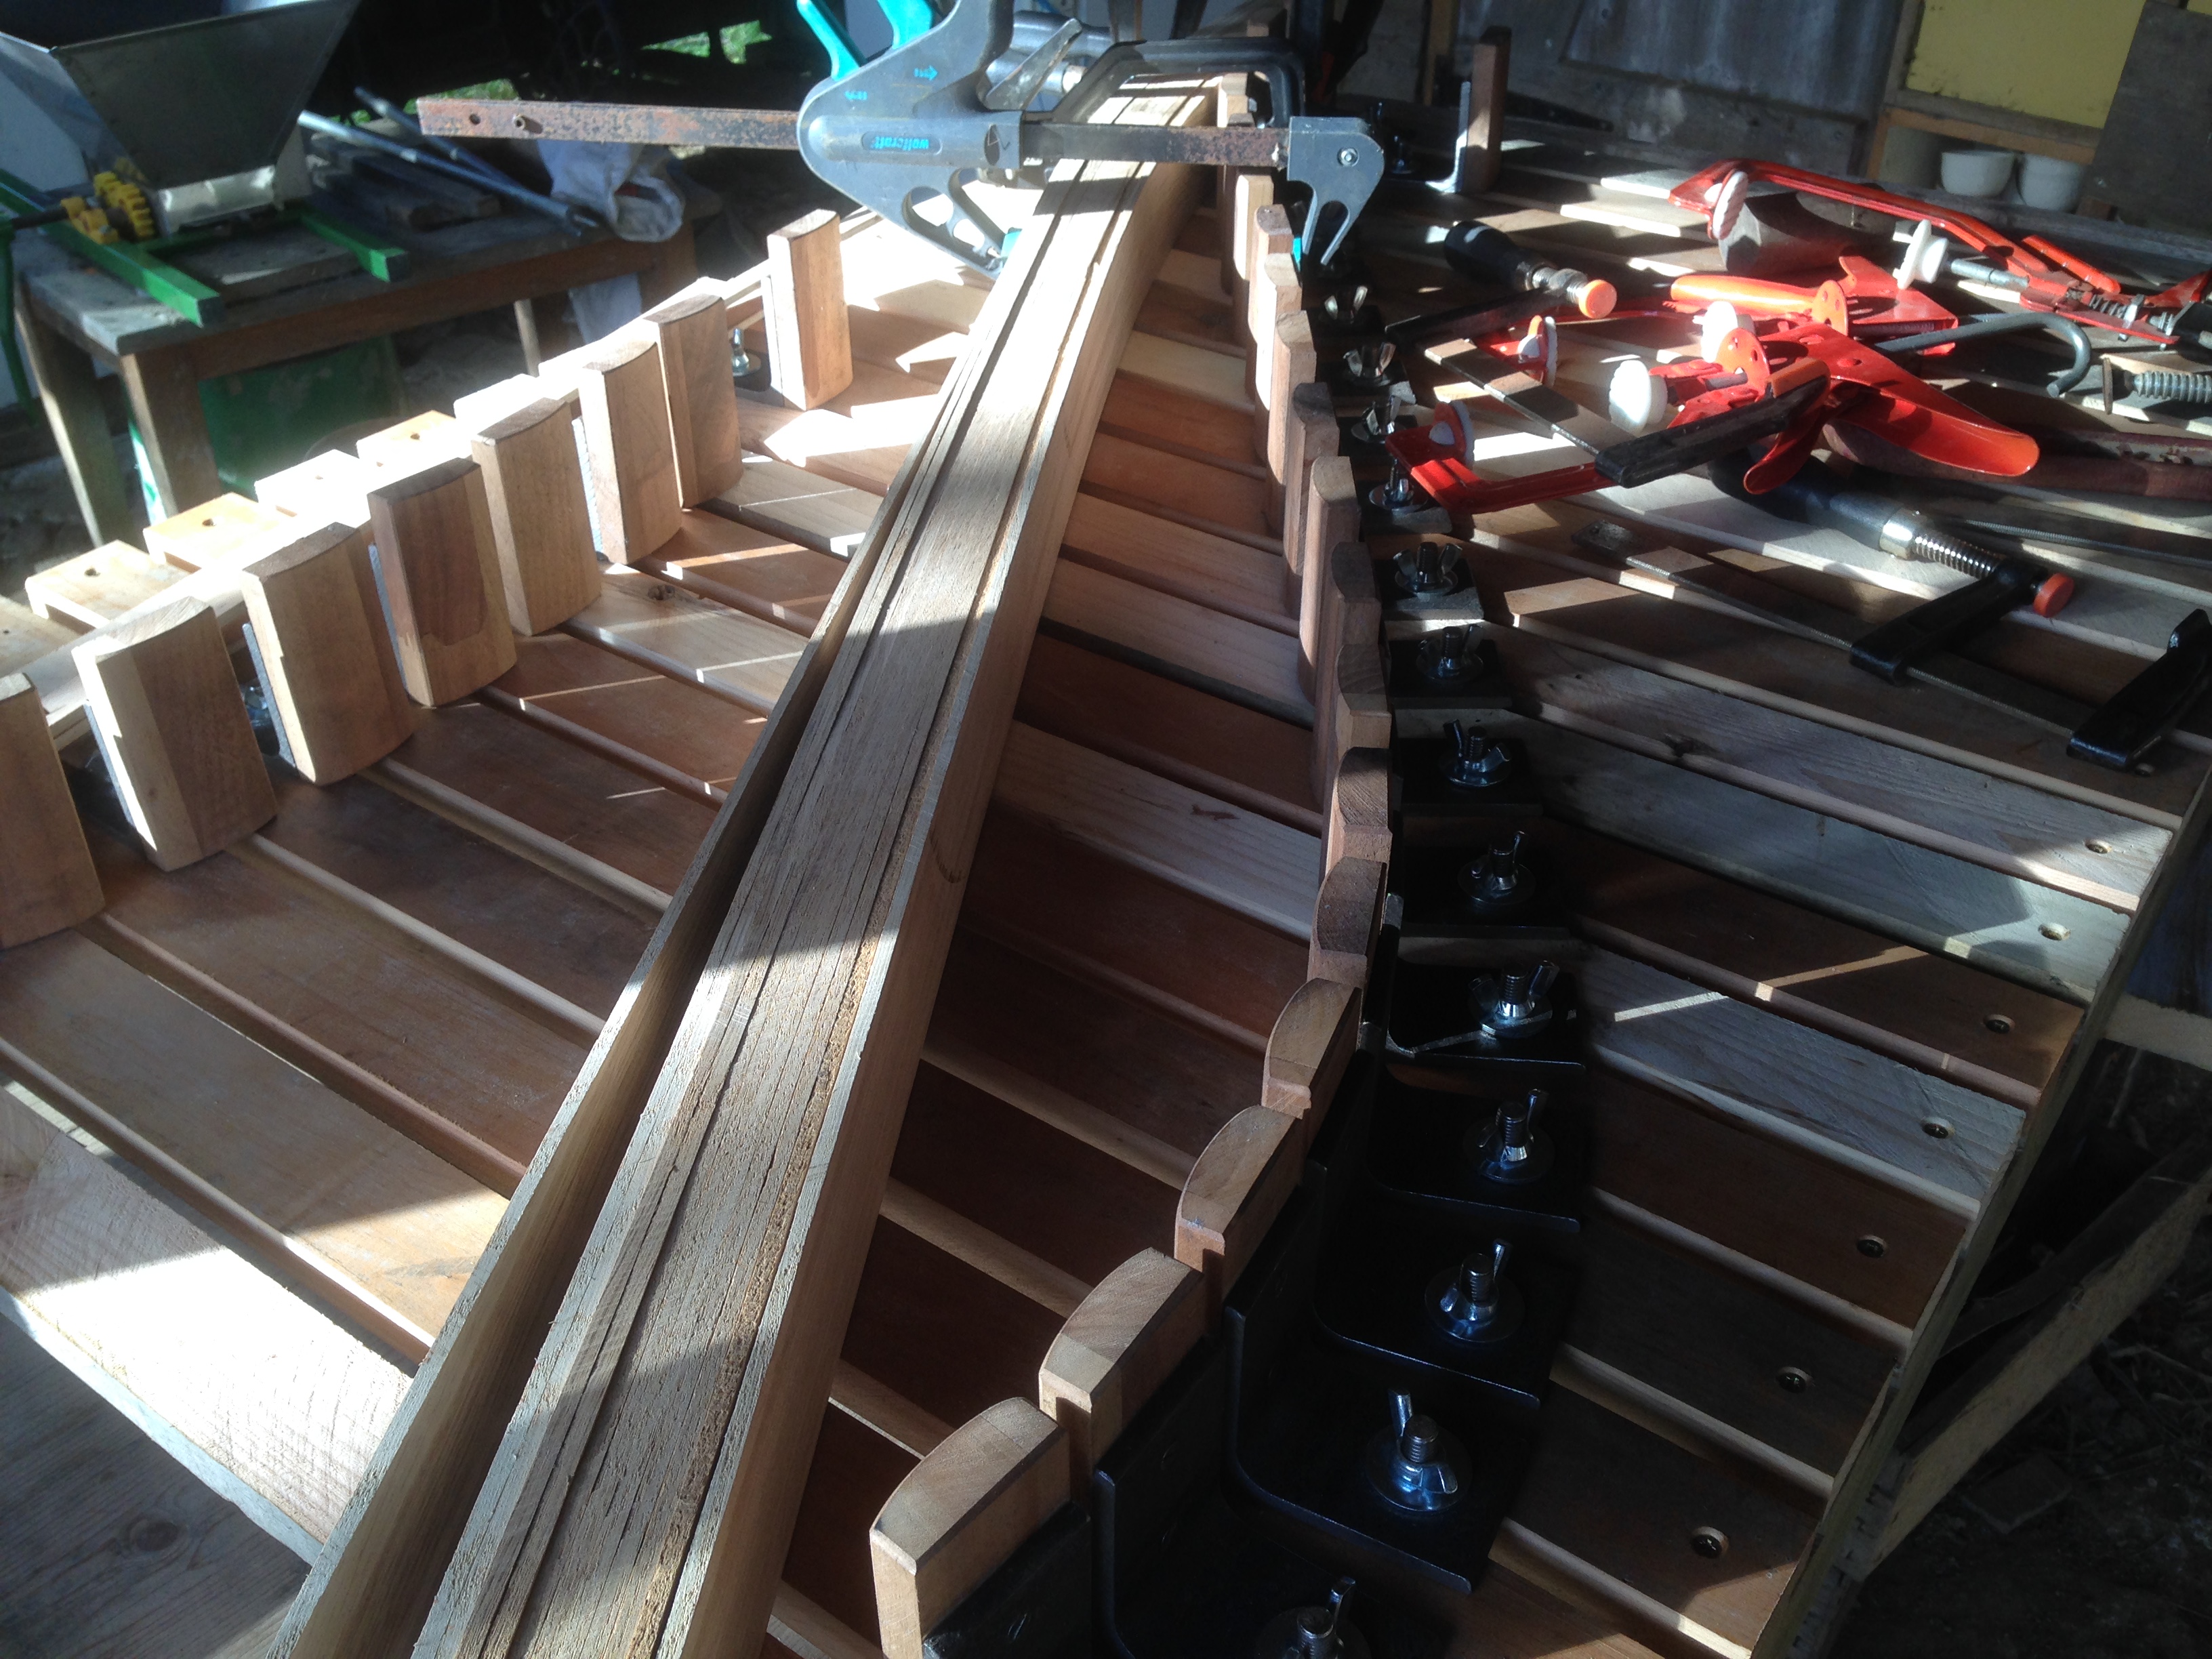
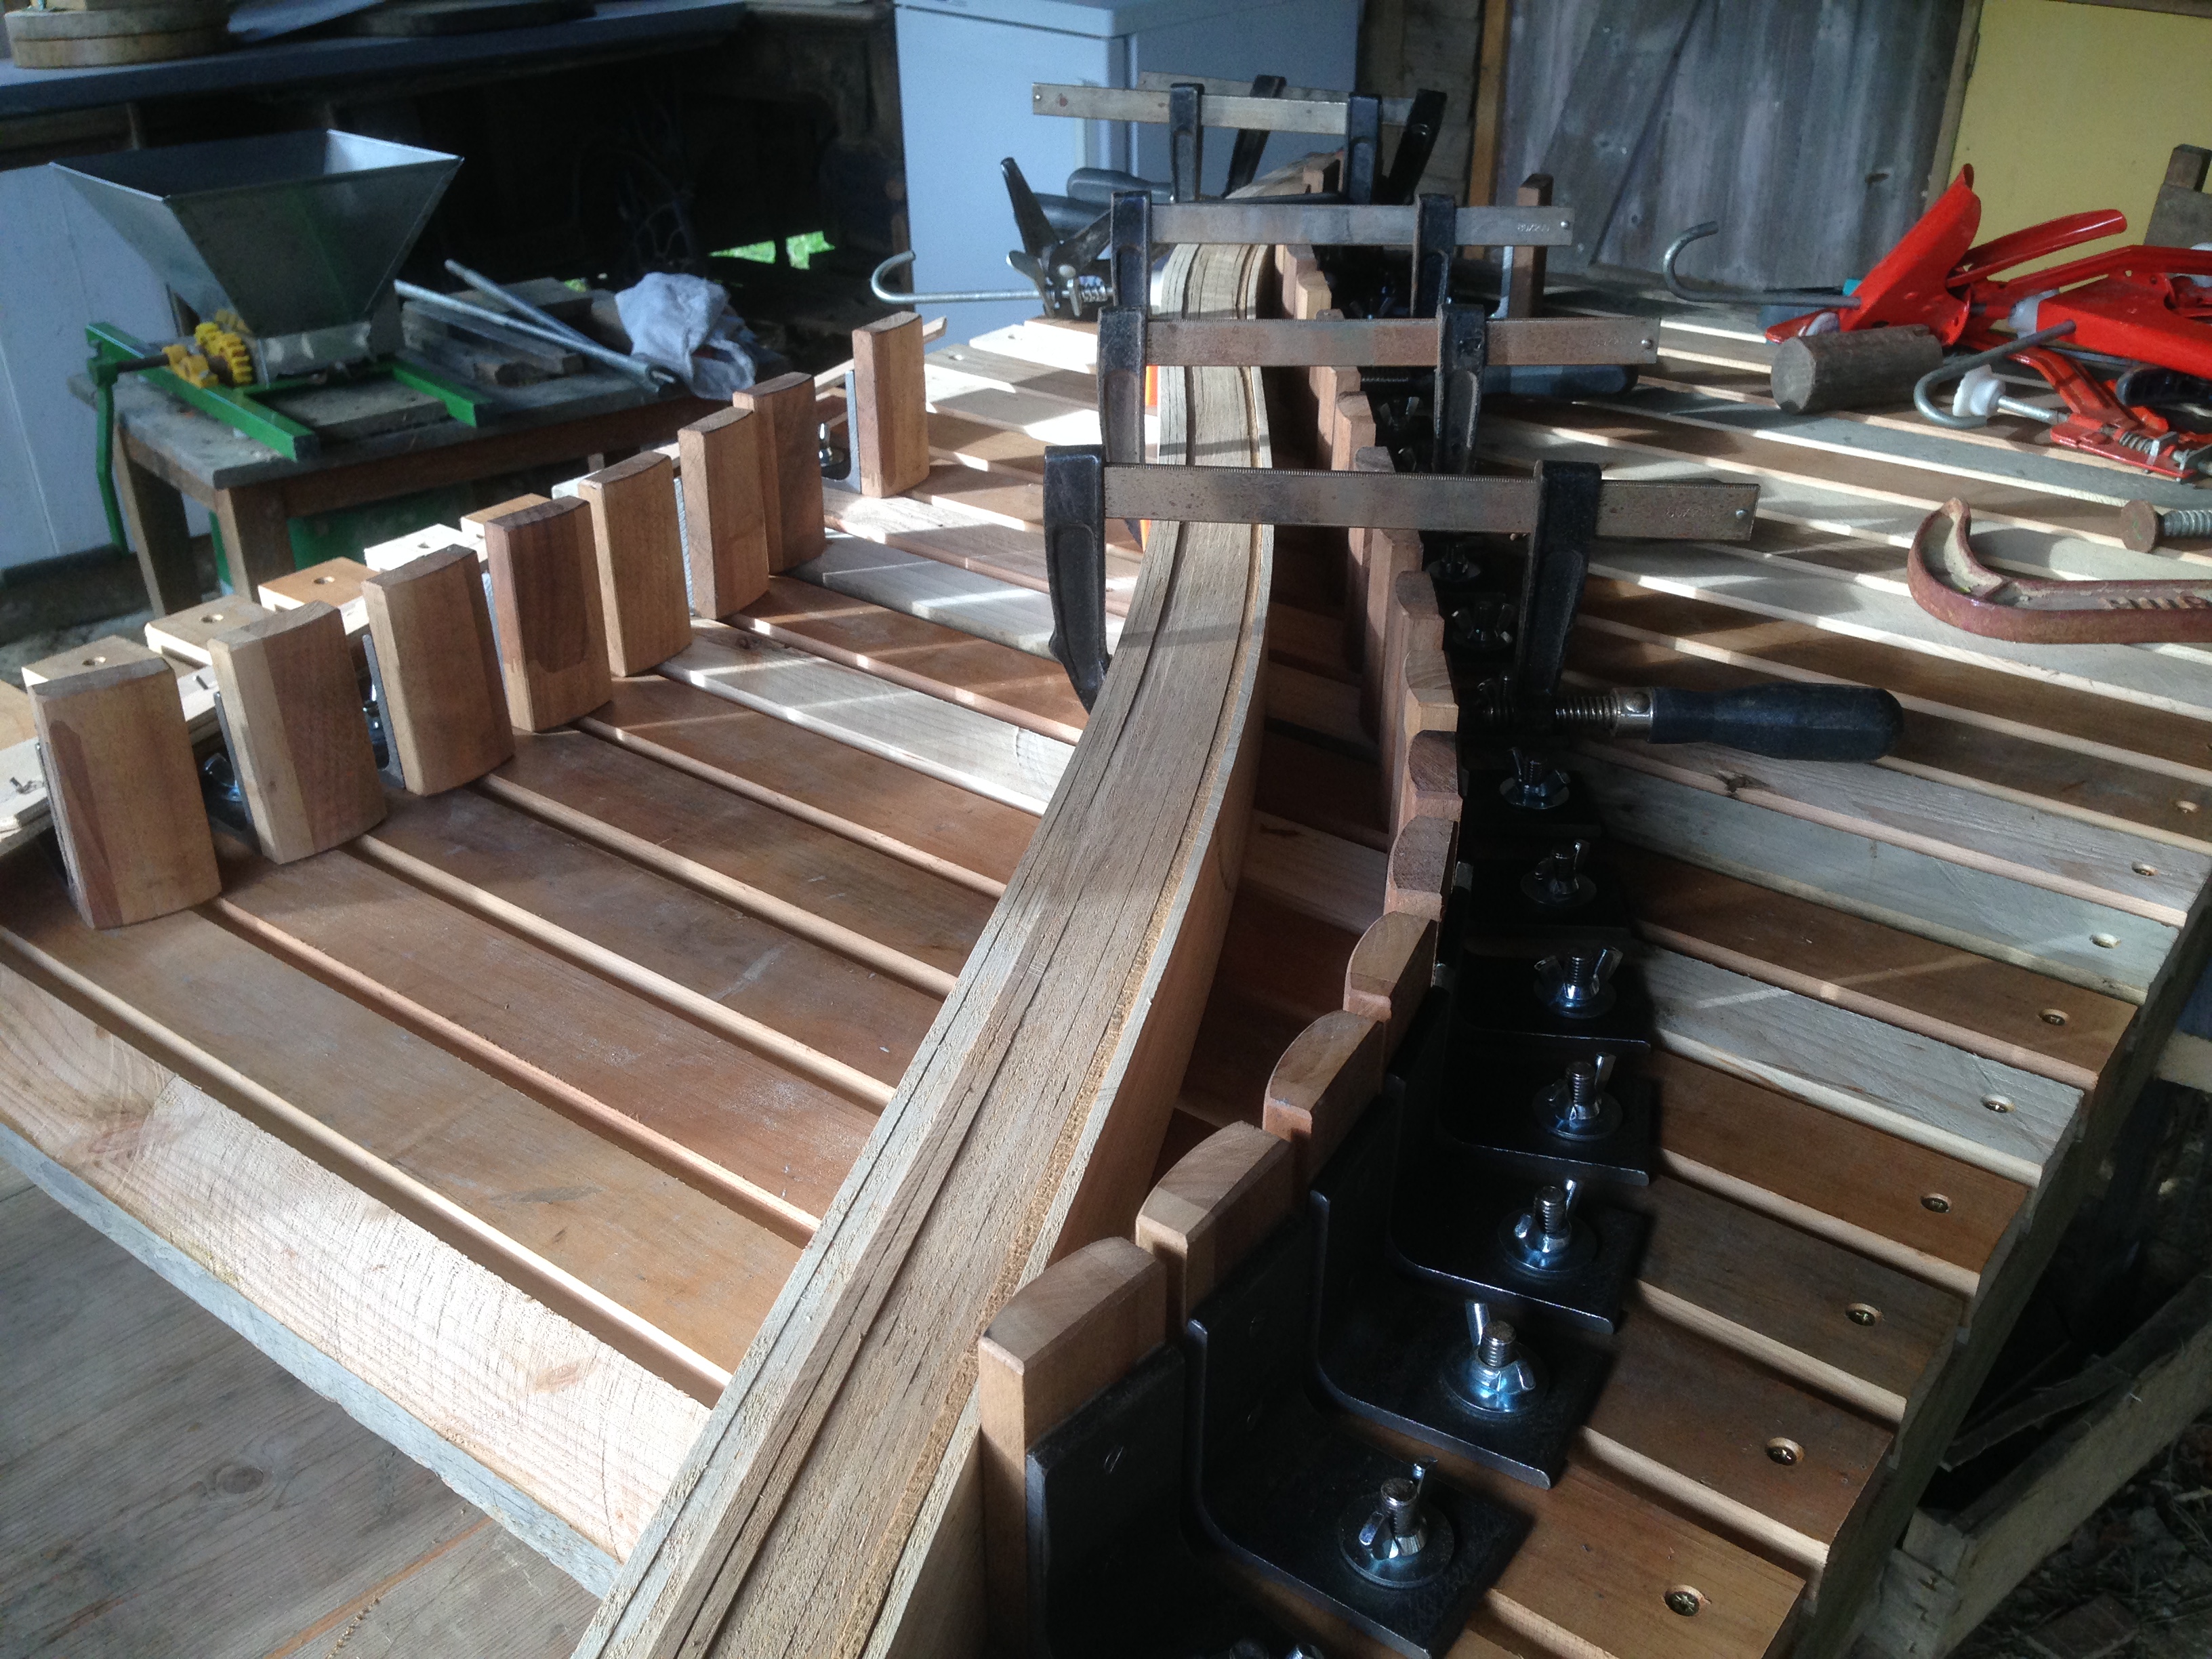
It’s been blowing a hoolie all weekend with plenty of rain too, so it was a perfect opportunity to work under cover. The laminating jig is finally finished, and a dry run clamping the Oak laminates produced a reasonably satisfactory result, so no chance to use my, ‘the jig is up’ gag that I’ve been trying to shoe horn into this blog. 🙂
The curving ranks of little Clamp Clones awaiting my bidding
Clamp the template and push the clamps up to it.
Laminates ready to clamp
Softly softly catchee monkey
Some ominous creaking at this point.
Home and dry!
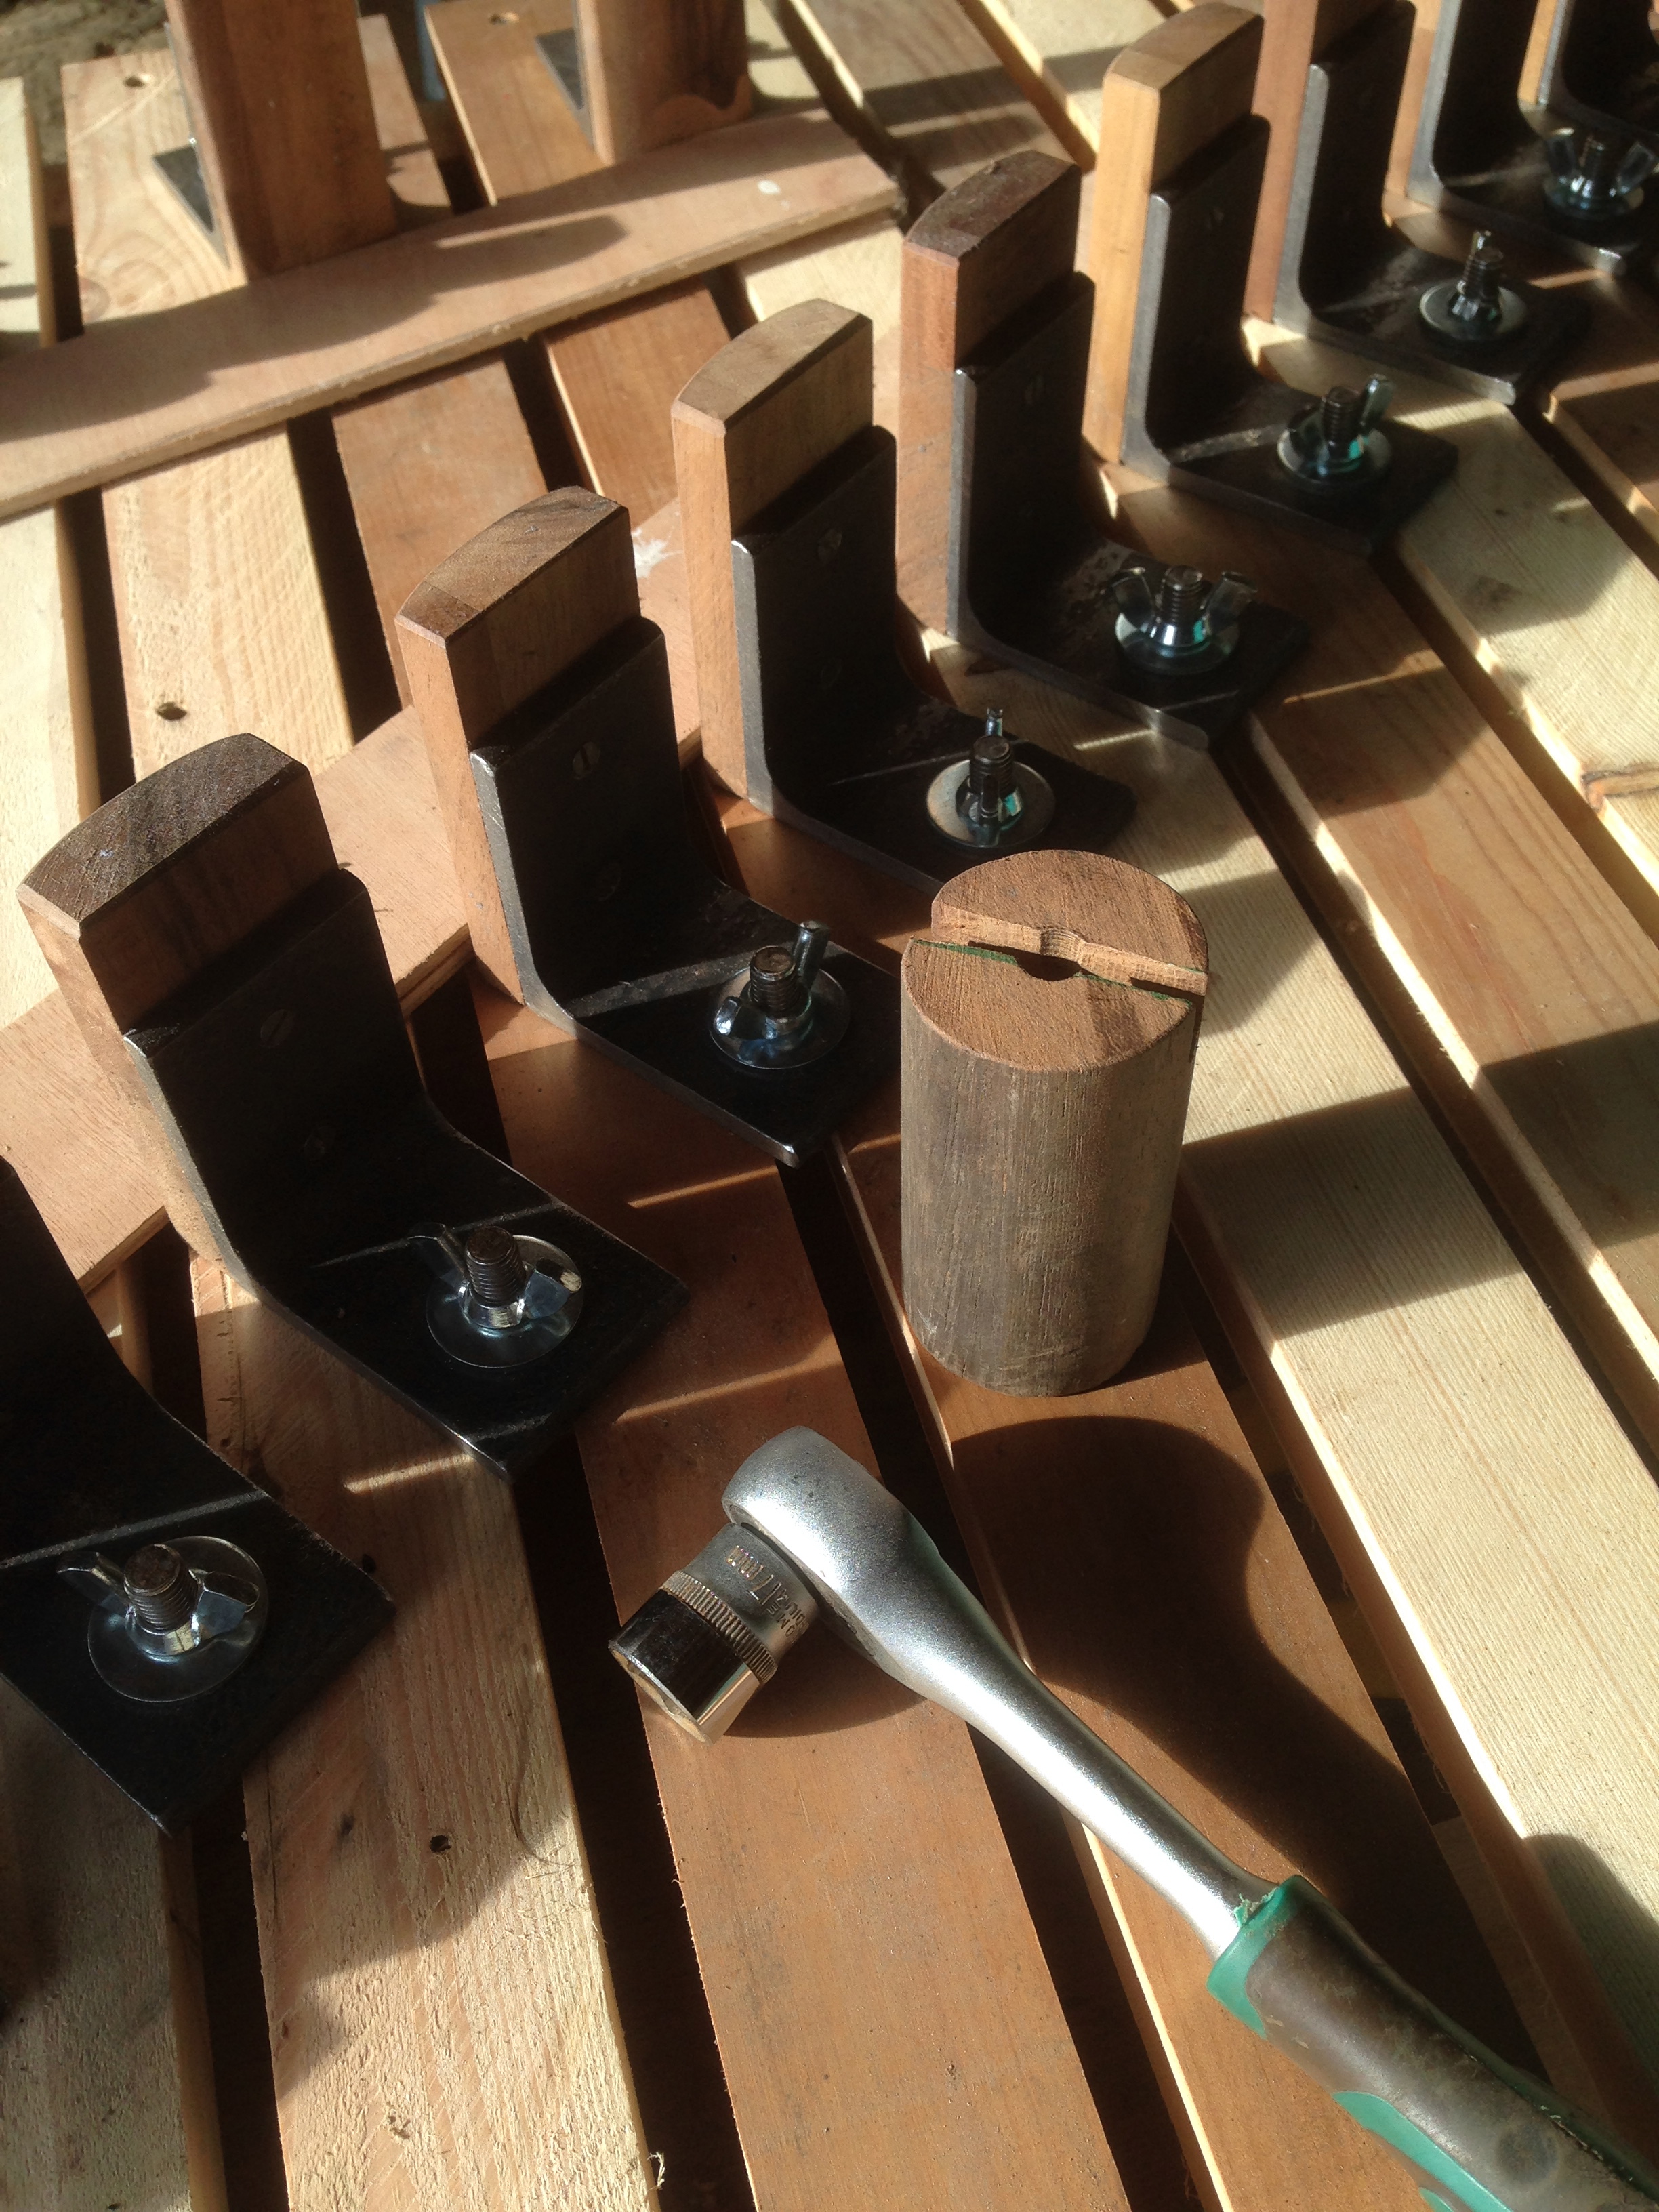
Socket Wrench and wing nut gripper to ease the burden on my tired old fingers.
Of course the whole process will be fraught with difficulty once there is glue sloshing about all over it and the jig may not just be ‘up’ it may be stratospheric! 🙂
I sent a whole day sawing Oak last Friday, the noise grinds you down a bit but the smell is fantastic! Sawing great lumps of Oak into 5mm thick slats creates a startling amount of sawdust, very expensive sawdust, still I can’t see another way round it. The beast of a saw at my father’s workshop has a very sharp new blade with a 3mm kerf which means to get 70mm of laminated beam I need around 125mm to start with.
Saw blade section
Great saw just a bit tight for space though.
The startling amount of sawdust settled on an equally startling amount of wine storage, (father has his priorities well sorted) which meant about an hour of sweeping and vacuuming at the end of the day.
The Oak started the day like this….
Once it was all sawn, this is what I was left with…
I hadn’t really thought through the amount of wastage so it will be back to the sawmill at some point to get some more. Meanwhile I’ve ordered some mild steel angle cut into 50mm lengths, from the The Metal Store, some bolts washers and wing nuts it’s time to make the jig!
time passes…..
Snow falls and 9 year old daughters must be appeased with snow man making.
Snowman or Snowgoblin?
He came out a little more martial then we were expecting with his teasel trident and ice shield. He lasted almost a week, looking more like a small white duck towards the end but still clinging on to ‘life’.
Eldest son, (usefully training to be an engineer) was cajoled into getting his hands dirty filing off burrs, and then the slightly warmer, inside by the fire, but rather tedious marking out. Now if I can just persuade son #2 and #3 to study Navigation and Sail Making we could have the makings of a pretty good team!
Filing off the burrs with Toby
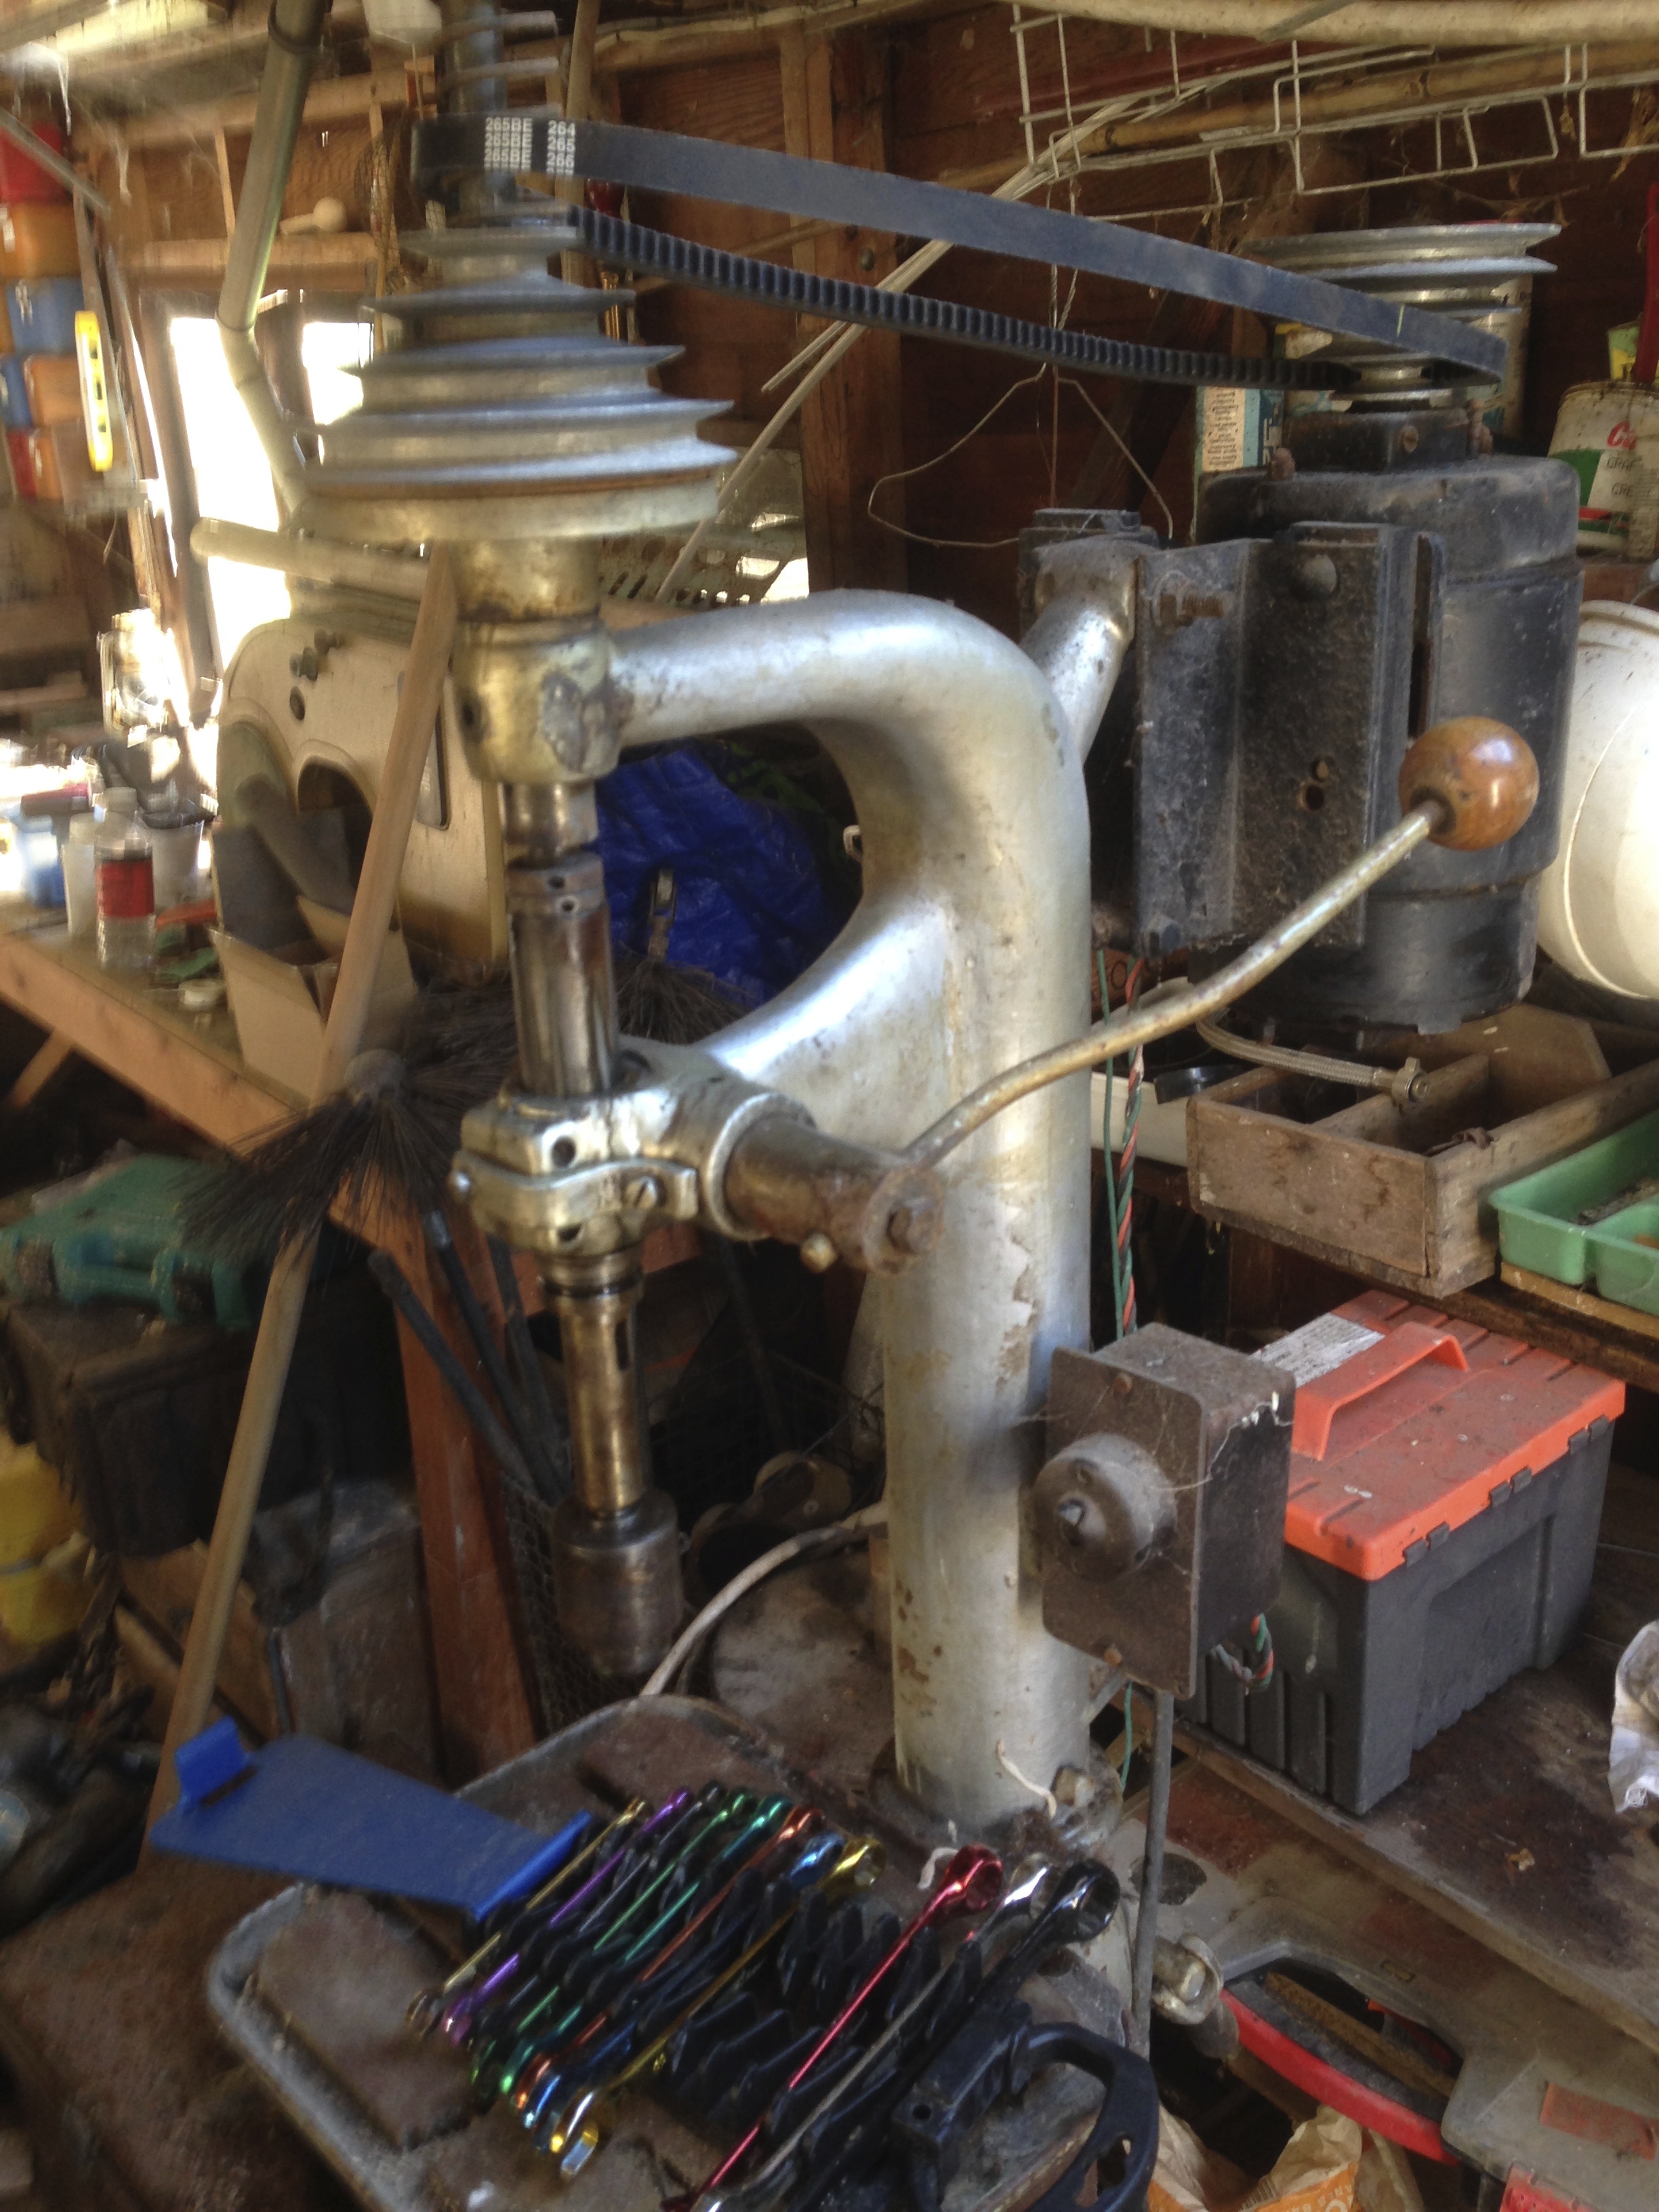
Back to the leaky workshop and before drilling 84 holes in 28 bits of steel angle, first get the trusty old drill working. After several years of neglect sitting under a leak in the roof, its more rusty than trusty and the belt shredded within moments. New belt from Lenco Motors, a squirt of oil, and the removal of some spacers to get the belt to fit, soon had it up and running.
Rusty but Trusty Old Drill
Next job, make a jig…. yes I’m making a jig to make clamps for a jig… to make frames for the boat. It does seem a bit of a long winded process as my wife sweetly pointed out.
The Drilling Jig in use
The conversation went something like this;
“What are these bits you’re making, dearest heart?”
“They’re clamps, my own sweet darling”
“Why, wherever do they go on the boat, you clever man?”
“Well my love, they don’t actually go on the boat…. they are more like tools… to make bits… that do go on the boat…”
“What?! You mean you’re spending all this time and money making things that aren’t even part of the boat?!” (thinks; “Dear lord what have I done to deserve this nincompoop?”)
Meanwhile, back in the cold and damp, a happy day is spent drilling, next stage, wooden pads.
Clamps ready for the next stage
Some leftover Walnut worktop seems a bit extravagant for clamps but its too small for any other use so…
Leftover Walnut worktop cut into blocks and marked up ready for drilling
Screwed onto the steel angles
Rounded off and squared up… does that make any sense at all?
The advantage of a bench disc sander is getting everything nice and square.
Finally! The finished clamps.
Next up, make the bed which might look something like this…
Drawing for the frame laminating jig
I’m sure this project is making very slow progress for anyone reading it, (don’t kid yourself man, there’s no one out there) but I’m starting to feel like things are moving forward. 🙂
So here we are, a few days in to 2016 and I’d like to have something more momentous to report other than the strong winds, tail end of storm Dave, Eva or Frank or whoever, which ripped the tarpaulin off the frame requiring a morning spent wrestling it back on. But the fact is, for the last month there’s been nothing more than some ineffectual pottering, inconsequential scraping, untimely stripping, and a morsel of polishing, in fact anything that puts off the moment of biting the bullet and actually starting to laminate frames. “It’s the weather.” I tell myself as another drip finds its way down my collar. “I need a workshop” I mutter as I squelch about in the mud. However, Christmas spending has depleted the workshop building pot to non existence so work will have to continue on a weather permitting basis.
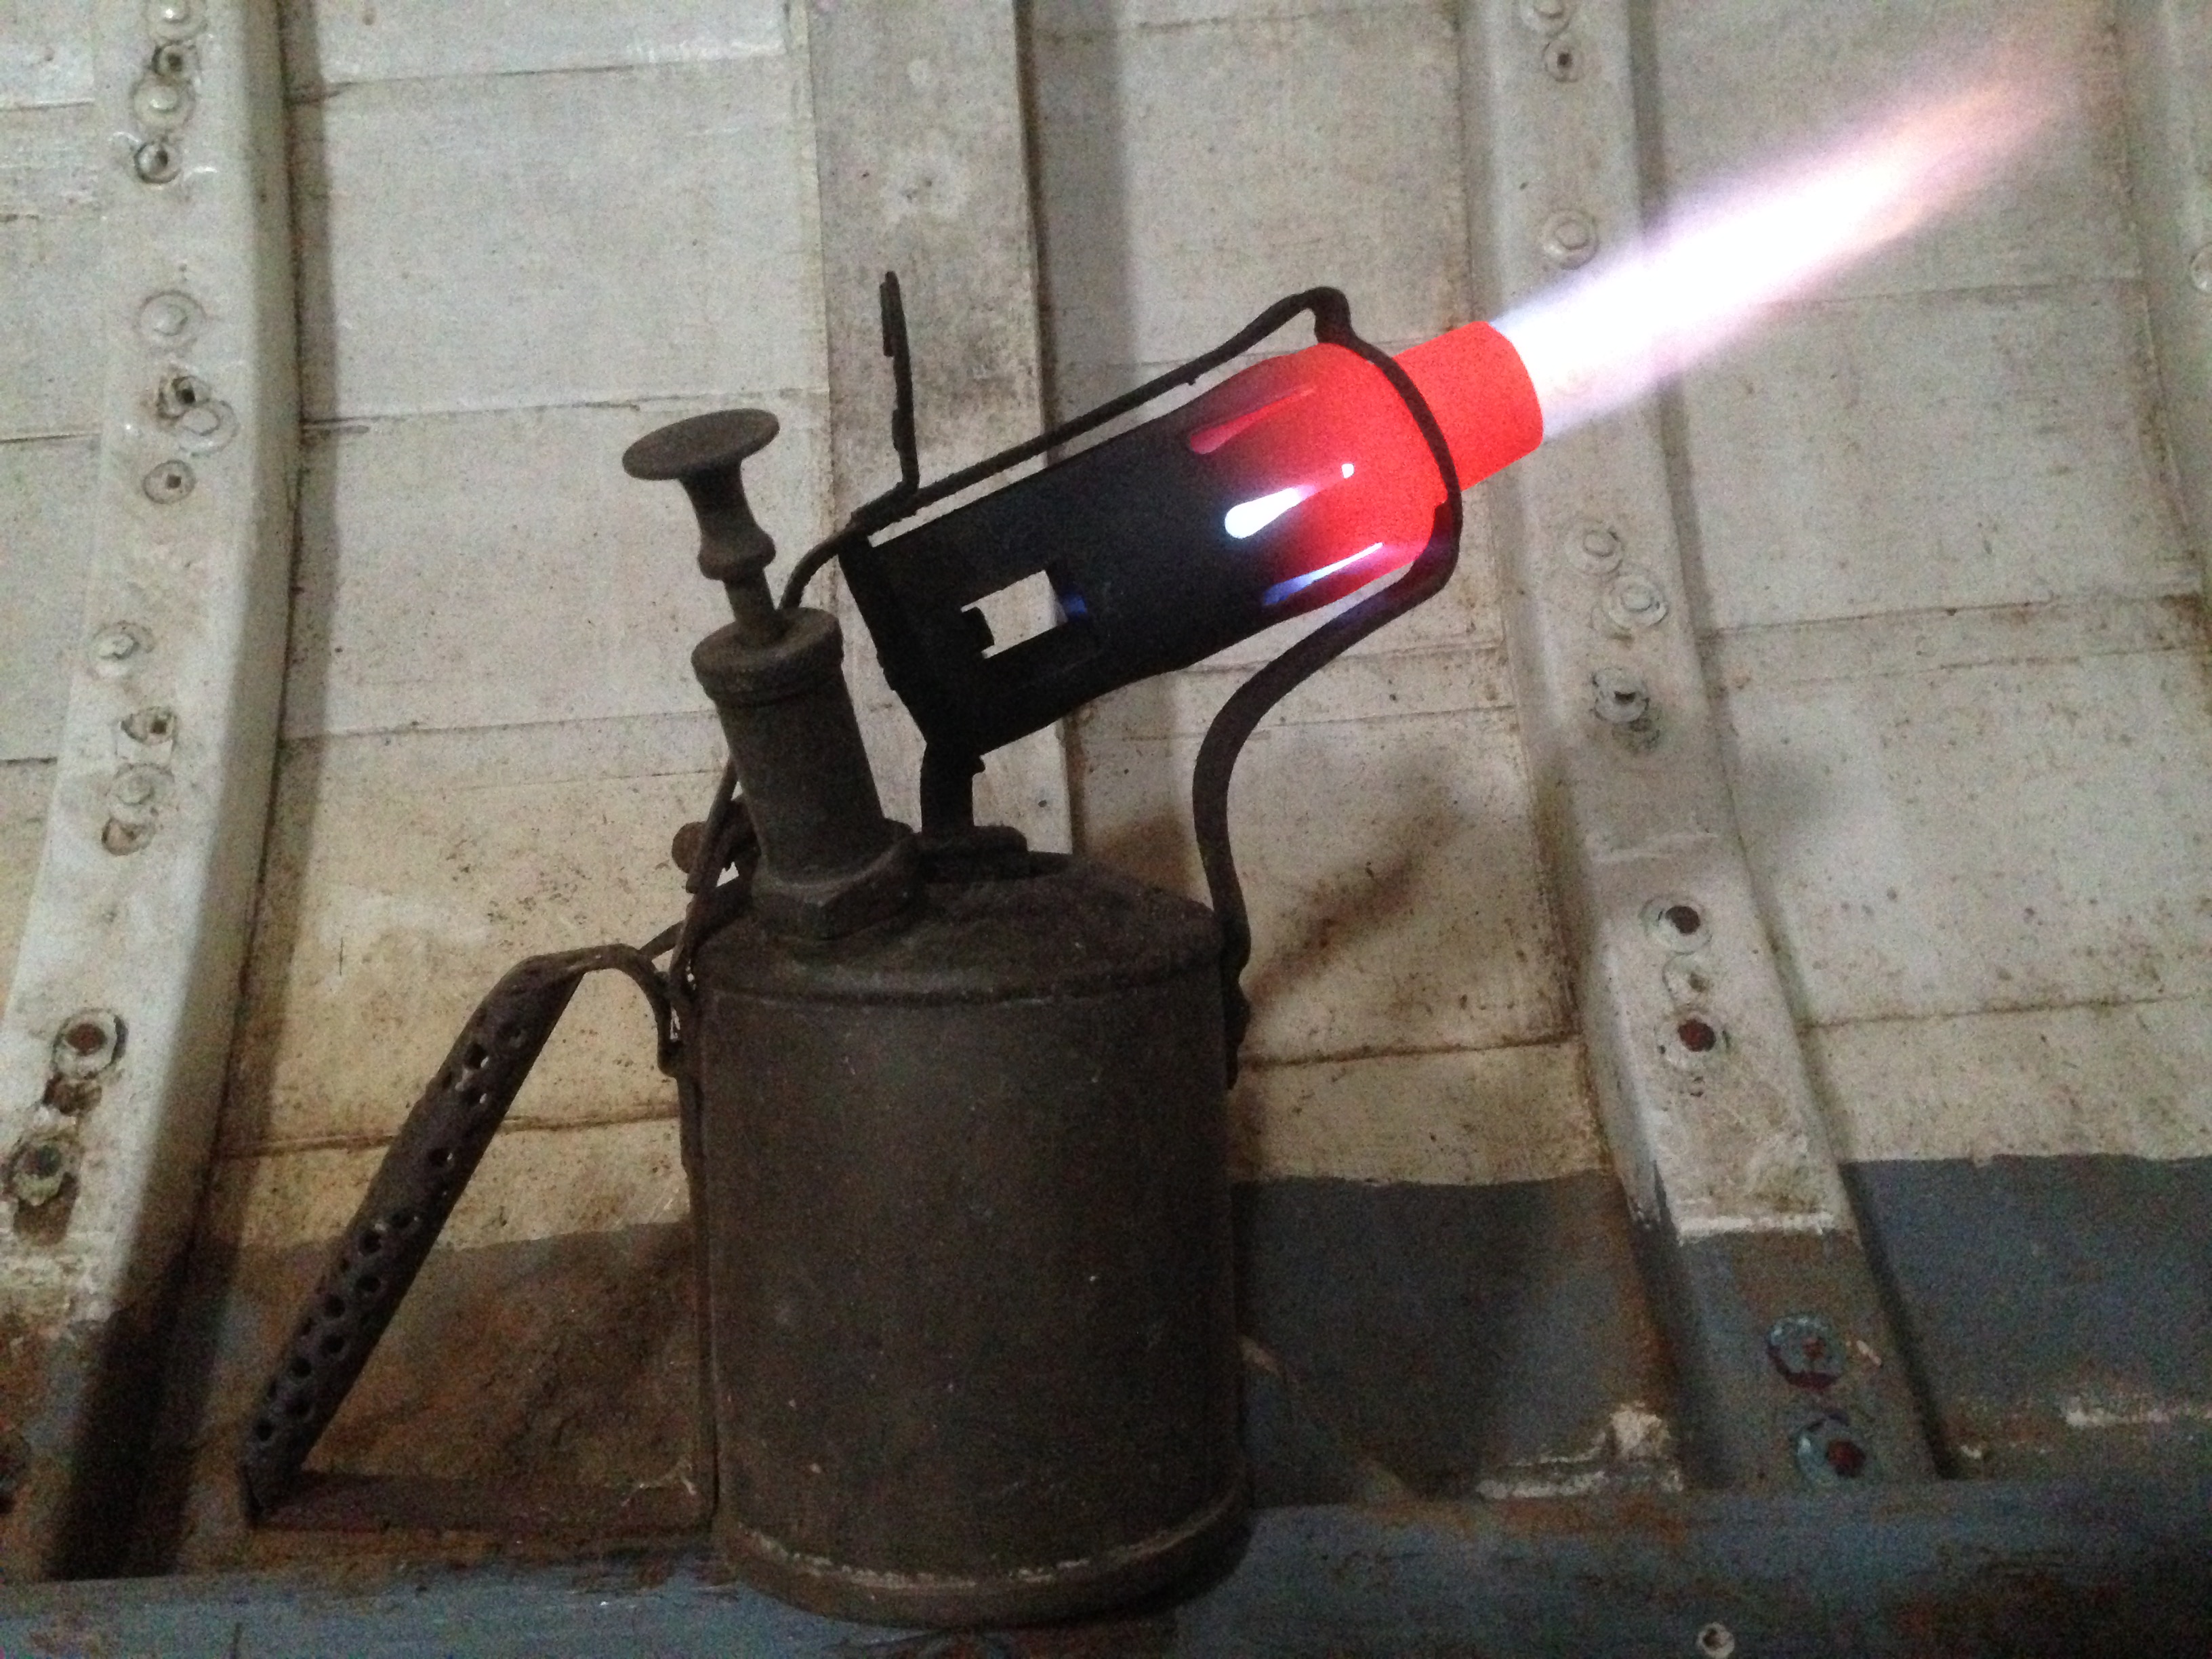
On a more positive note 25 litres of paraffin have found their way into my possession (thank you Brian!) and with this seemingly inexhaustible supply I fired up the old blow torch for some nice warm paint stripping.
Paraffin Blow Torch getting scarily hot
It’s a bit of a fiddle getting it fired up and it’s heavier than a gas one but there is something satisfying about a tool that’s on its third generation and it certainly keeps you warm!
More paint stripping…
It took a couple of hours to get to this stage (below) and there is still many hours of picking, scratching, scraping and sanding to go to get all trace of paint off…. where are my boys when I need them?
Lesson learned here is never paint wood if you might ever want it unpainted!
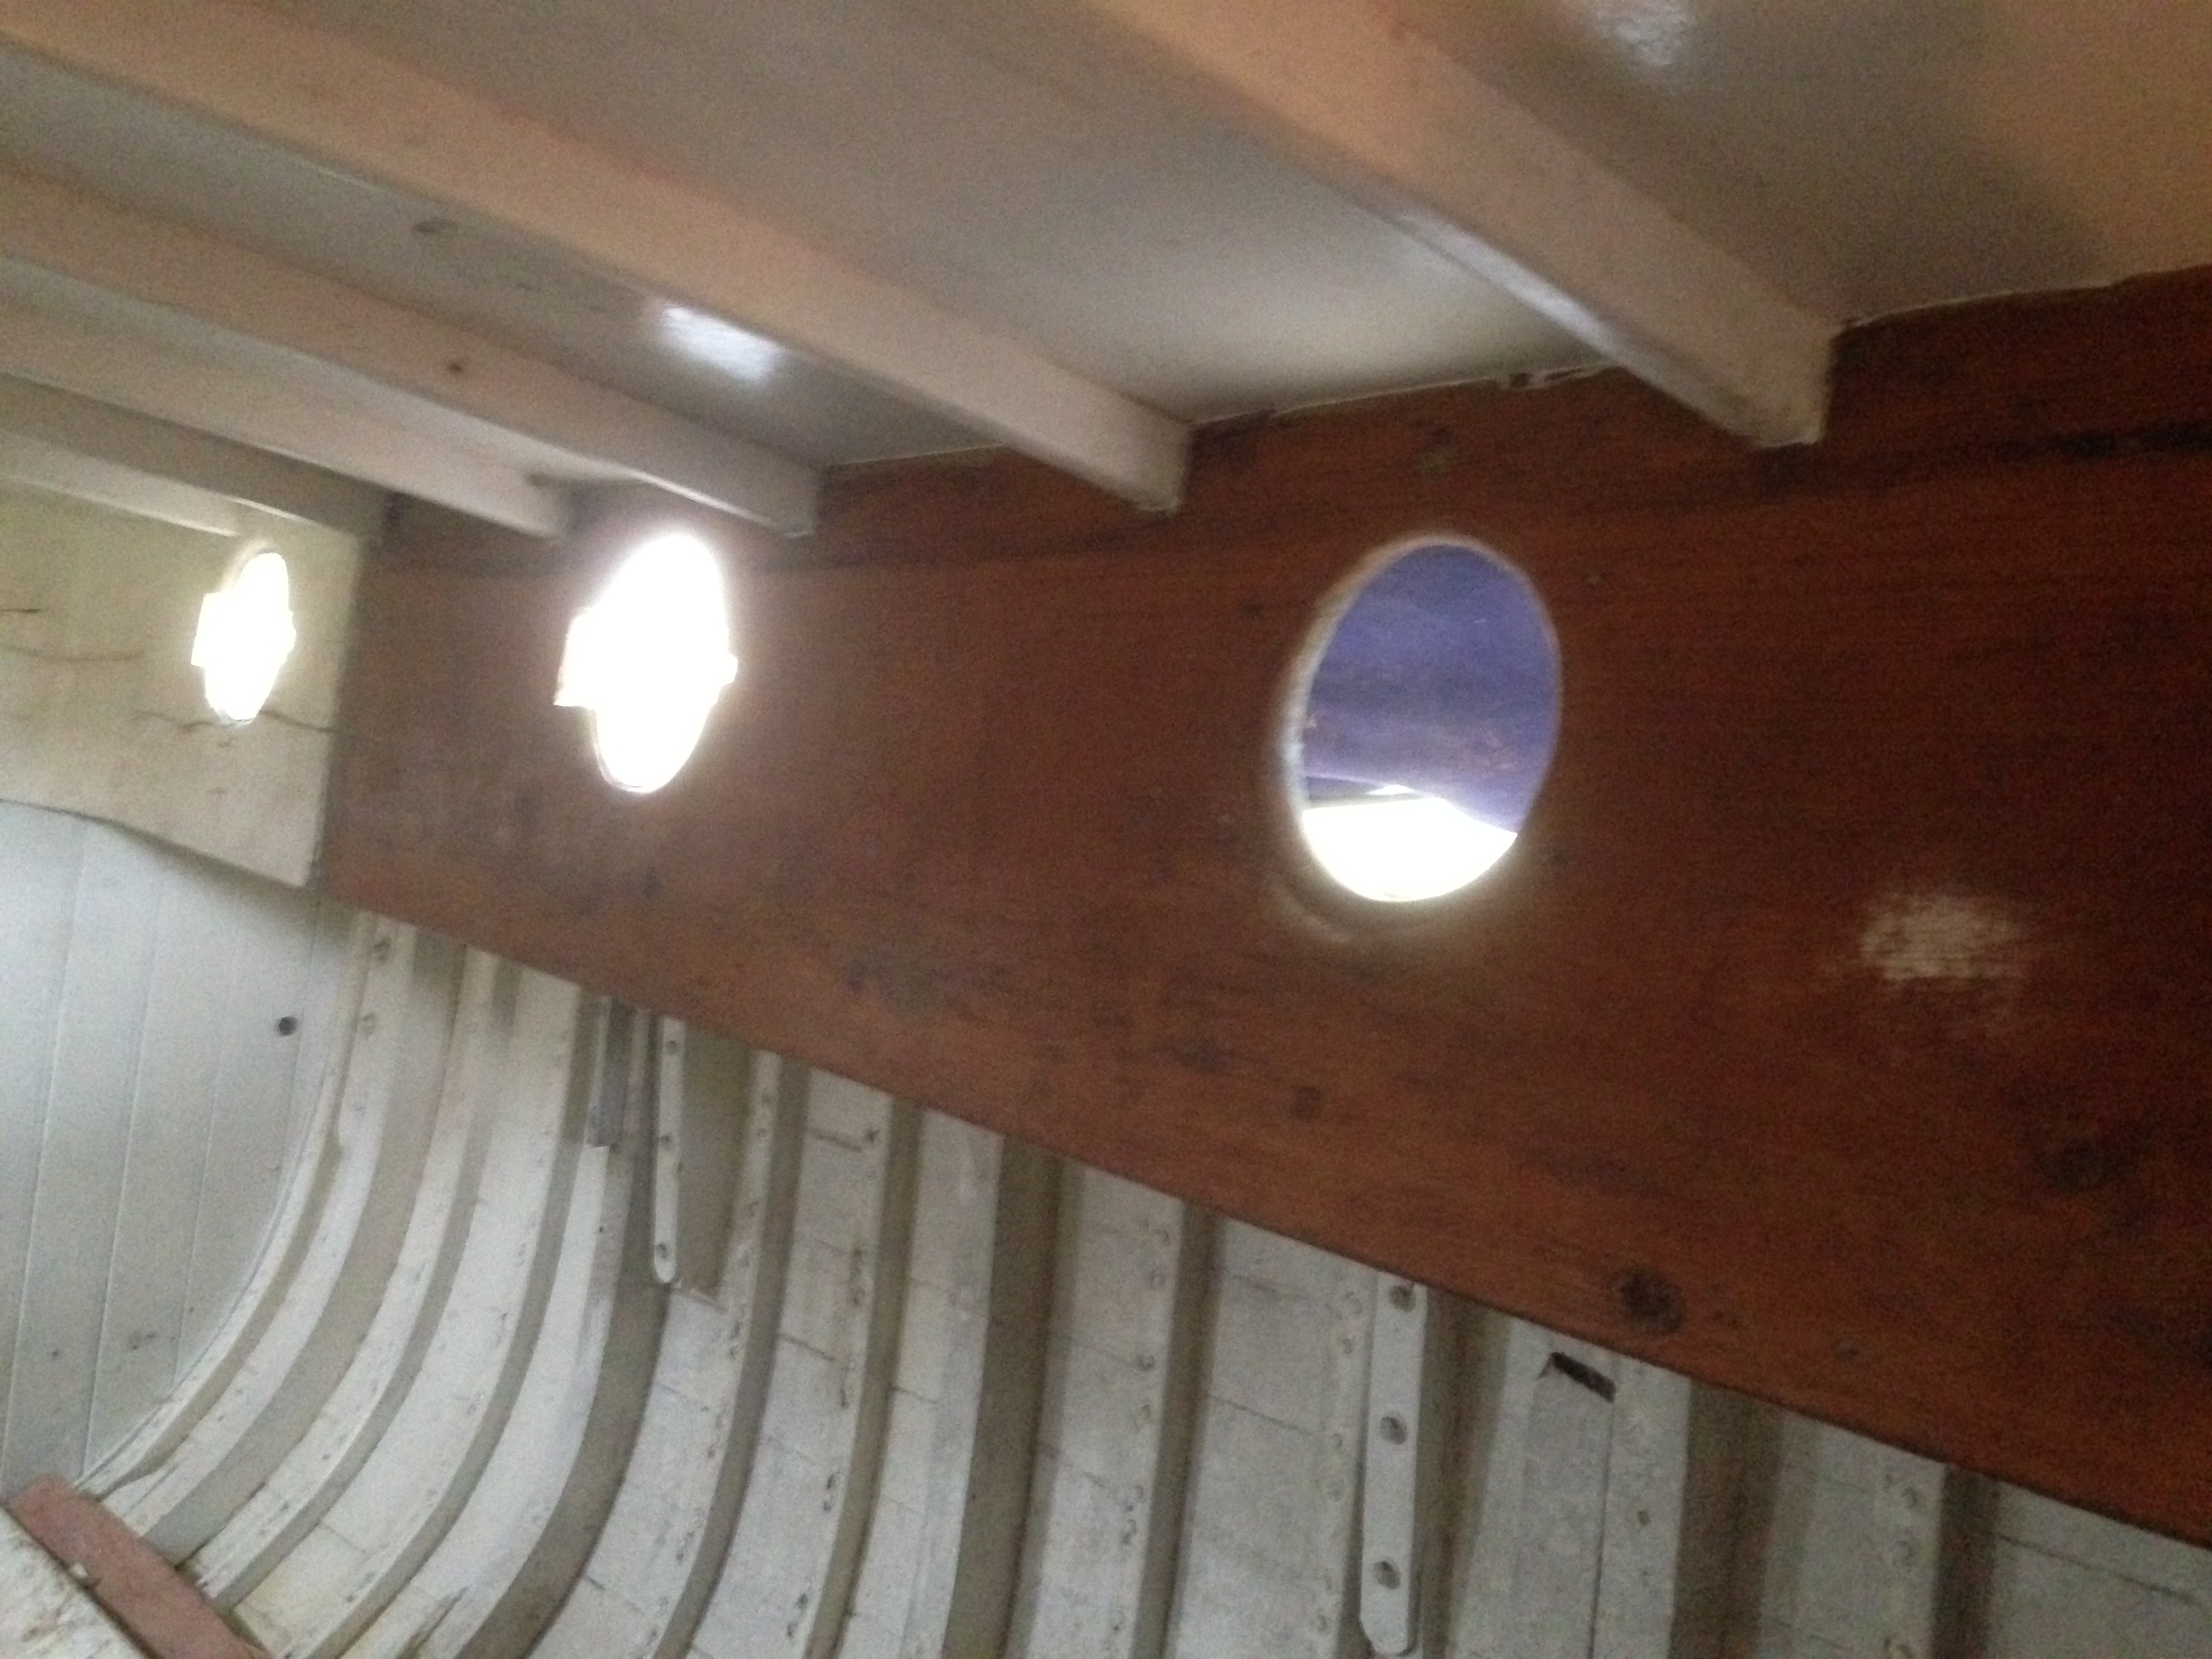
In these dark winter days the interior of Flamingo’s cabin is dim at best. Luckily my lovely wife bought me this old brass lamp for Christmas, with half a dozen more like this I may even be able to read a chart in there….
Despite much rubbing, no boat building genie appeared…
The arrival of the paraffin lamp prompted the removal of the nasty lighting and wiring, legacy of a previous owner.
Shoddy cabling…
Lights and wiring stripped out and all looking much cleaner.
Realising the little lamp was not giving quite the output required for working, I filled up and fired up an old pressure lamp. It adds heat and light in about equal measure and if I had portholes and wash boards in, might have actually made Flamingo, dare I say….. cosy!
Faithful old pressure lamp kicking out the heat
The extreme weather continued and days of rain culminated in the stream by the house rising about 1.5m in a few hours bringing it perilously close to the house. Remarkably an hour or so after the rain stopped the water level dropped back down to more normal winter levels. Still I think some sand bags might be a wise precaution.
This being the time of year for promises and plans I am adding another resolution to the ‘no alcohol during the week’ one that ‘we’ have decided on. I have shortened and prioritised the mahusive Schedule of Works from September last year, into a smaller, still daunting, but hopefully achievable list of jobs for 2016. I wont bore you with the details, but if I can complete it, I will have a watertight, seaworthy hull before the year is out and Tilly will no longer be able to refer to this project as ‘Daddy’s Shipwreck’.
Scraping and sanding the varnished cockpit coaming reveals repairs and reinforcements, witness to the passage of time and hard use of the past 85 years. Far from detracting from the look of the boat I rather like them, imaging the events in the past that led to these scars brings her history to life. Was it a storm straining on the cleat that split the teak, did the boom get dropped on it, or was it some clumsy oaf getting too enthusiastic with a winch handle?
Coaming repairs bear witness to the past.
At the stern is a Tiller Comb, a long piece of timber with holes for pegs that are used to trap the tiller on a given tack, a kind of auto pilot if you like. It cleaned up rather well… #2 Son did sterling work with the hot air gun and scraper, well done Joe.
Tiller Comb and Cockpit Coaming all sanded and lovely.
Sunday morning dawned frosty and blue and having treated ourselves to a sausage and egg onion bagel I left Tilly in the warm embrace of ‘USA’s Cutest Kittens’ or some such nonsense and ventured out for more sanding and musings on the tracks of Flamingo’s passing years. The muddy path to the field had tracks of a different kind, this part of East Sussex has a burgeoning population of deer and they are rather partial to apple trees, much to mother’s despair. Venison for Christmas?
Tracks of another kind show the orchard had some unwelcome visitors in the night
The cold weather and the shorter days have prompted me to set up this beauty. A cast off from work, the lamp blasts the bench with light and a bonus warmth too! I think some sort of spigot clamp would work better than the tripod though, as it eats up a rather large amount of floor space.
Improved lighting in the workshop
Though it is lighter now, the old workshop is still gently rotting from the ground up, the pillar drill is slowly disappearing into the floor and the roof leaks seem to be breeding, so I’ve cleared a space around the shed by the boat to build a new one….
Meanwhile, in a much smarter workshop, the Bosun has been beavering away making some lovely teak washboards.
Washboards nearly ready for fitting.
Can’t wait to get them fitted and give him his next project…… saloon table maybe? Teak grating for the cockpit….? Hand rails for the coach roof….


 As soon as I wrote, toing and froing I thought that can’t be right, so I googled and found this on the Macmillan dictionary website.